Monday, February 23, 2009

The exam is finally over.....

c1


Yes, I was having my first exam in pastry school last week and that explains the quietness around here. The self imposed expectation made me tense up and stress the whole week, which on hindsight, was pure silliness on my part. I think I did ok in the exam, even though a few mistakes were made and some of the final products were not how I envisioned them to be. But all is water under the bridge now. I am glad that I learnt a lot in the process.

Next week, we are learning to make tarts! The first tart recipe is none other than my favorite - lemon tart! I couldn't wait to see how it compares to my all time favorite.

033


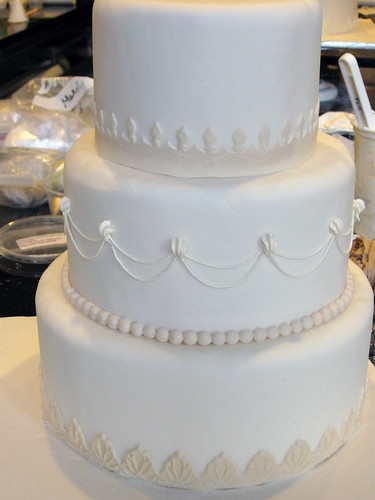
Here's a picture of my fondant covered dummy wedding cake sans gumpaste flowers. Surprisingly piping the string work on the middle layer was not as daunting as I imagined. I made all my cake layers white with ivory borders because my posy has some really crazy color. Moreover, I was too lazy to knead color into my fondant. I was a bit regret seeing how beautifully my classmates' cakes turned out. You can see some of them in my flickr.

On my train ride home, some of the strings broke, but most of them remain intact.This dummy cake is currently occupying almost a quarter of my small dining table. I am waiting for OCT to see the cake when he comes visit in March before I tear it down.

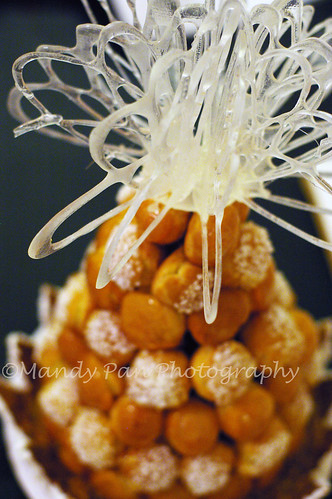
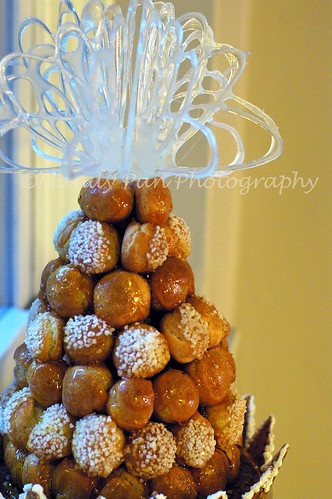
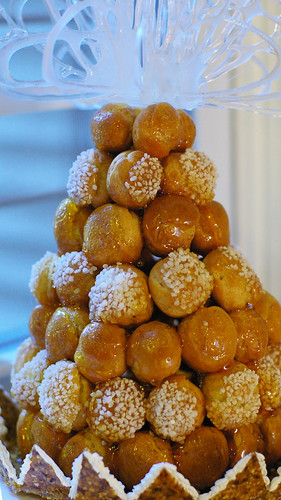
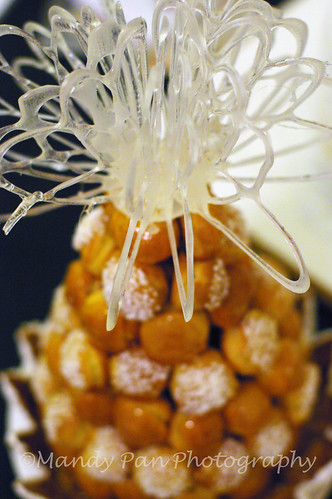
Moving on to something edible. The last wedding cake we made was a croquembouche, the traditional french wedding cake. Croquembouche is basically a tower of choux pastry glued together with caramelized sugar, sitting on top of a nougatine base. As the chef explained, croquembouche means "crunchy in one's mouth". So each choux pastry is coated with a thin crisp crust of hard crack sugar. The traditional version has each choux pastry filled with pastry cream, but due to time constraint, we skipped the filling.

c3


As I carefully dipped each of the mini puffs into the caramelized sugar, I could hardly resist the temptation to pop a few into my mouth as I worked. The thin crisp layer of sugar gave off a crunchy sound when one bit into it. Ah, the satisfaction. Not to mention, it was really addictive. I am glad that we made enough choux pastry to build the croquembouche!

012

Too bad I couldn't take a decent photo of this elaborate dessert. I was rushing out the next morning so the pictures were hastily taken, without proper lighting. I was planning to retake the picture the following day, but alas, the croquembouche fell apart when I was still in bed. Needless to say, my delicate spun sugar decoration on top of the croquembouche broke into a million pieces. :(

c2


On a happy note, it's finally Monday! I can't wait to start on tarts classes! And my friends A & D are visiting this Friday! Which means more eating ensues. :)

Read more...

Wednesday, February 11, 2009

Confession of a clumsy cake decorator

chocolate tart 1


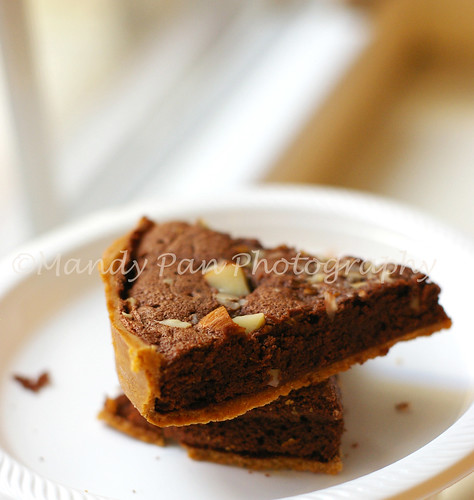
Looking at the chocolate tart we made in class 2 weeks ago makes me happy. It has been a solid 2 weeks when I last brought something edible home from school. These 2 weeks have been spent on gumpaste flowers, wedding cakes and fondant. In fact, there may be a 3-tiers fondant covered dummy cakes following me home tomorrow. It will be decorated with the gumpaste flowers that we spent almost a week to make. Another inedible creation before we conclude the 2 weeks wedding cake chapter of my pastry course.

010 copy


I know I don't sound too enthusiastic about wedding cakes. As a matter of fact, I would happily spend extra time on cakes, tarts, breads and petit fours. Sitting down the whole afternoon to make flowers only makes me tired and exhausted at the end of the day. Luckily, we have a really great instructor. Chef Laura makes the wedding cake classes so much more bearable. Her demo and clear instructions help even the most clumsy cake decorator like myself to perform the task at hand confidently. I am happy with how things turn out. Admittedly, I didn't set a high expectation on my decorating skill. My piping and flowers still suck compared to many of my classmates. I was totally in awe, seeing some of their creations. As for myself, I see obvious improvement in my piping and frosting, and that's all that matters to me in this stage! I only wish we have more time to practice. Although deep down in my heart, I couldn't wait to start the tart classes!

pate a choux 1
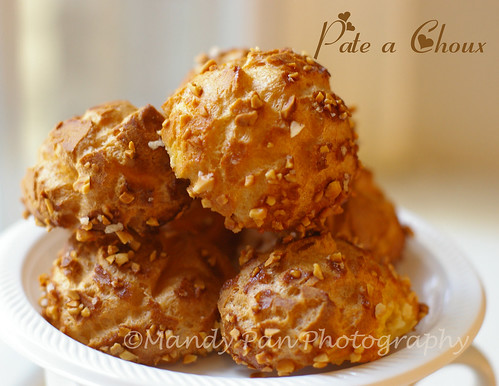
Instead of torturing you with my gumpaste flowers pictures, here's the picture of pate a choux we made awhile ago. When filled with hazelnut pastry cream, they are a real treat.

017 copy


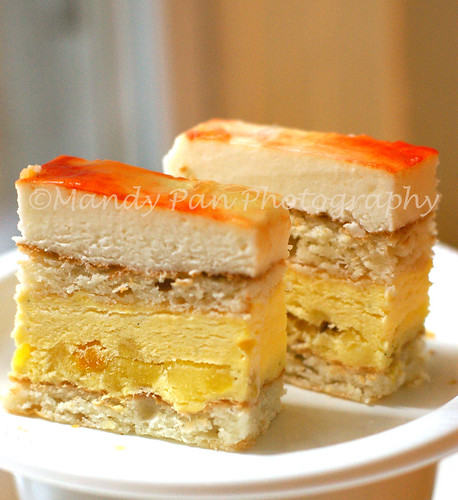
I also wanted to show you the coconut passion cake we made in cake class, which is one of my favorite. The various components like coconut mousse, passion fruit mousse, candied pineapple and coconut dacquiose are flavors that I can identify with, growing up in a tropical country.

side of my cake


I decided to show you a snapshot of my buttercream wedding cake even though it's far from perfect. I didn't have a clear idea on how to decorate it, so I simply piped with the techniques and patterns I learned. Please try not to laugh too hard. It's already the smoothest frosting I have ever done in my short baking life. I wish I could show you some of the pretty buttercream cakes my classmates have done! But I promised not to post them on my blog. If you go to my flickr, you can see some of their wedding cakes!

Read more...

Sunday, February 08, 2009

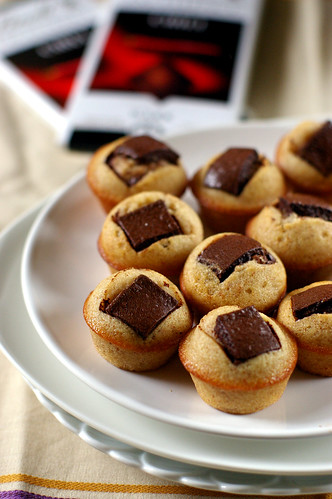
Chilli Chocolate Financiers

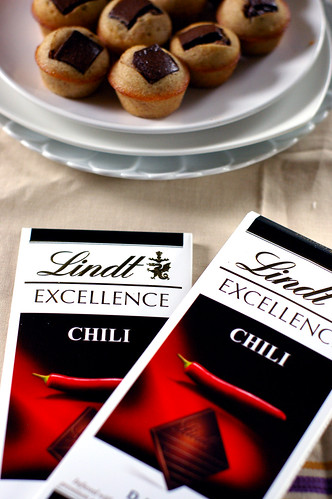
Chili chocolate for financiers


"I miss leisure baking!" I lamented to Grace when I saw her eclair pictures on Flickr.

Unconvinced, she thought I must have enjoyed the more "professional" baked goods I bring home from school nowadays. To the contrary, that is totally untrue. I miss those days when I could go into my fairly well equipped kitchen and whip up whatever my stomach desires. It could be a recipe I see on cookbook or a crazy idea I dream of. Or an old recipe that never cease to comfort me whenever I am homesick. The whir of kitchenaid in the otherwise quiet apartment and the smell of baked goods that permeated the air was once an important part of my life. So yes, despite the amount of baking I do in pastry school, I still miss leisure baking at home!

As I longingly looked through my photos on Flickr,I found these chili chocolate financiers. I made them awhile ago with some leftover batter from another recipe.

Chili and chocolate seems to be an unthinkable combination. However, to the slightly crazy baker like myself,it's an intriguing idea. OCT winced when he saw me placing two bars of Chili chocolate into the shopping cart.

"Why do you need two? You know I will not eat any" He said.
"It's for an experiment! Besides, it's on sale." I replied.

Chili chocolate for financiers

An experiment indeed! I added some into chocolate chips cookies batter, but the spiciness was neutralized by the copious amount of sugar and other chocolate in the recipe. I topped a chunk on top of these financiers and passed them to OCT's labmates, but no one commented about the slightly spicy note of the chili chocolate. I think it's safe to say that the chili chocolate is better to be enjoyed on its own. As for the financiers, it is a great base recipe which one can try with different toppings and flavors. I am thinking of adding cocoa nibs on top for some crunch, or making a matcha flavor one. It is one of those recipes which doesn't require many gadgets. Perfect for my ill equipped kitchen!

Coming back to chocolate. What is the most unusual chocolate you have tasted?Chocolate bacon anybody?

I used this recipe for my experimental chili chocolate financiers. The same one for my fig financiers.

Read more...

Sunday, February 01, 2009

Thing that makes me happy

puff pastry layers copy


I am a simple girl who derives happiness from many simple things in life. Coffee, chocolate, flowers, books, photography, snow, kindness from a stranger, a thought provoking conversation, emails from friends, silly jokes and most recently, the making of puff pastry.

Perhaps it's the intimacy with the dough that I covet. To make puff pastry,(at least for a small batch), we were taught to do it by hands. Everytime I roll out the dough for more turns, I feel that the dough and I are working as a team. I need to be sensitive to its hints on when to stop rolling, and when a little stretch is desired. This may sound a little superstitious, but I believe that the dough can sense if you are scared to work with it. And if you are intimidated, it will mischievously make things difficult for you.

006 copy


Lucky for me, as a member of the Daring Bakers last year, I had my first experience with laminated dough when we made Danish Braid for the June Challenge. Though the process is not identical, there are many similarities. It also helps that I have recently staged at one of the country's top laminated dough master's patisserie. I picked up a few tricks when observing the master make croissants and other breakfast pastries. That experience itself is worth another blog entry.

pithivier1


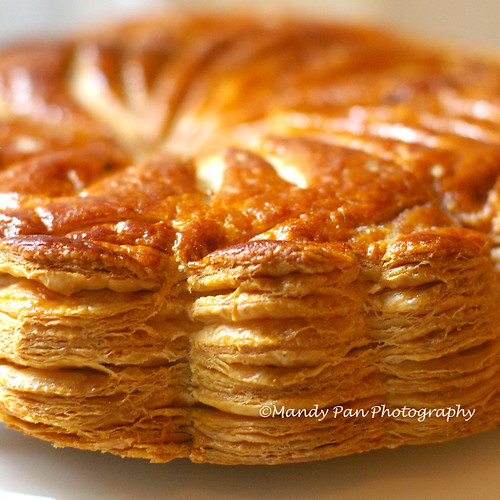
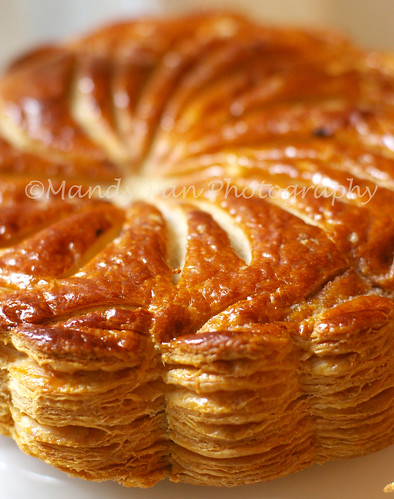
So back to my puff pastry. The whole process took 3 days, in which we allowed sufficient time for the dough to rest in the chiller. The resulting puff pastry was used to make Pithivier - a puff pastry pie filled with frangipane. The scrape of the puff pastry dough was collected, and used to make apple turnovers. Our thoughtful chefs baked them just before break time, so we can enjoy freshly baked apple turnovers as snack. The fresh from the oven's apple turnovers tasted so buttery and delicate. I almost ate two!

Not a big frangipane fan, I took the pithivier home for picture taking and passed the remaining Pithivier to my friend Heather, who sent her whole pie to her family in Michigan!

apple turnovers


I had so much fun making puff pastry in class that I persuaded Heather to make it again in her apartment this weekend. Unfortunately, that didn't materialize because I couldn't roll out of bed on Saturday morning to buy the ingredients! I blame it on the oily and msg-laden chinese food we ate on Friday night.

As I finally dragged my lazy bum out on Sunday afternoon, I bought all the ingredients and decided to make it on the only table I have in my tiny studio. While the rest of the world is watching Superbowl, I gently work on my puff pastry dough. Rolling, folding, turning and resting when it tells me to. The puff pastry dough has been rested in the refrigerator for 2 hours now, I think it's ready for the next 2 turns.

apple turnovers 1


After a total of 6 turns, my puff pastry dough will be frozen and waiting to be transformed into a delicious dessert when OCT comes visit in March! A tarte tatin perhaps? Or Nutella turnovers? Or maybe I will fill some with savory filling. OCT is green with envy of all the people who have eaten the pastries I bring home. So I hope the homemade puff pastry will alleviate his jealousy when he comes visit!

Read more...

Wednesday, January 28, 2009

Mousse cakes overloaded!

raspberry silk copy


Perhaps one of the unspoken perks of attending a pastry school is the amount of pastries we get to bring home almost on a daily basis.

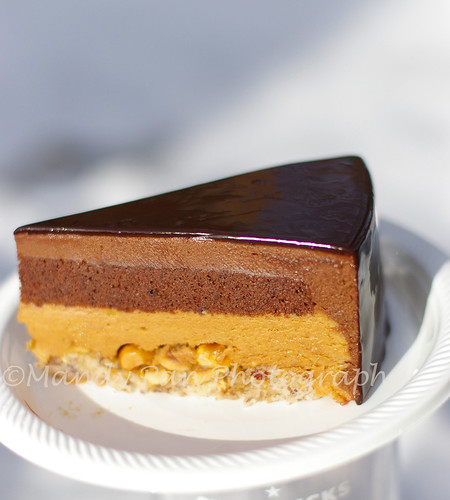
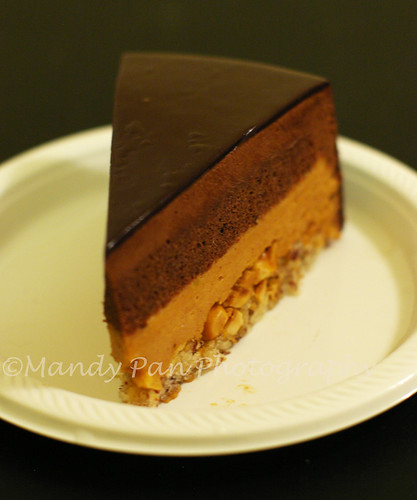
Last week, I brought home 3 cakes. The nougat mousse cake, in which the photos were poorly lit; a chocolate hazelnut mousse cake and a coconut passion cake, which I need to retake the pictures before telling you more about it.

011 copy


The prettiest of the bunch, in my humble opinion, is the Raspberry Silk Cake. Made with almond dacquiose, raspberry gelee, royaltine layer and white chocolate diplomat mousse, the flavor took me by surprise and little did I expect that I would fall in love with this cake. When I first saw white chocolate in the mousse recipe, I thought I wouldn't like it. I never like white chocolate; in fact,I have been shunning away from white chocolate in all my baked goods. It just taste too milky for my liking! But when all the elements in this cake come together, it tastes great. The flavor of the raspberry gelee and the royaltine layer take over the center stage and the white chocolate mousse plays a good supporting role. It provides the creaminess and smooth mouthfeel that completes the final product.

Looking at the raspberry silk cake makes me very happy, perhaps it's the constrasting color. We eat with our eyes first, no? :)

004 copy

The Chocolate Hazelnut Cake is love at first sight. The kind of cake I know I would love even before I tasted it. Eating the final product only confirm my assumption. It is nice, but a little too predictable. Having said that, it is probably the cake that I have eaten the biggest portion. See, I am pretty predictable too!

010 copy


For those who wonder what I do with the cakes: I give away most of my share to my classmates! And only this morning, while I juggled the raspberry silk cake and a cup as support on one hand and my camera on the other to take pictures outdoor; the maintenance guys came. I offered them the nougat mousse cake in the freezer and they walked away pretty happy. I love to see people happy, which in turn make my day!

Read more...

Sunday, January 25, 2009

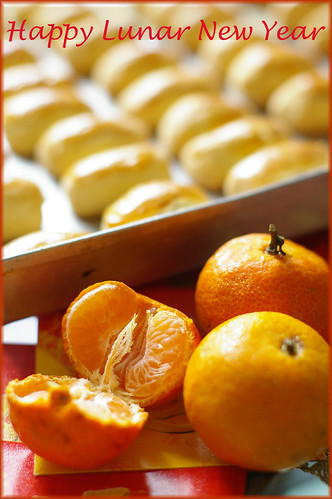
Happy Lunar New Year!

lunar 09


It certainly feels like yesterday, when OCT and I flew home to celebrate Chinese New Year with our families! And in the blink of an eye, another new year arrives without us realizing.

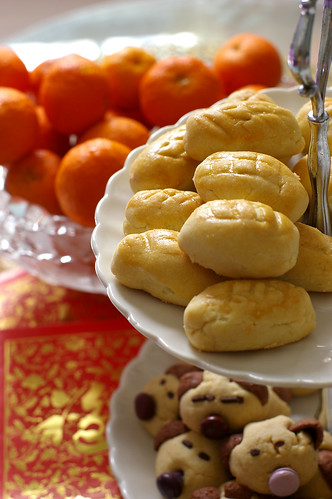
Most of my friends flew back to Malaysia/Singapore to be with their loved ones during this time of the year and I am a bit sad that I couldn't join in the festivity. I miss the reunion dinner on new year eve, when everyone comes home no matter in which part of the world they are working; The firecrackers, which children and kids-at-heart let off once the clock strikes 12 in the midnight. The festive but cheesy chinese songs that flood every shopping malls; and the pineapple tarts, bak gua, love letters, prawn-crackers, nian gao and other new year goodies we serve our visiting guests. Most often than not, the goodies are consumed by ourselves way before the festival begins.

I went to the Chinatown in Chicago this past weekend in search of traces of Lunar New Year festive ambience which my friends back home told me is ubiquitous in every corner of Asia. I came back to my little studio after an hour of strolling, with disappointment and a pair of numbed toes and none of the described atmosphere.

Having said that, I got myself a tray of nian gao, a kind of traditional chinese glutinous rice cake, which is sweet and has a chewy texture made with brown sugar and glutinuos rice flour among other ingredients. Dipped in beaten eggs and lightly pan-fried, it's one of my favorite treat on Lunar New Year.

Chinese New Year Goodies


If I were home, I would also make a few trays of crispy golden daikon/radish cake, my beloved pineapple tarts and horlicks animal cookies. But I am contented with the store-bought turnip cake for now. And tomorrow, on the actual day of Lunar New Year, I am bringing some to school for my classmates. I can't wait to see their responses. Especially my Mexican classmate- Fernanda, who winced slightly when I described nian gao to her last Friday.

For those who are celebrating the festival, here's wishing you a healthy, prosperous and wonderful Lunar New Year! Gong Xi Gong Xi!

Read more...

Thursday, January 22, 2009

My first cake in school!

nougat mousse cake


I brought home a cake yesterday! It was the first cake we made in French Pastry School and it was delicious. :) The cake in the picture above however, is the chef's cake. The poor lighting in my dungeon-like studio is impossible for photo taking without artificial light source. :(

Unlike the cakes that I am used to bake at home, the preparation of the various elements in the cake takes days. This nougat mousse cake for instant, took us 3 days. We made the dacquoise on the first day,the apricot gelee and nougat mousse on the second, and final glazing on the third day. I love that we are making all the elements from scratch and seeing the final cake taking shape day by day.

nougat mousse cake


In the cake classes, we arebeing introduced to many professional products like glucose, trimoline, gelatin sheets, cocoa paste etc that are only used in the professional kitchen. It is going to take some time before I can decipher the nuance of using them in my baked goods as opposed to the normal baking ingredients I have at home.

014


We are lucky to have 2 highly accomplished chefs as our instructors for cake classes. While imparting the techniques and skills in class, they also injected great sense of humour that make learning so much more enjoyable.

More cakes coming up soon!

Read more...

Friday, January 16, 2009

First 2 weeks in FPS!

Everyone agrees that time flies when one is busy or happy, or both. That pretty much sums up how I feel about the first 2 weeks in class.

First week, we went through the orientation, Servesafe classes, test and theory on baking. I enjoyed myself listening and learning from chefs about eggs, cream, butter among other things. Not so much about the servesafe classes, which talks about foodborne illness, bacteria, allergy etc. I am not saying sanity in kitchen is not important though....

knife skill


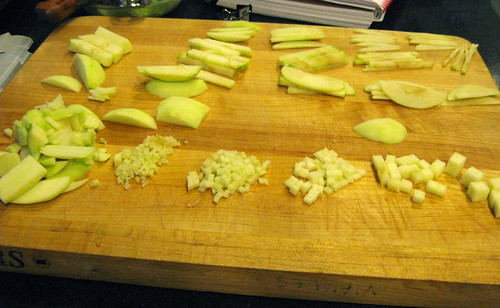
Second week is when all the kitchen works begin!We started with knife skills and practice with piping. Here's a picture of my 2 apples, peeled,cored, and cut into different dimensions.

butter piping


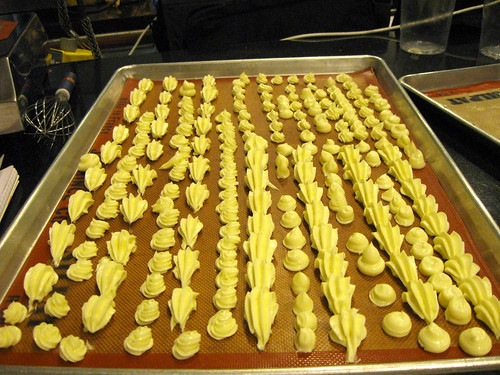
Piping is never my forte. It's sad that the Wilton courses I attended didn't make me any better. My friend Heather on the other hand,is insanely good at that.

Apparently, she could decorate more than 60 cakes in a day when she was the cake decorator in Sam's club. I think her next challenge would be to do piping with both eyes closed. Or could she do that already? Hmm....I need to ask her about that.

tart dough cookies


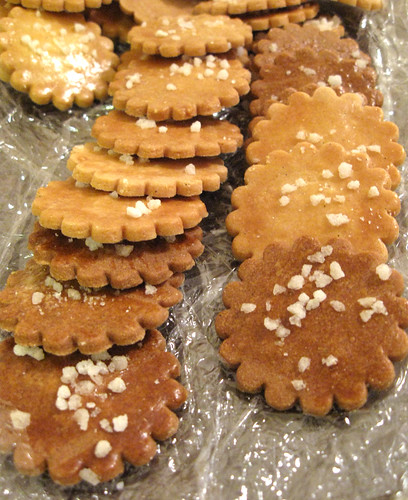
The first edible product I brought home was these cookies made of sweet tart dough. Unlike the soft and chewy cookies that many are accustomed to, these cookies are baked until really golden brown and crunchy. The dough was rolled and cut with cookie cutter, and after the second rolling and cutting, the dough was discarded. Being the frugal girl that I am, I couldn't stop thinking about the wasted dough in the bin. It could turn into some great fruit tarts, together with the pastry cream we made and brought home the same day. And speaking of the tub of pastry cream, I was too worried about what to do with it, since it had a short shelf life; I gave it to my classmate before tasting any myself. Silly me! The torturing thought of fruit tart with the wasted dough and pastry cream accompanied me into dream land that night.

piping french meringue


The second edible product I brought home today- Piped french meringues. The picture above was when they were still raw.

We have Chefs Sebastien Cannone and Dimitri Fayard for cake class today. The chefs shared about the thinking process of building a cake. The various elements that are in play and a demo on whipping cream to make butter! When OCT asked me how chef did it, I told him it's like centrifuguring the cream (centrifuge is a high spinning machine in the lab) to separate water from the fat, and bringing all the small fat molecules into one big glob. It feels like a chemistry experiment, except it's something that I can relate too.

Speaking of chemistry experiment, it brings a smile to my face everytime we do scaling for recipes. It was exactly what i did when I was trained to be a chemist many years ago. And when Chef Laura showed us how to scrape everything off the bowl, I remembered Dr Wang, my ex supervisor in the pharmaceutical plant. We scraped off everything from the instruments we were using, because every drop of drug active ingredient mixture translated into a few bucks. I think chemists can be very good bakers! ;)

Read more...

Tuesday, January 13, 2009

How I almost died

oreo cheesecake


From embarassement, that is. It all began on a snowy Saturday morning when I decided to make a pilgrimage to Vanille Patisserie, owned and run by my teacher to be- Chef Dimitri Fayard and his wife Chef Keli Fayard. By the time I got down to the nearest bus stop,which is another 5 minutes walk to the patisserie, the snow was ankle deep and a thought of turning back flashed through my mind.

"Everything is a test", I reminded myself of what Chef Jacquy Pfeffeir mentioned in one of our class session and persisted. I felt like a little penguin walking down the quiet and snowy street. Determined that nothing could stop me from getting to my final destination.


As I got there, I ordered some entrements, a macaron and a cup of cappucino. I also took the opportunity to introduce myself to Chef Dimitri, who was at the counter. Everything was cool and chef went on to prepare my drink.

And then, the unimaginable thing happened. I couldn't find my wallet! I must have put it in another bag when I went out on Friday night. My face was flushing and I stammered out what had transpired to chef and promised to come pay in the next day.

What a way to make an impression. That is certainly not a positive one. Although Chef Dimitri was nice about it, I tracked down the same trail later that day to pay.......


oreo cheesecake


Embarassement aside, the 2 entrements I bought were awesome. They were not overly sweet, but so full of flavors. I would highly recommend Vanille Patisserie for anyone visiting Chicago and have a craving for desserts. I tried to take pictures of the entrements, but the poor lighting in my room didn't do them justice.

As I was eating the first entrement in my tiny studio, the electricity went off. I couldn't even see my fingers, but I was strangely calm and satisfied. I continued to eat the remaining half of the entrement in dark and went straight to bed after that.

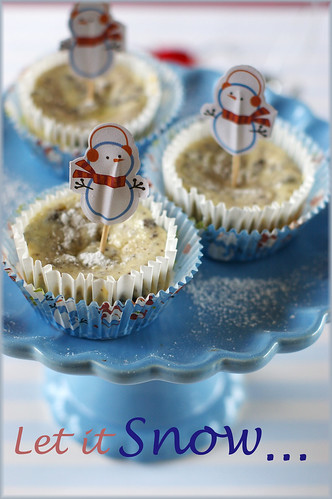
The mini oreo cheesecakes you see in the pictures are not from Vanille Patisserie. They were something I made for our post Christmas party before I came to Chicago. I used the leftover Trader Joe's peppermint jo-jo, which was only available around Christmas time.I used this recipe but incorporared oreo style cookies in the batter.You can put as much or as little cookies as you wish; But here, I separated the sandwiched cookies and used half of them as the base of the mini cheesecake and crumbled the remaining to mix in the batter. The mini cheesecakes turned out a tad dry for my liking, probably because I substituted one block of cream cheese with the low fat variety. Or I could have overbaked them, while trying to multitask at the same time.

As long as you don't repeat the mistakes I made, you will be rewarded with delicious mini cheesecakes which take a lot less time to prepare than a conventional one.

Vanille Patisserie
2229 N Clybourn Ave Chicago, IL 60614


Read more...

Monday, January 05, 2009

Novice baker goes to school!

Just a short note to let everyone know that I have safely arrived in Chicago and just started my new life as a student today!

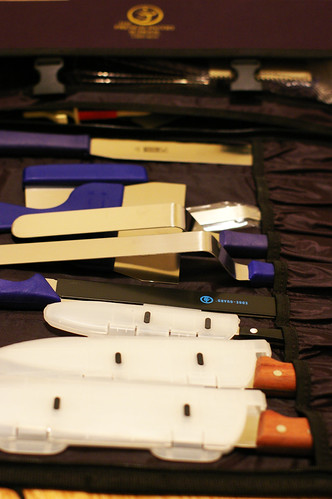
It's going to be an interesting 6 months here, and I can't wait to learn from some of best pastry chefs in this country! I am tired after waking up 6 something this morning and there's a 7 a.m class for the rest of the week! Arrgh.... I will leave you with a picture of my silly self and part of the tool kit that I brought home today.

part of the tool kit


With school starting, there will be some changes in this blog. This space will be a chronicle of my life as a pastry student and may or may not update as often as I'd love. No recipe from school will be provided.(school policy- I think it makes sense) But I will try to take some pictures of what I make. There's no guarantee on that as well, as I am a really shy person. :p Taking out a camera to take pictures during classes is just awkward to me. I am sure you will understand. :)

Read more...

Tuesday, December 30, 2008

December Daring Bakers Challenge: French Yule Log

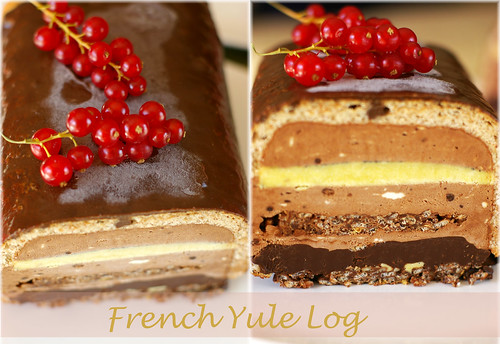
french yule log


"Is it that time of the month again?" OCT asked when he saw me running with mixing bowl in hand, between the laptop and the kitchen.

Indeed, it's time for another Daring Bakers' Challenge. I missed the November challenge when I went home for vacation. And I almost give the french yule log amiss too, because of my unusual tight schedule this month. In the end, I decided to do it, because this may be my last Daring Bakers' Challenge.
french yule log


There's some exciting change around here, which will prevent me from spending as much time as I'd love in my kitchen. But no, I am not pregnant. In case you wonder.

I am moving to Chicago on Jan 1 alone and will stay in the Windy City for another 6 months. I am excited but at the same time apprehensive of the challenges that lies ahead. More on that in my next post.

This month's challenge is brought to us by the adventurous Hilda from Saffron and Blueberry and Marion from Il En Faut Peu Pour Etre Heureux.They have chosen a French Yule Log by Flore from Florilege Gourmand. It turned out to be the most laborious Daring Bakers challenges I have participated. Perhaps it's my lack of foresight. I should have made detailed plan when making desserts of multiple components.


Well, it's almost 2009, and I don't want to spend the remaining time in year 2008 whining on the technical difficulties I faced when tackling the yule log, (such as the hot sugar syrup that harden too fast in the mousse and the never setting icing!) Neither should I lament on the miscalculation of dacquoise surface required to cover the log. That was all, as the saying goes- water under the bridge.

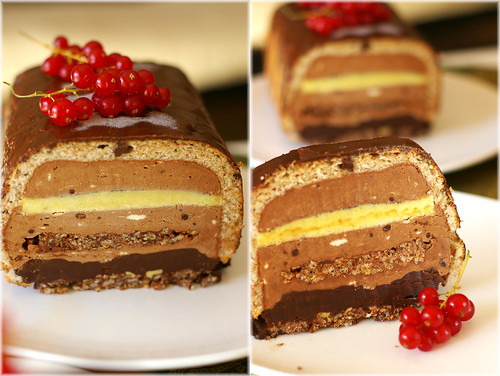
006


I am not entirely happy with the asthetic of the cake. I know I could do better. But that's under my 2009 resolutions. For now, I am going to dig in and enjoy a slice of cake before all the madness of moving ensues.....

Check out all the delicious french yule logs that dropped on blogsphere this festive season here.
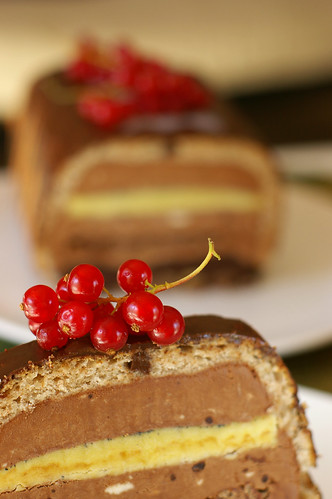
014


French Yule Log

Element #1 Dacquoise Biscuit (Almond Cake)

Preparation time: 10 mn + 15 mn for baking

Equipment: 2 mixing bowls, hand or stand mixer with whisk attachment, spatula, baking pan such as a 10”x15” jelly-roll pan, parchment paper

Note: You can use the Dacquoise for the bottom of your Yule Log only, or as bottom and top layers, or if using a Yule log mold (half-pipe) to line your entire mold with the biscuit. Take care to spread the Dacquoise accordingly. Try to bake the Dacquoise the same day you assemble the log to keep it as moist as possible.

Ingredients:
2.8 oz (3/4cup + 1Tbsp / 80g) almond meal
1.75 oz (1/2 cup / 50g) confectioner’s sugar
2Tbsp (15g) all-purpose flour
3.5oz (100g / ~100ml) about 3 medium egg whites
1.75 oz (4 Tbsp / 50g) granulated sugar

Finely mix the almond meal and the confectioner's sugar. (If you have a mixer, you can use it by pulsing the ingredients together for no longer than 30 seconds).

Sift the flour into the mix. Beat the eggs whites, gradually adding the granulated sugar until stiff. Pour the almond meal mixture into the egg whites and blend delicately with a spatula.

Grease a piece of parchment paper and line your baking pan with it.Spread the batter on a piece of parchment paper to an area slightly larger than your desired shape (circle, long strip etc...) and to a height of 1/3 inches (8mm).

Bake at 350°F (180°C) for approximately 15 minutes (depends on your oven), until golden.

Let cool and cut to the desired shape.

Element #2 Dark Chocolate Mousse

Preparation time: 20mn

Equipment: stand or hand mixer with whisk attachment, thermometer, double boiler or equivalent, spatula

Note: You will see that a Pate a Bombe is mentioned in this recipe. A Pate a Bombe is a term used for egg yolks beaten with a sugar syrup, then aerated. It is the base used for many mousse and buttercream recipes. It makes mousses and buttercreams more stable, particularly if they are to be frozen, so that they do not melt as quickly or collapse under the weight of heavier items such as the crème brulee insert.
In the Vanilla Mousse variation, pastry cream is made to the same effect.
In the Mango Mousse variation, Italian meringue is made to the same effect. Italian meringue is a simple syrup added to egg whites as they are beaten until stiff. It has the same consistency as Swiss meringue (thick and glossy) which we have used before in challenge recipes as a base for buttercream.
The Whipped Cream option contains no gelatin, so beware of how fast it may melt.
Gelatin is the gelifying agent in all of the following recipes, but if you would like to use agar-agar, here are the equivalencies: 8g powdered gelatin = 1 (0.25 oz) envelope powdered gelatin = 1 Tbsp powdered gelatin = 1 Tbsp Agar-Agar.
1 Tbsp. of agar-agar flakes is equal to 1 tsp. of agar-agar powder.

Ingredients:
2.5 sheets gelatin or 5g / 1 + 1/4 tsp powdered gelatin
1.5 oz (3 Tbsp / 40g) granulated sugar
1 ½ tsp (10g) glucose or thick corn syrup
0.5 oz (15g) water
50g egg yolks (about 3 medium)
6.2 oz (175g) dark chocolate, coarsely chopped
1.5 cups (350g) heavy cream (35% fat content)

Soften the gelatin in cold water. (If using powdered gelatin, follow the directions on the package.)

Make a Pate a Bombe: Beat the egg yolks until very light in colour (approximately 5 minutes until almost white).

Cook the sugar, glucose syrup and water on medium heat for approximately 3 minutes (if you have a candy thermometer, the mixture should reach 244°F (118°C). If you do not have a candy thermometer, test the sugar temperature by dipping the tip of a knife into the syrup then into a bowl of ice water, if it forms a soft ball in the water then you have reached the correct temperature.

Add the sugar syrup to the beaten yolks carefully by pouring it into the mixture in a thin stream while continuing to beat the yolks. You can do this by hand but it’s easier to do this with an electric mixer. Continue beating until cool (approximately 5 minutes). The batter should become thick and foamy.

In a double boiler or equivalent, heat 2 tablespoons (30g) of cream to boiling. Add the chopped chocolate and stir until melted and smooth.

Whip the remainder of the cream until stiff.Pour the melted chocolate over the softened gelatin, mixing well. Let the gelatin and chocolate cool slightly and then stir in ½ cup (100g) of WHIPPED cream to temper. Add the Pate a Bombe. Add in the rest of the WHIPPED cream (220g) mixing gently with a spatula.

Element #3 Dark Chocolate Ganache Insert

Preparation time: 10mn

Equipment: pan, whisk. If you have plunging mixer (a vertical hand mixer used to make soups and other liquids), it comes in handy.

Note: Because the ganache hardens as it cools, you should make it right before you intend to use it to facilitate piping it onto the log during assembly. Please be careful when caramelizing the sugar and then adding the cream. It may splatter and boil.

Ingredients:
1.75 oz (4 Tbsp / 50g) granulated sugar
4.5oz (2/3 cup – 1 Tbsp/ 135g) heavy cream (35% fat content)
5 oz (135g) dark chocolate, finely chopped
3Tbsp + 1/2tsp (45g) unsalted butter softened

Make a caramel: Using the dry method, melt the sugar by spreading it in an even layer in a small saucepan with high sides. Heat over medium-high heat, watching it carefully as the sugar begins to melt. Never stir the mixture. As the sugar starts to melt, swirl the pan occasionally to allow the sugar to melt evenly. Cook to dark amber color.

While the sugar is melting, heat the cream until boiling. Pour cream into the caramel and stir thoroughly. Be very careful as it may splatter and boil. Pour the hot caramel-milk mixture over the dark chocolate. Wait 30 seconds and stir until smooth.

Add the softened butter and whip hard and fast (if you have a plunging mixer use it). The chocolate should be smooth and shiny.

Element #4 Chocolate Crisp Insert

Preparation time: 10 mn

Equipment: Small saucepan.
Double boiler (or one small saucepan in another), wax paper

3.5 oz (100g) milk chocolate
1 2/3 Tbsp (25g) unsalted butter
2 Tbsp (1 oz / 30g) praline
1 oz. rice krispies

Melt the chocolate and butter in a double boiler.

Add the praline and the rice Krispies. Mix quickly to thoroughly coat with the chocolate.

Spread between two sheets of wax paper to a size slightly larger than your desired shape. Refrigerate until hard.

Element #5 Vanilla Crème Brulée Insert

Preparation time: 15mn + 1h infusing + 1h baking

Equipment: Small saucepan, mixing bowl, baking mold, wax paper

Note: The vanilla crème brulée can be flavored differently by simply replacing the vanilla with something else e.g. cardamom, lavender, etc...

Ingredients:
1/2 cup (115g) heavy cream (35% fat content)
½ cup (115g) whole milk
4 medium-sized (72g) egg yolks
0.75 oz (2 Tbsp / 25g) granulated sugar
1 vanilla bean

Heat the milk, cream, and scraped vanilla bean to just boiling. Remove from the stove and let the vanilla infuse for about 1 hour.

Whisk together the sugar and egg yolks (but do not beat until white). Pour the vanilla-infused milk over the sugar/yolk mixture. Mix well.

Wipe with a very wet cloth and then cover your baking mold (whatever shape is going to fit on the inside of your Yule log/cake) with parchment paper. Pour the cream into the mold and bake at 210°F (100°C) for about 1 hour or until firm on the edges and slightly wobbly in the center.

Element #6 Dark Chocolate Icing

Preparation time: 25 minutes (10mn if you don’t count softening the gelatin)

Equipment: Small bowl, small saucepan

Note: Because the icing gelifies quickly, you should make it at the last minute.
For other gelatin equivalencies or gelatin to agar-agar equivalencies, look at the notes for the mousse component.

Ingredients:
4g / ½ Tbsp powdered gelatin or 2 sheets gelatin
¼ cup (60g) heavy cream (35 % fat content)
2.1 oz (5 Tbsp / 60g) granulated sugar
¼ cup (50g) water
1/3 cup (30g) unsweetened cocoa powder

Soften the gelatin in cold water for 15 minutes. Boil the rest of the ingredients and cook an additional 3 minutes after boiling.Add gelatin to the chocolate mixture. Mix well.

Let cool while checking the texture regularly. As soon as the mixture is smooth and coats a spoon well (it is starting to gelify), use immediately.

Assembling the yule log:
1) Line your mold or pan, whatever its shape, with rhodoid (clear hard plastic, I usually use transparencies cut to the desired shape, it’s easier to find than cellulose acetate which is what rhodoid translates to in English) OR plastic film. Rhodoid will give you a smoother shape but you may have a hard time using it depending on the kind of mold you’re using.

Cut the Dacquoise into a shape fitting your mold and set it in there. If you are using an actual Yule mold which is in the shape of a half-pipe, you want the Dacquoise to cover the entire half-pipe portion of the mold.

Pipe one third of the Mousse component on the Dacquoise.

Take the Creme Brulee Insert out of the freezer at the last minute and set on top of the mousse. Press down gently to slightly ensconce it in the mousse.

Pipe second third of the Mousse component around and on top of the Creme Brulee Insert.

Cut the Praline/Crisp Insert to a size slightly smaller than your mold so that it can be surrounded by mousse. Lay it on top of the mousse you just piped into the mold.

Pipe the last third of the Mousse component on top of the Praline Insert.

Freeze for a few hours to set. Take out of the freezer.

Pipe the Ganache Insert onto the frozen mousse leaving a slight eidge so that ganache doesn’t seep out when you set the Dacquoise on top.

Close with the last strip of Dacquoise. (in my case, the praline chocolate crisp insert)

Freeze until the next day.

Read more...

Wednesday, December 24, 2008

Dear Friends......

christmas 2008


May Christmas
bring you happiness
and many dreams come true,
And may the love you give
throughout the year
come right back to you.

Merry Christmas and Happy New Year!

christmas 08


And remember good food are meant to be shared with people you care.

052

Read more...

Monday, December 22, 2008

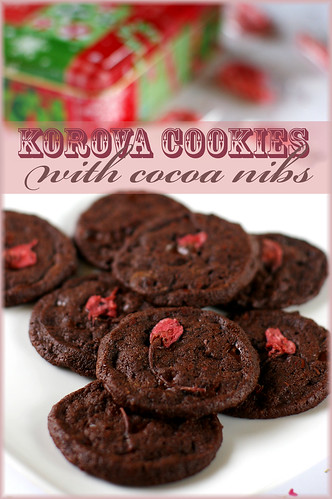
Christmas Baking III: Korova Cookies with Cocoa Nib

korova cookies


Korova Cookies, also known as World Peace Cookies is possibly my most favorite chocolate cookies. Naturally, I have to include some in the cookie tin I was sending to sister in law and ST.

To make it extra special, I added some Valrhona cocoa nibs which I brought back from Singapore. Thanks to my friend Evan, who pointed me to the Varlhona distributor in Singapore. It was soooo much cheaper to buy in bulk!

nibs


I got a pound of that good stuff with the same price I paid for the Scharffen Berger 6oz pack of cocoa nibs.So readers, embrace yourself for many more cocoa nibs related recipes in the near future of my little blog. I can't help it!

korova cookies


The Korova Cookies are mighty tasty even without cocoa nibs. But a healthy dose of nibs give the chocolatey cookies a crunchy and intriguing edge. I topped the cookies with some salted cherry blossoms Grace passed me a few months ago in place of fleur de sel.


Korova Cookies with Cocoa Nibs aka World Peace Cookies
adapted from Dorie Greenspan's Baking: From My Home to Yours

1 1/4 cups all purpose flour
1/3 cup unsweetened cocoa powder (I used Dutch processed cocoa powder)
1/2 tsp baking soda
11 tbsps unsalted butter, at room temperature
2/3 cup packed, light brown sugar
1/4 cup sugar
1/2 tsp fleur de sel or 1/4 tsp fine sea salt
1 tsp pure vanilla extract
1 (3.5 oz) 72% chocolate (I used green & black), chopped
1 oz cocoa nibs
salted cherry blossom ( optional)

Sift flour, cocoa powder and baking soda together.

Working with a mixer with paddle attachment, beat the butter until soft and creamy. Add both sugars, salt and vanilla and beat for 2 minutes more.

Turn off the mixer, pour in the dry ingredients. Pulse the mixture at low speed for 5 times, with one to two seconds each time, until the flour disappear into the dough. Try to work the dough as little as possible for better texture. Toss in the chocolate pieces and cocoa nibs and mix only to incorporate.

Turn the dough out onto a piece of saran wrap, roughly shape it into a log, approximately 1.5 inch.

tip:For perfect round, I split the paper towel core to half in the center, and place the wrapped dough in the center. Tie the paper core on both ends and freeze the perfect round dough in the freezer until ready to bake.

Slice the dough into 1/2 inch rounds, don't be concerned if the dough crack as you cut them, simply squeeze the bits back to the cookies.

Tip:To minimize crack, try to cut the chocolate chunks into smaller chips, that way the chocolate can disperse more evenly into the dough. Also, if you put the dough in freezer, wait about 5 minutes to let the dough soften a bit.

Bake at 325F for 12 minutes. They won't look done nor firm, but that's the way they should be. Transfer to cool.


Read more...

Sunday, December 21, 2008

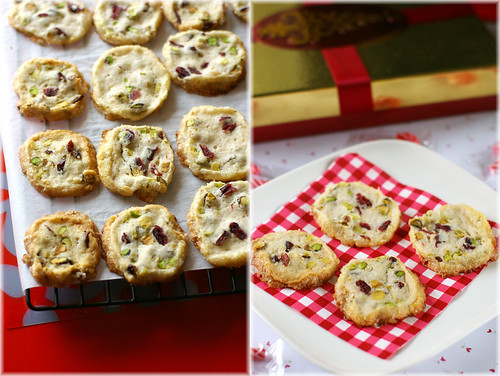
Christmas Baking Part II: Pistachio & Cranberry Icebox Cookies

Pistachio and Cranberry Icebox Cookies


"What cookies do you want me to include in your cookies box?" I asked sister in law earlier last week.
"Chocolate chips cookies, almond cocoa nib sticks! And something christmassy." She enthused.

Something Christmassy? I considered making the Cherry Garcia Biscotti or the Decorated Sugar Cookies. In the end, the favorite cookies slideshow that Gourmet.com put up changed my mind. Folks at Gourmet has choosen the pistachio & cranberry icebox cookies as their favorite for year 2006.


The same cookies I made for friends when that issue came out. Despite their festive appearance, the resulting cookies were quite forgetable. I didn't even blog about it then.

"Did I miss something?" I think long and hard. All I could recall, is the omitted decorative sugar in the last step. I didn't think it was a make or break factor then.

To satisfy my curiousity, I got myself a big bottle of the glittery sugar this year and sprinkled it liberally on the shaped square log before slicing and baking them. I also replaced the orange zest with lemon zest, because I always have extra lemons in the fridge.

pistachio and cranberry cookies

My verdict? The pistachio & cranberry icebox cookies are totally worthy of their prime location in the packed cookies tin! The decorative sugars transformed the otherwise forgetable cookies into something seductive and memorable. It provides the crunchy sweet edges to the buttery cookies that makes them down right addictive.

If you are planning to make these cookies, learn from my mistake- don't omit the decorative sugar! And make a double batches.


Want more cookie recipes?
Cherry Garcia Biscotti
Nutella Two Tone Cookies
Rugelach
Pinwheel Cookies
Decorated Sugar Cookies
Coffee Hazelnut Cookies
Hot Chocolate Cookies
Peppermint Cookie and Cream Brownie

Pistachio & Cranberry Icebox Cookies
adopted from Gourmet.com

1 1/2 cups all-purpose flour
1/2 teaspoon cinnamon
1/4 teaspoon salt
1 1/2 sticks (3/4 cup) unsalted butter, softened
1/4 cup plus 2 tablespoons granulated sugar
zest from 1 lemon
1/2 cup shelled pistachios, roughly chopped (2 1/4 oz; not dyed red)
1/3 cup dried cranberries (1 1/4 oz)
1 large egg, lightly beaten
1/4 cup decorative sugar (preferably coarse)


Stir together flour, cinnamon, and salt in a bowl.

Beat together butter, granulated sugar, and zest in a large bowl with an electric mixer at medium-high speed until pale and fluffy, about 3 minutes. Reduce speed to low and add flour mixture in 3 batches, mixing until dough just comes together in clumps, then mix in pistachios and cranberries. Gather and press dough together, then divide into 2 equal pieces. Using a sheet of plastic wrap or wax paper as an aid, form each piece of dough into a log about 1 1/2 inches in diameter. Square off long sides of each log to form a bar, then chill, wrapped in plastic wrap, until very firm, at least 2 hours.

Slice and bake cookies:
Put oven racks in upper and lower thirds of oven and preheat oven to 350°F. Line 2 large baking sheets with parchment paper.

Brush egg over all 4 long sides of bars (but not ends). Sprinkle decorative sugar on a separate sheet of parchment or wax paper and press bars into sugar, coating well.
Cut each bar crosswise into 1/4-inch-thick slices, rotating bar after cutting each slice to help keep square shape. (If dough gets too soft to slice, freeze bars briefly until firm.) Arrange cookies about 1/2 inch apart on lined baking sheets.

Bake cookies, switching position of sheets halfway through baking, until edges are pale golden, 15 to 18 minutes total. Transfer cookies from parchment to racks using a slotted spatula and cool completely.

Cooks’ notes:
Dough bars can be chilled up to 3 days or frozen, wrapped in plastic wrap and then foil, 1 month (thaw frozen dough in refrigerator just until dough can be sliced).
Cookies keep in an airtight container at room temperature 5 days.

Read more...
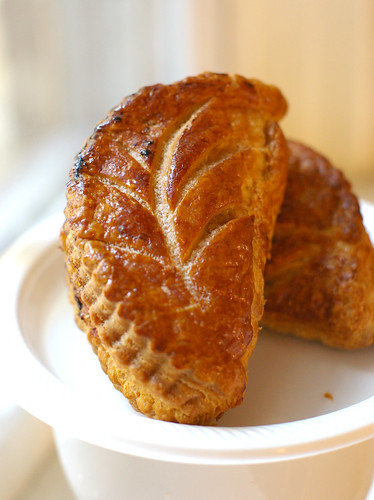
Friday, December 19, 2008

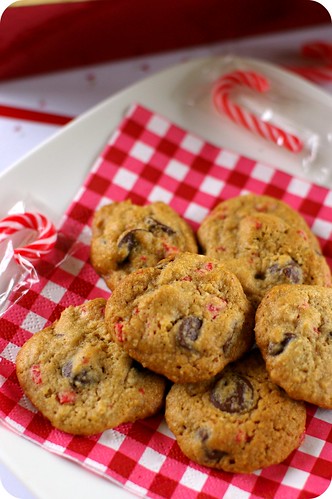
Christmas Baking Part I : Chocolate and Peppermint Cookies

playing with picnik!


"I am late in my Christmas baking!" I told OCT when I realised it's less than 2 weeks before we celebrate our 4th Christmas here.

Earlier this week, I baked 4 different kinds of cookies and have them packed and shipped, the seconds they cooled down.

I have wanted to attempt fancier cookies and spread our cookies love to more friends overseas, but things are crazy around here. We have no choice but to abort our grand plan.

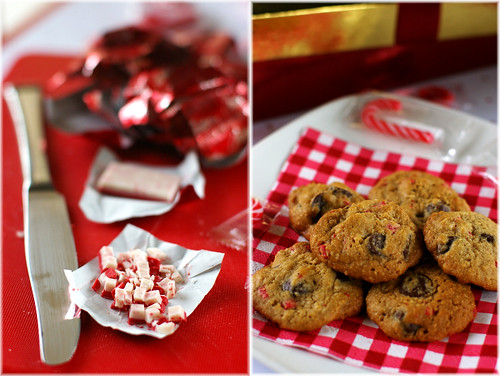
One of the cookies on my baking list is the Not- Neiman Marcus's Chocolate Chip Cookies from Nancy Baggett's "The All American Cookies book". I can't believe I have quietly made them so many times without telling you! This is one of my favorite cookie recipes. During Christmas season, I like to add chopped Andes peppermint thins into the batter to make a chocolate and peppermint cookies. It is not a complicated recipe, but the cookies benefitted from the use of oat flour, (which is basically rolled oats grinded in a food processor),various kind of sweeteners and chocolate. It is everything that a good cookie should be, at least in my book!

Tis the season to make cookies


Whenever I make this cookie, OCT openly wonder why the author has to incorporate peppermint chips as an ingredient.
"The cookies would be better without the peppermint chips!" He said.

Of course, I never let on the truth - that "special touch" is my stroke of brilliant! If you are not a peppermint fan too, simply omit it and substituted chopped milk chocolate to the batter. Nuts are optional too.


Here's some of the cookies I made last year:
Cherry Garcia Biscotti
Nutella Two Tone Cookies
Rugelach
Pinwheel Cookies
Decorated Sugar Cookies
Coffee Hazelnut Cookies
Hot Chocolate Cookies
Peppermint Cookie and Cream Brownie


Chocolate and Peppermint Cookies (aka Not Neiman Marcus's Chocolate Chip Cookies)
adapted from Nancy Baggett's " The All- American Cookie Book"

2 cups old fashioned rolled oats (grind to a fine powder in a food processor, blender or coffee grinder)
2 cups all purpose flour
1 teaspoon baking powder
1 teaspoon baking soda
1/2 teaspoon salt
1 cup (2 sticks) unsalted butter, slightly softened
1/4 cup packed light brown sugar
1/2 cup granulated sugar
2 tablespoons light corn syrup
2 large eggs
2 teaspoon vanilla extract
1 bag (11.5 oz) semisweet/ bittersweet chocolate chips
3.5 oz chopped Andes Peppermint Thins (or chopped milk chocolate)
1 cup (4 ounces) chopped walnut (optional)

Preheat the oven to 350F. Line baking sheets with parchment paper.

Combine the grinded oat, all purpose flour, baking powder, baking soda and salt in a large bowl and mix well, set aside.

In a mixer bowl, with an electric mixer on medium speed, beat butter unil light and fluffy. Add the brown sugar, granulated sugar and corn syrup and beat until well blended and fluffy. Add the eggs and vanilla extract and beat until incorporated. Beat in about half of the flour mixture. Beat in the chocolate and peppermint chips, nuts (if using), and remaining flour mixture until evenly incorporated. Let stand for 5 to 10 minutes, or until the dough firms up just slightly.

Depending on how big you want the cookies, use an ice cream scoop or teaspoon to drop rounds of dough onto parchment paper. Bake the cookies for 6-12 minutes, or until tinged with brown and just beginning to firm up in the centers, for very moist cookies. Becareful not to overbake. Bake longer if you prefer crispy cookies.

Transfer baking sheet to a wire rack and let stand until the cookies firm up slightly, 3-4 minutes. Using a spatula, transfer cookies to wire rack to cool completely before storing in airtight container. Cookies keep for 1 weeks or can be frozen for up to 1 month.

Read more...
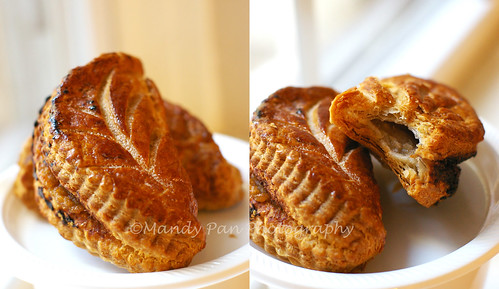
Monday, December 15, 2008

And the winners are.....

Thanks everyone for your participation in my little lucky draw! The three Hershey baskets go to........

Eliza, Rachel and Kevin!

Congratulations guys! I will drop you an email later for your addresses. The baskets will be sent directly by Hersheys.

On another not so great news, my laptop died on me last Sat. :(
But OCT got me a new one tonight! I lost all the photos in the old laptop because I did't backup! What a bummer.Lesson learned. The hard way.

oatmeal cookies


Here's a sneak peak of something I made this afternoon, along with other treats, all ready to be sent off! More on that later, after I have the new laptop set up.

Have a good week ahead everyone!

Read more...
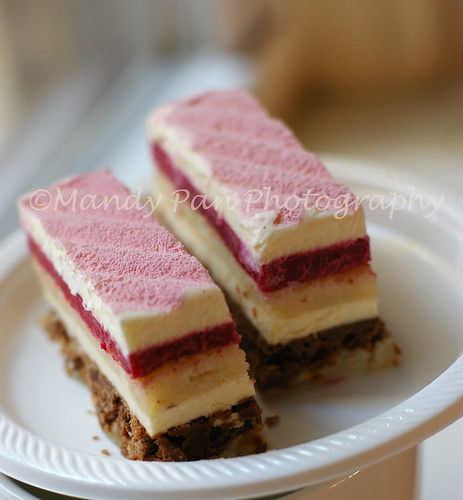
Wednesday, December 10, 2008

Almond Cocoa Nib Sticks and a Giveaway!

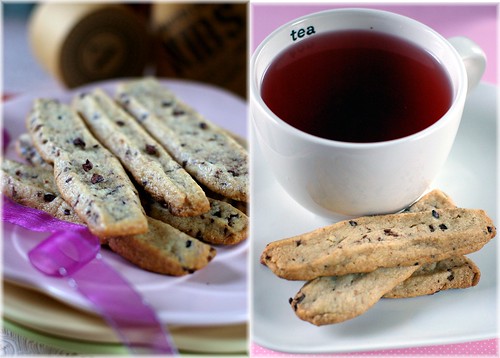
almond sticks

Unlike some of my caring, thoughtful and meticulous friends, who have started Christmas baking and packing well ahead of time, I procastinate. I blame everything on the jetlag since I returned from Asia last Thursday.The horrible food on board, various transits and the long hours flights have zapped out most of my energy. All I want to do, is curling up on my favorite spot, drooling over the food photos on tastespotting and foodgawker and eating the snacks I sneaked in from Malaysia.

Having said that, I have shortlisted some cookies to be included in my baking list this holiday, and a list of friends, who may receive the cookies. (It all depends on whether I could bake and send them out on time! )

almond sticks2

One of the cookies I intend to make this year is Almond Cocoa Nib Sticks from Alice Medrich's Bittersweet.I have made them once to be sent overseas. Not only are they sturdy enough to withstand the potential abuse when mailed; according to OCT, they taste pretty darn good too. So good that he who usually doesn't like cookies can't stop munching them. I have to stop OCT from snatching yet another stick in order to have enough to fill up a box I need to send.

The almond cocoa nib sticks are not as hard as biscotti but don't crumble as easily as shortbread cookies. They would be perfect by the side of a steaming cup of tea. Although OCT would add that it tastes just as awesome as it is-buttery, nutty, crunchy with a hint of cacao.


Almond Cocoa Nib Sticks
adopted from Alice Medrich's- Bittersweet

3/4 cup (3 3/4 ounces) whole blanched almonds
1 cup plus 2 T. all-purpose flour
2/3 cup sugar
1/4 t. salt
6 T. unsalted butter, cut into chunks
2 T. water
1 t. pure vanilla extract
1/8 t. pure almond extract
1/4 cup Cocoa Nibs

Combine the almonds, flour, sugar, and salt in a food processor, and pulse until the almonds are reduced to a fine meal. Add the butter and pulse until the mixture looks like a mass of crumbs. Combine the water, vanilla, and almond extract, drizzle them into the processor bowl and pulse just until the dough looks damp. Add the cocoa nibs and pulse only until evenly dispersed.

The dough will not form a smooth cohesive mass - it will be crumbly, but it will stick together when you press it. Turn it out on a large sheet of foil and form it into a 6 x 9 inch rectangle a scant 1/2 inch thick. fold the foil over the dough and press firmly with your hands to compress it, then wrap it airtight. Slide a cookie sheet under the package and refrigerate for at least 2 hours or overnight.

Position the racks in the upper and lower thirds of the oven, and preheat the oven to 350 degrees. Line two cookie sheets with parchment or wax paper.

Use a long sharp knife to trim one short edge of the dough rectangle to even it. Then cut a slice a scant 3/8 inch wide and use the knife to transfer the delicate slice to the cookie sheet. Repeat with the rest of the dough, transferring each slice as it is cut and placing them at least 1 inch apart. If some break, just push them back together, or bake them broken - they will look and taste great anyway.

Bake, rotating the cookie sheets from top to bottom and front to back half way through the baking time, 12-14 minutes, or until the cookies are golden at the edges. Set the pans on the racks to cool completely. (The cookies can be stored, airtight, for several days).

Makes about 30, 6-inch sticks


***************************

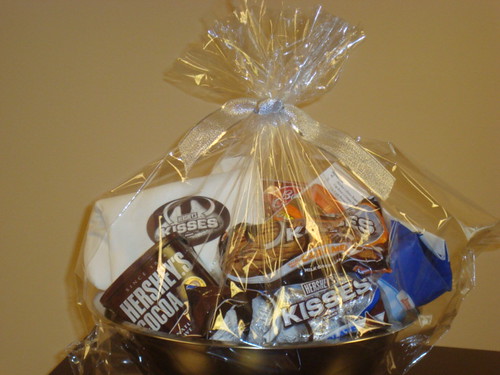
And now, onto something fun- the Giveaway! The good folks at The Hershey Company are offering to send 3 baskets full of baking goodies, which include: 2 varieties of Hershey Kisses, Peanut Butter, flour, brownie mixes, cocoa powder, spatula, mixing bowl and oven mitt to 3 lucky readers of Fresh From The Oven!

Wrapped_Hersheys_Baking_Gift_Basket

photo provided by The Hershey Company


All you have to do, is leave me a comment to tell me what's your favorite cookies for the holiday season. The deadline is 14th Dec, which is this Sunday. I will conduct a drawing on Monday morning, and 3 lucky readers will each receive a goodies basket, courtesy of The Hershey Company.

The only catch? It's only open to US and Canada residents.


Read more...
Related Posts with Thumbnails