


I just received the latest Cookinglight magazine today and this is the first recipe I make! Irish Cream Brownie is a combination of 2 of my favorite things together: Irish Cream + Chocolate. Do I have to say more? I know I have to make it, eventhough I was really tired,and I have already made some goodies for OCT's Friday lab meeting.
One thing I like about making brownie is its simplicity. You don't have to take the butter out in advance, and mixer is absolutely not required.
Compare this to the Nancy Baggett's Fudge Brownies Supreme I made sometime ago, this has a pronouned Irish Cream flavor, more to adult liking come to think of it. I believe children or people who do not like alcohol would prefer Nancy Baggett's version (eg OCT).
I slightly overbaked the brownie. Not on intention, but it was already fully baked at 15 minutes. According to the recipe, it should be done around 20 minutes. Maybe I will shorten the baking time to 12 to 13 minutes, if I ever baked this again. I doubt....not that it's not nice. But they are so many other tempting recipes out there!
I have just bought 10 blocks of cream cheese which was on sale, so I guess I will tackle some cheesecake recipes soon. That will be after I get back from our " Happiest Celebration on Earth" vacation of course.
Irish Cream Brownies
adapted from Cookinglight Oct 2006
For truly fudgy treats, be sure to cook the brownies until a wooden pick inserted in the center comes out almost clean. If you wait until the pick is clean, the brownies will be overcooked. Garnish the plate with a sprig of mint.
1 cup all-purpose flour (about 4 1/2 ounces)
1/2 cup unsweetened cocoa
1/4 teaspoon baking soda
1/4 teaspoon salt
1/3 cup semisweet chocolate chips
1/4 cup butter
1 cup sugar
1/2 cup egg substitute
1/4 cup Baileys Irish Cream
1 teaspoon vanilla extract
Cooking spray
Preheat oven to 350°.
Lightly spoon flour into a dry measuring cup; level with a knife. Combine flour, cocoa, baking soda, and salt in a small bowl, stirring with a whisk.
Place the chocolate chips and the butter in a large microwave-safe bowl. Microwave at HIGH 1 1/2 minutes or until the chocolate chips and butter melt, stirring every 30 seconds. Cool slightly. Add sugar and next 3 ingredients (through vanilla extract), stirring well with a whisk. Microwave at HIGH 1 minute or until sugar dissolves, stirring every 30 seconds. Fold in the flour mixture, stirring just until moist. Spread batter in a thin layer into a 9-inch square baking pan coated with cooking spray. Bake at 350° for 20 minutes or until a wooden pick inserted in center comes out almost clean. Cool on a wire rack.
Yield: 16 servings (serving size: 1 brownie)
Thursday, September 21, 2006
Irish Cream Brownies
Beef Carnitas
Having thouroughly enjoyed the pork carnitas last week, I can't help but wonder how the beef version measured to its predecessor? To me, the pork carnitas is already very very good. How could we possibly have something better? But the panel at cookinglight magazine apparently think that the beef Carnitas is more flavourful and hence selected it as one of the staff favorite.
Since top round roast was on sale last week, I have planned to make the beef carnitas this week. It's in our menu tonight, and I can form my opionion upon trying them both. Compared to pork carnitas, the beef version took only one and a half hour to cook. Because OCT doesn't want to eat it with tortilla, we paired it with rice. It was pretty tasty actually. Though the cooking method is similar to beef stew, but the lime juice added towards the end made the beef carnitas tasted refreshing. I have no doubt that this will make very nice filling for tacos.
After trying both versions of carnitas, OCT prefers the beef carnitas, while I like the pork's better. The beef was flavourful, but it wasn't fork tender. But it could be the user error while preparing the dish too. Anyway, with its short ingredient list, I have no doubt that the beef carnitas will return to our dining table soon. ( when beef roast is on sale again!)
 Alright, I know. It doesn't look appetizing. But it's really tasty. I will continue to work on the presentation...
Beef Carnitas
adapted from Cookinglight Sept 2006
This simple recipe, which uses inexpensive beef stew meat, garnered our highest rating for great flavor and versatility. To freeze the carnitas, wrap them tightly in heavy-duty plastic wrap or foil, and place in a zip-top plastic freezer bag; they will keep in the freezer for up to three months.
This recipe goes with Beef Carnitas Empanada, Enchilada Casserole with Quick Mole Sauce, Spicy Beef Salad, Beef Carnitas Tacos
Cooking spray
1 cup chopped onion
3 garlic cloves, crushed
2 pounds beef stew meat, trimmed and cut into 1-inch pieces (I used top round roast)
1 cup less-sodium beef broth
1 teaspoon sugar
3/4 teaspoon salt
1/2 teaspoon crushed red pepper
1 large unpeeled orange wedge (I used one quarter of an orange)
Heat a large Dutch oven over medium-high heat. Coat pan with cooking spray. Add onion; sauté 4 minutes or until tender. Add garlic; sauté 1 minute. Add beef; sauté 5 minutes or until beef is browned on all sides. Stir in broth, sugar, salt, and pepper; nestle orange section into beef mixture. Bring to a boil. Cover, reduce heat, and simmer 1 1/2 hours or until beef is tender. Remove and discard orange. Continue simmering, uncovered, 8 minutes or until liquid almost evaporates, stirring frequently.
Note: I served the beef carnitas with some diced plum tomatoes and fresh lime juice on top of the meat. Next time, I will remember to add some avocados to make this a real Mexican dish.
Wednesday, September 20, 2006
Hazelnut Chocolate Sandwich Cookies
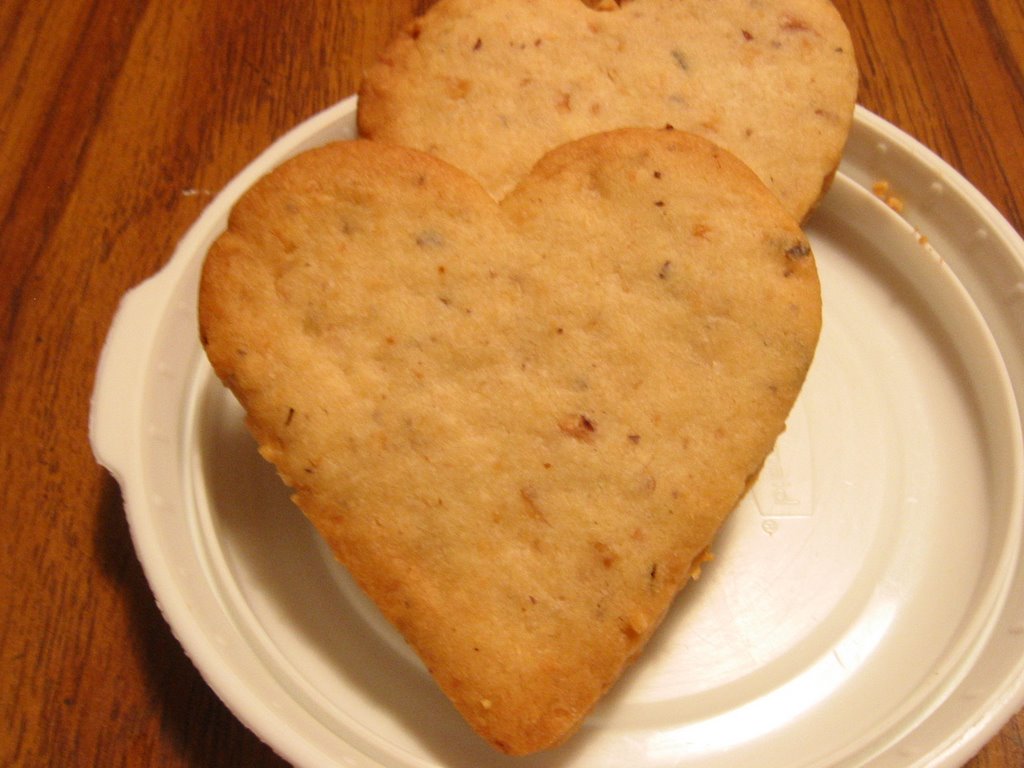
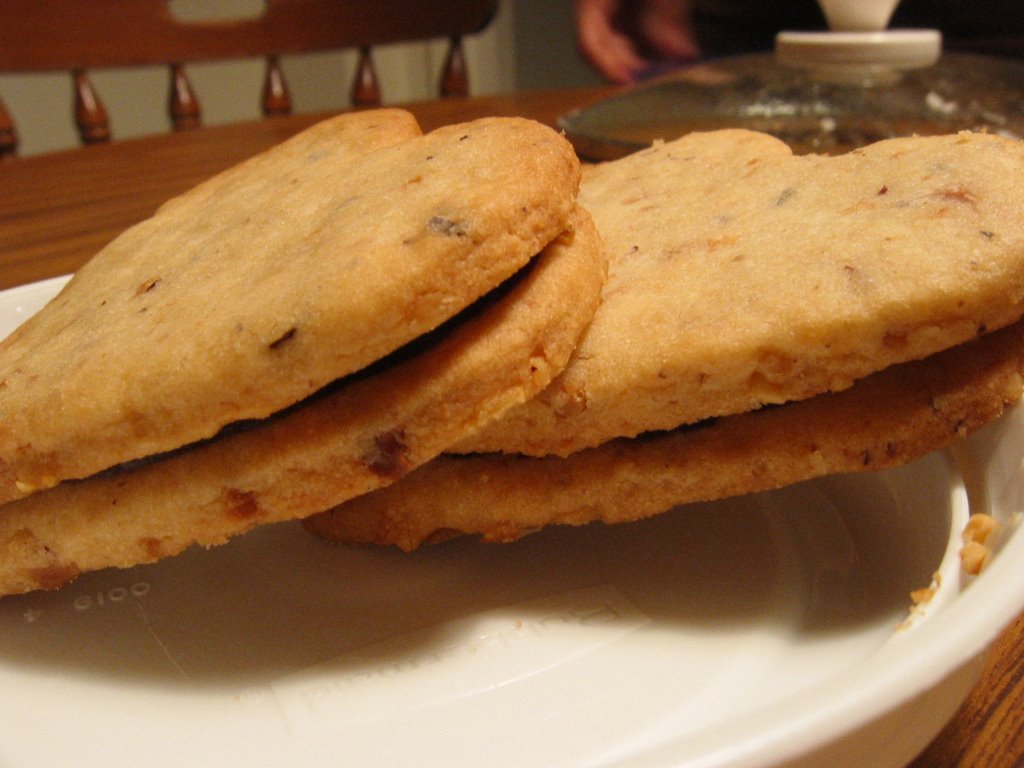
I set out to make a batch of Chocolate Hazelnut Biscottis for our upcoming trip but change my mind last minute. Instead of biscottis, I make a batch of Hazelnut Chocolate Sandwich Cookies from my newly acquired Cookies Book by Nancy Baggett.
According to Nancy, this is a closely guarded recipe by a Oregon hostess, but she somehow developed a recipe that was close, if not better than the original's. I think chocolate pairs well with almost any nuts, especially with hazelnut. So this recipe got to be a winner.
As usual, I patiently followed the instructions, including grinding the hazelnut to fine powder, using my trust-worthy rolling-pin.And carefully roll out the dough to about 11-inch long and 1/8-inch thick after other mix in.They wre then freezed, and cut into 1.5 x 2.25 inches rectangles. Naturely, I detest the extra measurements required. But to make sandwich cookies, I need every cookies to be of the exact same size. I silently send a brain wave to Nancy Baggett that these cookies better be good. Almost at the same time, my heart sent me a signal to look for an easier way out. I followed my heart and cut out the remaining dough using the "heart" shape cookie cutter.
The end products are walnut shortbreads with 72% chocolate filling. They are good. But too sweet to my liking. Most cookies have been sent to OCT's lab. I hope they will like the little perk-me-up in their breakfast meeting.
With the amount of effort and time spent, I think I still prefer the lower fat chocolate hazelnut biscottis. I believe this recipe is not available on internet, so drop me a note if you are interested to try this out. Since the instructions are kind of long, I will not be typing it out unless someone needs it.
Tuesday, September 19, 2006
Pepperoni Pizza
I made a pizza from scratch today! Though I make a mess along the way, we both agreed that the end product was well worth it.
Because OCT doesn't like pepperoni, I spared a 1/4 dough to make him a ham and pesto version. I actually thought that's a nicer version. We will be making a whole ham and pesto version soon!
I followed the instructions on this month's Cookinglight to make the pizza dough, and it was really easy to follow. There are quite a few of other pizza recipes on this issue, I think I will try to make the seafood one next, with prawn and calamari! 

Friday, September 15, 2006
Curry Baked Rice
It's a yummy creation! OCT said it reminded him of the baked rice in Swanson and NYDC. Yes, baked rice has been our favorite entree in these 2 restaurants. I wonder why it took me so long to try this very simple and do-able entree at home. Anyway, better late than never.
Present to you, my latest fusion creation :

Curry Baked Rice
4 chicken drumsticks, skinned and boned; cut into bite size
1/2 red onion, minced
1 red pepper, diced
1 cup green pea
1.5 cup pineapple chunk
cooked and cooled rice
shredded mozzarella cheese
shredded sharp cheddar cheese
Marinate for chicken: ( marinate for at least 20 minutes)
ground coriander
curry poweder
salt
white pepper
mirin
cornstarch
Preheat oven too 400F.
Add 1 tablespoon of oil to a hot nonstick skillet. Add the marinated chicken to the skillet and cook until chicken is no longer pink. Remove to a plate.
Add red onion and red pepper to the same skillet and cook until fragrant. 2 to 3 minutes. Add green peas, followed by chicken and pineapple back to the skillet and stirfry for another minute. Add rice to the skillet, and mix all the ingredients well. Add extra curry powder, soy sauce and salt along the way, until desired taste is achieved.
Arrange the curry chicken rice on a 9 inch baking dish and sprinkle sharp cheedar cheese on top, followed by another layer of shredded mozzarella cheese.
Baked in the oven for 10-15 minutes until the cheese melts.
Serves 4
Wednesday, September 13, 2006
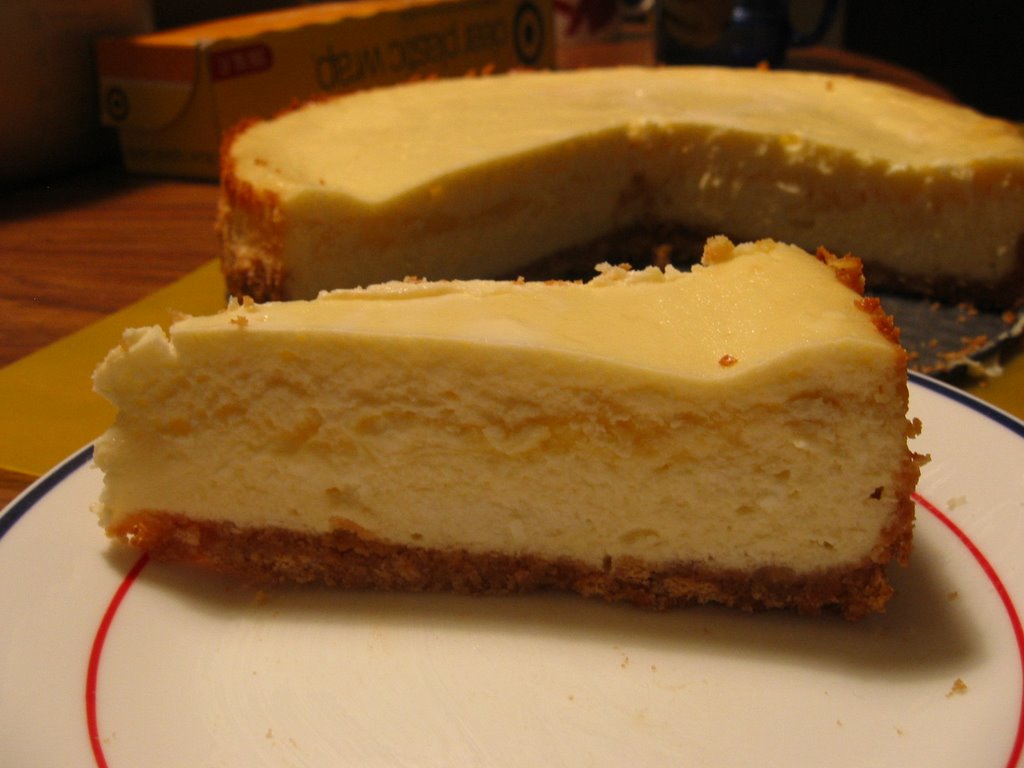
Lemon Curd Marbled Cheesecake
This is another typical case of trying to use up the almost expiring stuff. This time, the items include 3 blocks of cream cheese and half a tub of sour cream. After some research, and some mental struggling of whether to make something new or follow a T&T recipe, I decided to try the Lemon Curd Marble Cheesecake, featured on Gourmet magazine.
There were mixed reviews on this recipe. But I decided to bake it anyway, since Gourmet has never disappointed me before. 2 of the common complaints were cracks on top of the cheesecake and the wobbly center when the cheesecakes were pulled out from the oven. Crack, is something I am familiar with. I am famous for forgeting how long the cake has been baking. So mine always come out a tad too dry, with cracks on top. They were still delicious (most of the time), but never presentable. So, crack is not an issue for me. Since overbake is my specialty, I don't see why my cheesecake will have the wobbly center, as some encountered. In fact, it will be a challenge for me to remember when to pull the cheesecake out when the center is still wobbly....
Anyhow, I proceeded to make the lemon curd, which proved to be very time consuming. Because I only have a tiny sieve. It took forever to force the residue-less curd through the sieve. After that was done, I took out a pack of graham cracker, and carefully crushed them into crumbs. Did I tell you that I get the lemon zest for the curd by first peeling the skin, and then cut them into tiny bits? Yes, everything here is pretty primitive and hence time consuming. But I believe once upon a time, this was how our ancestor did it. I should be thankful that I have a kitchen-aid blender to do all the mixing and beating.
After all these work were done, making cheesecake was a breeze. I baked mine for 1 hour, as suggested by others, and it was a bit wobbly in the center. And yes! I remembered the time! The cheesecake firmed up just as the recipe described. I am also thrilled that there's no crack for the first time! ( ok, there were some small cracks initially, but they somehow patched back as the cake firmed up.)
OCT brought a big piece for his collaborator who is leaving St Louis on Friday. It would be nice if we had time to dress the cake up a bit or wrote something meaning on the cake. But I guess, it's the thought that counts? Nevermind that he didn't contribute any effort in making the cheesecake.
I had a piece with OCT and another piece later for morning snack. They were delicious! I probably didn't add enough lemon curd to the batter. Because I didn't see the distinct line formed as described in the magazine. No matter, they still taste yummy. And I really like the tangy lemon curd in the cheesecake. I guess I like everything with lemon. Now, I must think of a way to use up the rest of the lemon curd...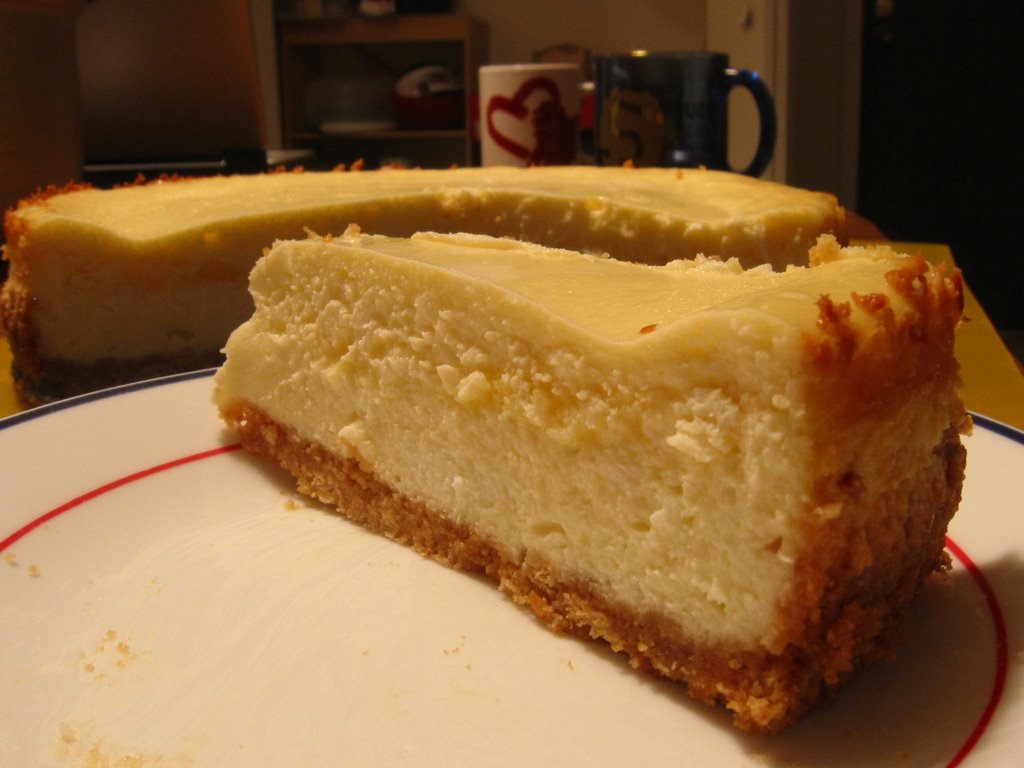
Lemon Curd Marbled Cheesecake
(adapted from Gourmet July 2006)
For lemon curd
1 teaspoon finely grated fresh lemon zest
1/2 cup fresh lemon juice
1/2 cup sugar
3 large eggs
1/2 stick (1/4 cup) unsalted butter, cut into small pieces
For crust
1 1/3 cups finely ground graham cracker crumbs (5 oz)
1/3 cup sugar
3/4 teaspoon salt
5 tablespoons unsalted butter, melted
For filling
3 (8-oz) packages cream cheese, softened
1 cup sugar
3 large eggs
3/4 cup sour cream
1 teaspoon vanilla
Special equipment: a 9- to 91/2-inch (24-cm) springform pan
Accompaniment: blueberries
Make lemon curd: Whisk together zest, juice, sugar, and eggs in a 2-quart heavy saucepan. Add butter and cook over moderately low heat, whisking frequently, until curd is thick enough to hold marks of whisk and first bubbles appear on surface, about 6 minutes.
Force lemon curd through a fine-mesh sieve into a wide shallow dish, scraping bottom of sieve, then cover surface with wax paper. Cool completely, stirring occasionally, about 30 minutes.
Make and bake crust: Put oven rack in middle position and preheat oven to 350°F. Invert bottom of springform pan (to make it easier to slide cake off bottom), then lock on side. 3Stir together crust ingredients in a bowl, then press onto bottom and 1 inch up side of springform pan. Place springform pan in a shallow baking pan and bake 10 minutes, then cool crust completely in springform pan on a rack.
Make filling and bake cheesecake: Reduce oven temperature to 300°F.
Beat together cream cheese and sugar in a bowl with an electric mixer at medium speed until smooth, 1 to 2 minutes. Reduce speed to low and add eggs 1 at a time, beating until incorporated. Beat in sour cream and vanilla until combined.
Pour two thirds of cream cheese filling into crust, then spoon half of lemon curd over filling and swirl curd into filling with a small knife. (Avoid touching crust with knife to prevent crumbs getting into filling.) Repeat with remaining filling and curd.
Bake cheesecake until set 1 1/2 inches from edge but center trembles when pan is gently shaken, about 45 minutes. (Center of cake will appear very loose but will continue to set as it cools.) Transfer springform pan to a rack and immediately run a knife around top edge of cake to loosen. Cool completely, about 2 hours, then chill, uncovered, at least 4 hours. Remove side of springform pan before serving.
Cooks' Notes:
• Lemon curd can be made 1 week ahead and chilled, covered.
• Crust (without filling) can be made 1 day ahead and kept, covered, at room temperature.
• Cheesecake can be chilled, loosely covered, up to 2 days. Cheesecake must be completely chilled before covering to prevent condensation on its surface.
Tuesday, September 12, 2006
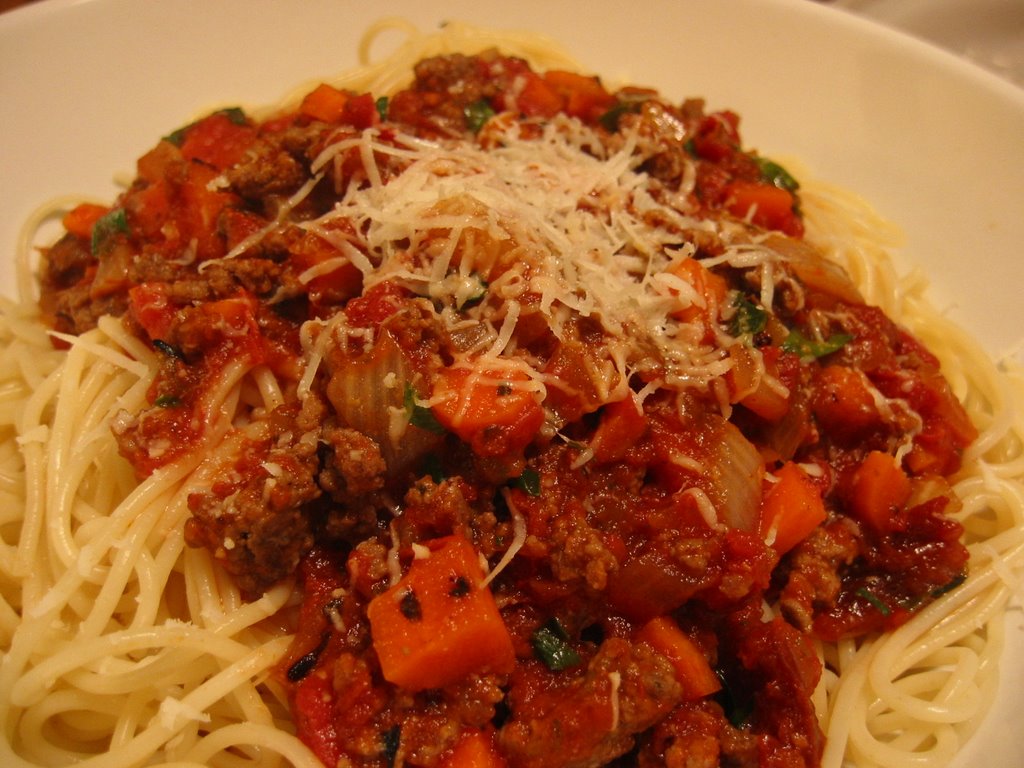
Monday Dinner : Beef and mushroom pasta nest

It is just another Spaghetti Bolognese recipe. Had I knew it earlier, I would rather make something different. By the way, it doesn't taste nicer than my own version, using chipotle chilli. OCT and I added lots of Asian chilli sauce to make this boring dish more appetising.
Oh, this is a recipe from Rachel Ray's 365 No Repeat book, a variation from the tomato and basil pasta nest we had last week. I love it so much to give this variation, printed next to my favorite one a chance, hoping that it's something extraordinary as well. I am definitely wrong this time.
I also tried another recipe of oven baked corn dog from the book. It tasted ok, but the dough was runny beyond believe! I doubt how RR got her hotdog covered with the dough! Anyway, it was too ugly, so I didn't take any picture of my corn dog.
Quite a depressing night when everything comes out from the kitchen didn't taste nice.
Sunday, September 10, 2006
It really bothers me
When I went into the magazine website and checked my personal detail, the yearly rate offered to me was $13. Feeling confused, I wrote an email to their customer service to clarify the matter, and following were our correspondence:
--- Original Message ---
From: novice baker
Received: 9/6/2006 2:10:12 PM Eastern Standard Time (GMT - 4:00 )
To: wes.ck@customersvc.com
Subject: Cooking Light Billing Inquiry,
On Wed Sep 06 14:18:46 EDT 2006 novice baker wrote:
Subject : Billing Inquiry
SubType :
Comments :
On August 23, I received a letter to remind me of the automatic renewal program. However, the rate offered was $18. It was different from the $13 per annum I see when I log into my customer service page online.
As my subscription is ending in Nov 2006, I am currently exploring various options to renew my subscription.
I look forward to your clarification on the subscription rate before I make any decision to renew my subscription.
thanks.
Keina F
Dear novice baker:
Thank you for contacting COOKING LIGHT Customer Service.
Please understand that testing different rates is a common marketing
practice. The offer you mention is targeting new subscribers. The offer
enables potential customers to review the magazines at that low rate to
decide if they would like to continue with a subscription. Because we
value your business, we will be happy to extend your current
subscription with that offer, if you like.
You may visit our website and renew your subscription from there. Or,
if you prefer, you may return this e-mail with your full name, complete
mailing address (including city, state, and zip code), and account
number. Please include your order and billing instructions.
We apologize for any confusion and look forward to hearing from you!
We appreciate this opportunity to be of service.
COOKING LIGHT Customer Service
www.cookinglight.com
--- Original Message ---
From: novice baker
Received: 9/7/2006 2:23:58 PM Eastern Standard Time (GMT - 4:00 )
To: KXXXX F
Subject: Re: Cooking Light Billing Inquiry,
I am afraid you didn't read my email clearly. Let me reiterate. I received a mail from Cookinglight to remind me of the auto renewal program. Under the program, I have to pay $18 per annum.
However, in my customer service page on cookinglight.com, the rate is $13!!!!! Why would I want to accept the $18 offer which is much higher than the rate quoted on the website?
Anyway, I just found out that I can renew the subscription at ebay for only $9.00. I may as well do so, since all the reply I got from your customer service is a "cut and paste" formal reply without even a close look at my inquiry.
From: "RXXXXX C OQ"
To: novice baker
Subject: Re: Cooking Light Billing Inquiry, <<#!$%^$#@!#$%#>>
Date: Fri, 08 Sep 2006 01:11:35 GMT
Dear novice baker:
Thank you for contacting COOKING LIGHT Customer Service.
Please understand that testing different rates is a common marketing
practice. The offer you mention is targeting new subscribers. The offer
enables potential customers to review the magazines at that low rate to
decide if they would like to continue with a subscription. Because we
value your business, we will be happy to extend your current
subscription with that offer, if you like.
You may visit our website and renew your subscription from there. Or,
if you prefer, you may return this e-mail with your full name, complete
mailing address (including city, state, and zip code), and account
number. Please include your order and billing instructions.
We apologize for any confusion and look forward to hearing from you!
We appreciate this opportunity to be of service.
COOKING LIGHT Customer Service
www.cookinglight.com
I feel stupid to even bother to drop them a second email, for all I got in return was another thoughtless cut and paste reply like the first one. I wonder why they even have a link on the website for subscribers to inquire about other issues.
Saturday, September 09, 2006
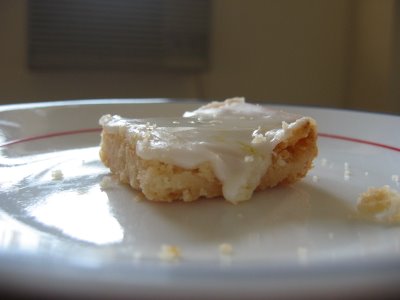
Friday breakfast treat : Iced Lemon Shortbread Fingers
This is another recipe from Nancy Baggett's The All American Cookies Book. I personally like it a lot for the lemony taste. Trace of lemon zest could be found thoughout the shortbread and in the icing. You will like this if you are a lemon sucker like me. I saved some for myself to indulge (with coffee of course) while packing most for OCT's Friday lab meeting.
I made a mess cutting the iced shortbread. The icing just stick to the knife eventhough I wiped the knife after every cut. Maybe I should use some hot water to clean the knife next time. It works for cheesecake, so I guess it may work for pastry with icing too. I think the shortbread will appear more appetising if I cut them neater.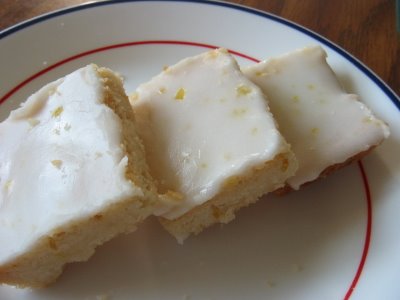
Unfortunately, there wasn't a single review from his colleague. But they did finish the whole tray that he brought. So maybe it's not that bad. Afterall, everything taste nice with icing right? However, on a health conscious note, this is certainly not the kind of dessert I should indulge on a daily basis. Maybe I should make myself a batch of biscotti. The yummy yet low fat biscotti. Anyway, I am thinking of baking a batch of chocolate pistachio biscottis for OCT's next lab meeting, but that will be later..
Wednesday, September 06, 2006
Pork Carnitas and sauteed root veggie
Believe it or not, the pork carnitas took 2 days to prepare. First day, it was baked slowly for 1.5 hours in the 350F oven and refrigerated overnight to remove the solidified fat. Second day, the pork carnita was sauteed in a heavy skillet until most liquid had evaporated.
The end result totally justified the time and effort involved. For the pork was fork tender. OCT and I liked this dish very much, not to mention it used the very affordable pork butt! Definitely a keeper.
On the side, I sauteed some root veggies, a good accompaniment for the pork carnitas. OCT ate them with rice, while I went with the Mexican way.With the corn tortilla that is. Excellent both ways!
Because the pork carnitas didn't need much time to prepare on the second day, I have some time to kill. I decided to make some corn pancakes. Nice addition to our dinner. Though it can hardly be counted as a dish. Nowaday I pretty much cook anything I feel like eating at the moment. 
Pork Carnitas
(adapted from Cookinglight Sept 2006)
2 tablespoons tomato paste
1 teaspoon salt
1 teaspoon freshly ground black pepper
10 garlic cloves, peeled
2 1/4 pounds boneless Boston butt pork roast, trimmed and cut into 1/2-inch pieces
1 cup fat-free, less-sodium chicken broth
1 tablespoon fresh lime juice
Preheat oven to 350°.
Combine first 5 ingredients in a large Dutch oven; pour broth over pork mixture. Cover and bake at 350° for 1 1/2 hours or until pork is very tender.
Transfer pork mixture to a 13 x 9-inch baking dish, and cool to room temperature. Cover and chill for 8 hours or overnight.
Skim the solidified fat from surface; discard fat. Let pork stand at room temperature 30 minutes to soften. Heat a large nonstick skillet over medium-high heat. Add pork; cook 8 minutes or until liquid almost evaporates. Remove from heat; stir in juice.
Seared Tofu with Gingered Vegetables
 Dare I say this looks pretty appetising? It was indeed a very appetising dish. Maybe it's the rice wine vinegar. It goes well with the sweet peppers. I think the only complaint was the lack of sauce.
I will add more liquid when I make this dish again next week.
Seared Tofu with Gingered Vegetables
(adapted from Cookinglight Aug 06)
1 pound reduced-fat extrafirm tofu
3/4 teaspoon salt, divided
1 tablespoon dark sesame oil, divided
3 cloves of garlic, minced
1 tablespoon ginger, finely minced
1 large red bell pepper, thinly sliced
1 cup sliced green onions, divided (omitted)
2 tablespoons rice vinegar
1 tablespoon low-sodium soy sauce
Cooking spray
1/4 teaspoon freshly ground black pepper
1 tablespoon sesame seeds, toasted
Place tofu on several layers of paper towels; let stand 10 minutes. Cut tofu into 1-inch cubes.
Heat 2 teaspoons oil in a large nonstick skillet over medium-high heat. Add garlic, ginger, and bell pepper to pan; sauté for 3 minutes. Stir in 3/4 cup green onions, vinegar, and soy sauce; cook for 30 seconds. Remove from pan. Wipe skillet with paper towels; recoat pan with cooking spray.
Place pan over medium-high heat. Sprinkle tofu with remaining 1/2 teaspoon salt and black pepper. Add tofu to pan; cook 8 minutes or until golden, turning to brown on all sides. Return bell pepper mixture to pan, and cook 1 minute or until thoroughly heated. Drizzle tofu mixture with remaining 1 teaspoon oil; top with sesame seeds. Serve tofu mixture with rice; top with remaining 1/4 cup onions.
Tuesday, September 05, 2006
Deviled Chicken Divan
This is a variation of the chicken with mustard sauce I made last week. OCT didn't like the mustard sauce but I think it has room for improvement. Hence, I decided to give it another chance. With some disguise of course, by adding broccoli, hot sauce and Gruyere cheese as Rachel Ray suggested.
A brand new chicken dish was born! Without OCT noticed they were one of the same dish.  Chicken with Mustard Sauce
4 6-ounce boneless, skinless chicken breast halves
1 Tbsp. fresh thyme leaves, chopped (from 4 sprigs)
Juice of 1 lemon
Salt and freshly ground black pepper
2 Tbsp. extra-virgin olive oil (EVOO)
3/4 cup chicken stock or broth
3 super-heaping Tbsp. good quality Dijon mustard
3 super-heaping Tbsp. sour cream
Season the chicken with the thyme, lemon juice, salt, and pepper. Heat a large non-stick skillet over medium-high heat with the EVOO. Add the seasoned chicken breasts and cook for 5 to 6 minutes on each side, or until cooked through. Remove the chicken from the pan and cover with the foil. Turn up the heat on the skillet to high and add the chicken stock and mustard, whisking to combine. Bring up to a boil, reduce the heat, and simmer for 3 minutes.
Whisk in the sour cream and continue to cook until slightly thickened, about 2 more minutes. Serve the sauce over the chicken and accompany with a simple salad and something to sop up the sauce, like couscous or bread.
VARIATIONS:
Deviled Chicken Divan
Add:
2 10-ounce boxes frozen broccoli spears
A few pieces of lemon peel
2 tsp. hot sauce
2 cups shredded Gruyere or Swiss cheese such as Emmentaler
Cook the broccoli in boiling water in a shallow pan with the lemon peel. Cook to just heat through—you want the broccoli spears to retain their bright color. Drain well.
Preheat the broiler.
Prepare the chicken and sauce as directed in the master recipe, adding the hot sauce to the finished sauce (to "devil" it). Place the cooked chicken breasts and broccoli in a shallow casserole and top with the deviled sauce and the cheese. Broil until the cheese is brown and bubbly. Serve with crusty bread.
Monday, September 04, 2006
Sunday Dinner
We had Spaghetti Bolognese on Sunday night. I made the sauce with a can of crushed tomato, red wine, lots of onion and carrot and some chipotle chile with adobo sauce. The smoky and spicy chipotle chile has officially become one of my favorite condiments. It added a new dimension to this otherwise ordinary meal. No wonder it's one of the must have items for many chefs.
Sunday, September 03, 2006
Oat and Golden Raisin Scones
I was motivated to make a batch of scones after seeing the outrageous price of scones at the Bagel Place downstair. Because I still have some buttermilk left, I decided to go with this recipe : Oat and Golden Raisin Scones. Which I have made another variation using cranberries and chocolate chips before. The original recipe called for dried fruits only (dried apricot, golden raisin, sour cherry or cranberries). But knowing OCT likes neither of the above, I added in some chocolate chips to entice him. So far, this method works. He happily finished the scones I made without complaining the dried fruits hidden in between.
Though scones are traditionally made with fresh cream, I find the version made with buttermilk gives more tang with lesser calories. More often than not,I like to make a batch of scone dough and freeze them for later use. Eventhough scones can be made in a snap. they only taste good on the day they are baked. By freezing the unbaked dough, I can easily bake some for weekend breakfast. Scone dough is a must have item in my freezer.

Friday, September 01, 2006
Banana Chocolate Cookies
If you were as unadventurous as me, you will probably be cynical about adding banana to cookies. Chocolate chips with any nuts will probably be more appropriate. Or with cranberries and cherry.
I first came across the banana chocolate cookies from Nancy Baggett's Cookies book. And I was torned between making a hazelnut chocolate chips cookies or the banana chocolate cookies for this Friday. Fate had it when I saw a similar recipe in the Sept issue of Martha Stewart Living. It was on the last page. Like a sign that I MUST give it a try. The magazine described it as a cross between banana bread and chocolate chips cookies. And further asserted that if you like both, you will like this cookies. So cast away your cynicism and give it a try. (alright, the last sentense was my sentiment). Since I saw this recipe while browsing in bookstore, I quickly memorise the ingredients list and baking temperature.
When I came back and compared the Martha Stewart's version and Nancy Baguett version, they were almost the same in the proportions of dry and wet ingredients. In the end, I decided to try Martha Stewart's version, which she used half a cup of whole wheat flour.
While the cookies were baking in the oven, the whole apartment smells of banana bread. I can't help but worry that the cookies will turn out tasting like banana bread- texture wise.Not that I don't like banana bread, but I just think that a cookie should behaves like a cookie. Of course by this I mean the texture. I suddenly remembered what my mum told me while I was young : "A girl should behave like a girl". In case you wonder, I am never a girly girl since young. Except the fact that I cried a lot. Thanks to the good genes from mom, people can still distinguish me from boys.
It proved that my worry was not unfounded. When I pull the first batch out from oven, they didn't spread as much as the other cookies I baked. On the contrary, they rose a bit like how a muffin behaved. They were soft, on the tender side and not crispy. If you can get over the texture issue, they actually taste quite good. They were unlike cookies nor muffins. Maybe they should belong to their own class. Like Pluto, the poor planet; that has been demoted and classified under a new class as dwarf planet.
Whatever. OCT brought a batch to school and we shall wait for the verdict.
Update:
They tasted nicer and firmer when I refrigerated them for 2 days. Maybe they were meant to be made ahead.....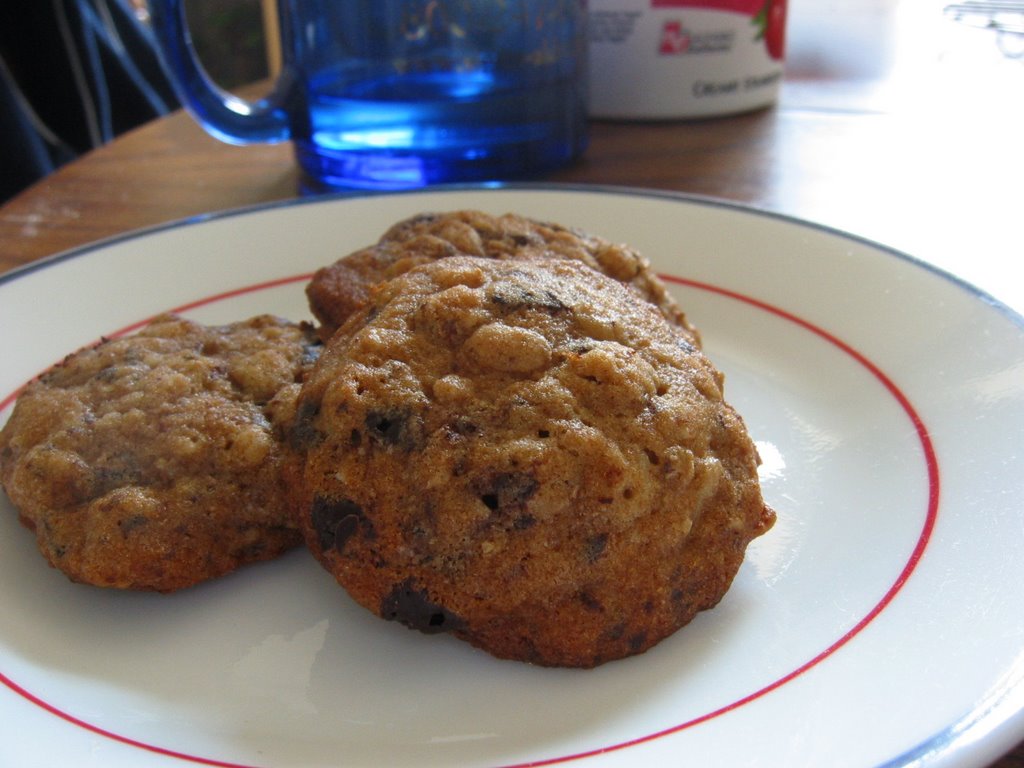
Banana Chocolate Cookies
1 cup all-purpose white flour
1/2 cup whole wheat flour
1/2 teaspoon baking soda
1 teaspoon salt
3/4 cup (1-1/2 sticks) unsalted butter, slightly softened
1/2 cup sugar
1/2 cup packed light brown sugar
1 large egg
2 teaspoons vanilla extract
1/2 cup thoroughly mashed or pureed overripe banana (1 medium banana)
1 cup old-fashioned rolled oats
1 cup (8 ounces) dark chocolate, chopped
Preheat the oven to 375 degrees F. Grease several baking sheets or coat with nonstick spray.
In a medium bowl, thoroughly stir together the flour, baking soda, and salt; set aside. In a large bowl, with an electric mixer on medium speed, beat together the butter, sugar, and brown sugar until very well blended, about 2 minutes. Add the egg and vanilla and beat until evenly incorporated. Beat in the banana, then the flour mixture, until evenly incorporated. Stir in the oats and chocolate until evenly incorporated.
Using an ice cream scoop or spoons, drop the dough onto the baking sheets in scant golf-ball-sized mounds, spacing about 2-1/2 inches apart.
Bake the cookies, one sheet at a time, in the upper third of the oven for 10 to 14 minutes, or until lightly tinged with brown all over and almost firm when pressed in the centers. Reverse the sheet from front to back halfway through baking to ensure even browning. Transfer the sheet to a wire rack and let stand until the cookies firm up slightly, 2 to 3 minutes. Using a spatula, transfer the cookies to wire racks. Let stand until completely cooled.
These cookies are best when fresh but may be stored in an airtight container for up to 4 days or frozen for up to 1 month.
Tip
For the best flavor and texture, be sure to use an extremely ripe banana. One that is too soft and brown to eat fresh is ideal for this recipe.
Note: Nancy Baggett used milk chocolate, while Martha's recipe recommended semi sweet chocolate. I prefer bittersweet chocolate, and hence used the 72% chocolate in this recipe.