Friday, December 24, 2010

Merry Christmas!

Christmas Greetings

Sorry that I haven't updated this space for the longest time! Just when I thought nobody noticed, my old professor from college (hi Prof Jaenicke!)dropped me an email. The least expected reader of this blog, he wanted to know how I was and why hadn't I wrote a post since August.

Gingerbread tree

"I have been busy" is undeniably one of the reasons. However, it also feels a little awkward to come back after leaving my blog for so long. So many things had happened since my last post, I wonder where I should begin!

My days are mostly occupied by playing with butter, sugar and flour at work. On most days, I am exhausted by the time I get home. A simple meal and a little tv time later, I hit the pillow and ready to do the same routine again the next day. Social life is almost non existence which is not uncommon for many cooks and chefs I know. We work when others play. I feel fine working the holidays. Knowing that the food I put out make someone's holiday that much special makes me happy. :)

gingerbreadhouse

But I digress. I mean to come here to wish all of you who have been reading and following a Merry Christmas and Happy New Year! May your day be filled with love, laughter, peace and lots of deliciousness. See you in 2011.

Read more...

Thursday, August 05, 2010

Stone fruit tarts

peach tarts

I am a creature of habit. Whenever life hands me a lot of stone fruits, as in the past few weeks, I went straight into the kitchen and rolled out some sweet tart dough.

Probably it has something to do with the food I eat when I was growing up. Fresh peaches and other stone fruits were rare in Malaysia. I remember when mum needed to make a peach cake, she used the syrupy peaches that came from a can. So I am never a big fan of fresh peaches and apricot. Having said that, I still love stone fruits when they are baked. Safely nestled in the almond cream, in the confine of a sweet tart shell.

stone fruit tartlets

Pretty predictable and boring. That's who I am. But it doesn't change the fact that these tarts are delicious,and should be consumed on the same day they are made.

half eaten

Stone fruits and almond tart

You can use any kind of stone fruits, but I have a weakness for baked apricot. The whole kitchen, or rather my whole apartment, smells like a bakeshop the moment I pulled the tarts out of the oven.

sweet tart dough:
adapted from Desserts by Pierre Herme

2.5 sticks (10 ounces, 285g) unsalted butter, at room temperature
1.5 cups (150g) confectioners' sugar, sifted
1/2 cup (lightly packed)(3 1/4 ounces, 100g) finely ground almond powder or finely ground blanched almond
1/2 tsp salt
1/2 tsp vanlla bean pulp or pure vanilla extract
2 large eggs, at room temperature, lightly beaten
3.5 cups (490g) all purpose flour

Place the butter in the bowl of a mixer fitted with the paddle attachment and beat on low speed until creamy. Add the sugar, almond powder, salt, vanilla, and eggs and still working on low speed, beat to blend the ingredients, scraping down the paddle and the sides of the bowl as needed. The dough may loo cuddled- that's all right. With the machine on low, add the flour in three or four additions and mix only until the mixture comes together to form a soft, moist dough- a matter of seconds. Don't overdo it.

Gather the dough into a ball and divide it into 3 or 4 pieces: 3 pieces for 10 inch (26cm) tarts, 4 for 9 inch (24cm) tarts. Or, press the dough into one big disk and cut off as much as you need at the time that you need it. gently press the dough into disks and wrap them in plastic. Allow the dough to rest in the refrigerator for at least 4 hours or up to 2 days , before rolling and baking. Alternatively, the dough can be freeze for up to 1 month.

For each tart, place a buttered tart ring on a parchment lined baking sheet and keep close at hand. Work with one piece of dough at a time, keep the remaining dough in the refrigerator.

To roll and bake the tart shells:
Working on a lightly floured surface, roll the dough to a thickness of between 1/16 and 1/8 inch (2 and 4 cm), lifting the dough often and making certain that the work surface and the dough are amply floured at all times. (a well floured area makes rolling this rich dough easier) Roll the dough up around your rolling pin and unroll it onto the tart ring. Fit the dough into the bottom and up the sides of the ring, then run your rolling pin across the top of the ring to cut off the excess. If the dough cracks or splits as you work, don't worry- patch the cracks with scraps and just certain not to stretch the dough that's in the pan. Prick the dough all over with fork and chill it for at least 30 minutes in the refrigerator.

Preheat the oven to 350F (180C) and fit a circle of parchment paper or foil into the crust and fill with dried beans or rice. ( i usually skip this step after resting my rolled out dough in the fridge for about 1 hour).

Bake the crust for 18-20 minutes, for a big (9-inch ring), 10-15 mins for a small (3-4 inch ring),  just until it is very lightly coloured. If the crust needs to be fully baked, remove the parchment and beans and bake the crust for another 3 to 5 minutes, or until golden. Transfer the crust to a rack to cool.

Almond Cream
adapted from Baking: From My Home to Yours
3/4 stick (6 tablespoons) unsalted butter, at room temperature
2/3 cup sugar
3/4 cup almond flour
2 teaspoons all purpose flour
1 teaspoon cornstarch
1 large egg
2 teaspoon dark rum or 1 teaspoon vanilla extract

Beat the butter and sugar together until smooth. Add the almond flour, all purpose flour and cornstarch into the bowl.

Beat to incorporate all the ingredients in the bowl. Add in the egg and rum/vanilla extract and continue to beat. The cream is ready when it is homogenous.

Scrape the almond cream into a container and use it immediately or cover and refrigerate to be used within 3 days.

To make the tarts:

Spread a thick layer of almond cream in the baked tart shells. Arrange the sliced fruits on top. You dont have to press the fruits into the almond cream, because the almond cream will puff up in the oven, covering part of the fruits.

Sprinkle some almond flour on the fruits if you like, which will help to absorb some of the liquid released while baking, or you can simply omit this step.

Bake at 350F until the almond cream puff up and turn golden color. The fruit should be soft, and the almond cream firm. Depending on the size of your tarts, it may takes anything from 15-30 minutes. Check after 15 minutes if you are making small tarts and pull the tarts out when they are ready.

Read more...

Thursday, July 08, 2010

Summer Fruit Galette

Among the four seasons, summer has got to be my least favorite. I hate the heat and humidity that summer brings. The worst time for a pastry girl who likes to play with chocolate, laminated dough and macarons.

galette

I often told my friends that I wouldn't mind the long cold and dry months in Chicago, because that's the best weather condition to bake! And I wasn't kidding.

The only redeeming aspect of summer, in my pastry oriented point of view is the endless stream of juicy sweet berries and stone fruits. I reconcile my dislike for summer with many bowls of sweet cherries in front of the computer in an air-conditioned room. When I muster enough courage to turn on the oven, I make many fruit tarts with the berries, peaches, apricot and nectarines.

036 copy

Depending on my mood, sometime I like to leave the fruits unbaked and garnish directly onto the sweet tart shell with a little pastry cream,like these. Sometime, I like to bake the dough and fruits together, like these gorgeous galettes.

summer fruit galette

I made a few galettes last week when the temperature hadn't hit triple digits in the east coast. The abundant bounty of stone fruits at the grocery store screamed out loud to be baked that I couldn't turn a deaf ear. So I lugged as many home as OCT allowed. Along with the SUPER sweet mango and lychee, which I snack on everyday. (more on the mango and lychee next time).

Back to the galette. I made a 9-inch one for OCT's lab and a few smaller ones for us. I adapted the flaky dough recipe from one of my favorite author Ina Garten and the filling and custard idea and recipe from Dorie Greenspan's Baking: From My Home to Yours.

before and after

I love how flaky and sturdy the dough is, which can hold a thin layer of my homemade strawberry jam, sprinkled graham cracker crumbs, various kinds of stone fruits and blueberries and a little sweet custard that was poured in when the galette was almost done.

A rustic but absolutely delectable and flexible dessert. You can use whatever stone fruits you have on hand, replace the jam with another kind of preserve and sprinkle almond flour to soak up some of the oozing fruit juice instead of graham cracker. The galette was so good that it doesn't need any adornment other than a few sprinkle of powdered sugar.

summer fruit galette for the lab.

It is definitely a recipe that makes the sweltering summer heat slightly bearable.

I am planing to show OCT how to make this galette,so he can make it for us in the coming months while I hide in the air-conditioned room with bowlful of cherries. :)


Summer Fruit Galette

for the pastry
adapted from Barefoot Contessa at Home: Everyday Recipes You'll Make Over and Over Again
2 cups all purpose flour
1/4 cup granulated sugar
1/2 pound (2 sticks) cold unsalted butter, diced
6 tablespoons (3 ounces)ice water

Put the all purpose flour and sugar in a mixing bowl. Use a spatula to stir and make sure that they are well mixed. Add in the diced butter. Use your hand and fingers to break up the pieces of butter and at the same time, rub the butter into the dry ingredients. (you can do this in the food processor, but I find it easier to do it by hand)

Stop when the butter is the size of pea.(you will see pieces of butter in your finished dough, but that is what gives you the flakiness in the tart) Add in the ice water and gently knead to make a dough.Depending on the humidity level, you may or may not need all the water. Stop when the dough almost come together. (you will see some pieces of flour at the bottom of the bowl that refuse to be binded)

Turn the dough (including the flour at the bottom of the bowl) out onto a well-floured board. Roll it into a ball with well floured hands, and cut in half. Flatten the doughs into 2 flat disks. Wrap the disks in plastic and refrigerate for at least an hour. If you are going to use one disk,the second one can be freezed and use later.

For the filling:
adapted from Baking: From My Home to Yours
jam/marmaleide (i used homemade strawberry jam)
graham cracker crumbs (or almond flour)
summer fruits of your choice (i used nectarine, peach and blueberry), sliced
vanilla custard (combine 3 tablespoons of melted butter, 1/3 cup granulated sugar, 1 egg and 1 teaspoon vanilla extract)

Preheat the oven to 425F and line the baking sheet with parchment paper.

Take the pastry out from the cooler and roll it out on a well floured board into a 11 inch circle. Remember to turn the dough as you roll it out, so it doesn't stick to the board. Add more flour if the dough is too sticky to work with. Transfer the roll out dough onto the sheet pan.

Use a 9 inch cake pan as your guide, mark a circle in the middle of the dough. Spread a thin layer of jam in the circle, and spread the cookie crumb on top. Arrange the sliced fruits within the confine of the circle. Carefully fold the border of the pastry over the fruit, pleating it to make an edge.

Keep it in the cooler for 15 minutes so the dough has a chance to relax.

When ready to bake, brush the border of the galette with water and sprinkle about 2 tablespoons of turbinado sugar. (You can use granulated sugar too, but I like the crunch of turbinado)

Bake for 20-25 minutes until the galette turns golden and the fruits are soft. With a tablespoon, carefully pour some vanilla custard into the galette. Take care not to fill up too much until it overflow. You may not be able to use up all the mixture, but a few tablespoons will help to firm up the oozing juice from the baked fruits.

Bake for another 10-15 minutes until the custard has set.

Let cool on a cooling rack. Dust with powdered sugar when ready to serve.

Read more...

Wednesday, June 30, 2010

What I do on my days off

The other day Chef asked me what I did on my days off.
When I told him that I made croissants and macarons, he looked a little bemused.
"Dont you bake enough at work?"
"I guess I am just really lucky to have my hobby as my job!"

As any professional bakers would agree, baking at home is very different from professional baking. The portion is smaller and the pace is slower. The downside of baking at home however, is the dirty dishes one has to clean. But on the other hand, you get to decide what and when you want to make!

croissants batch 2.1

It has almost become my second nature to make croissants on my days off. I make a small batch, enough to last us a week. I like to shape and proof my dough then freeze them in the freezer. They are ready to bake on the days we want to eat them. That way, we can always have fresh croissants.

Making croissants at home may seem a little time consuming and daunting at first, but after a few practices, it gets easier. The key to a good croissant in my opinion is good butter. By that, I mean Plugra butter. It's the European butter with a higher fat content. While the usual butter in market has fat content of 70-73% ( and we are talking about the better brands), Plugra has 83% fat. I used Plugra butter liberally in my bakes when I could find it cheap at my local farmers market. But lately, the market has decided to discontinue the product, so I restraint the use of Plugra butter in croissants and danishes only.
choc croissants

Usually, making croissants is a 2 days event. After the dough is made, it benefits from the overnight rest in the fridge before rolling out and shaping for the final proof. One time I tried to rush it and made everything in a day. The croissants were lacking in flavor. Apparently, there wasn't enough time for the yeast fermentation, which contribute to the flavor development. After the first failure, I treated my dough with more patience and let it rest overnight before the final proof.
croissants batch 2.1

I find it really therapeutic to play with croissant dough. I told the chef. To which he said: "Mandy, you are something else."

note: I will include the recipe with a step by step pictures instruction when I make croissants again next week. Stay tune!

Read more...

Friday, June 18, 2010

Summer fruit tarts

005 copy


I love H Mart. The clean and spacious grocery store always have something exotic and intriguing for the adventurous to try. It is where I stock up on korean bulgogi sauce, kimchi, rice, Pocky and asian greens. It is also the place where I can get fresh berries for as little as a dollar a punnet.

fruit tarts

As we were planning to go for another fruit picking in the next few days,I really shouldn't be buying any fruits from the store. But my logic flew out of the window when seeing other customers surrounded a pile of neatly arranged berries with the board so big you can see it from miles away- "Raspberry 8oz- $0.99". Not  too far away from it, the blueberries and blackberries were selling for the same price. I put one punnet of each kind in my basket and  thought I was pretty good with self restraint. :)

fruit tarts

Once home, I rolled out some sweet tart dough and showed OCT how to make pastry cream. He was constantly bugging me to teach him something so he could brag in front of his colleagues.

fruit tarts


Less is more when dealing with fruits that are in season. So I made fruit tarts. Buttery sweet tart dough with a layer of luscious vanilla pastry cream. Topped that with lots of fruits. I made a big tart for a friend and some individual tarts for us. The mini tarts were so small that we each ate two.

Some kiwi and mangoes found their ways into my grocery basket without me realised, so I made a few tarts with them too. ;)

Summer Fruit Tarts

sweet tart dough:
adapted from Desserts by Pierre Herme

2.5 sticks (10 ounces, 285g) unsalted butter, at room temperature
1.5 cups (150g) confectioners' sugar, sifted
1/2 cup (lightly packed)(3 1/4 ounces, 100g) finely ground almond powder or finely ground blanched almond
1/2 tsp salt
1/2 tsp vanlla bean pulp or pure vanilla extract
2 large eggs, at room temperature, lightly beaten
3.5 cups (490g) all purpose flour

Place the butter in the bowl of a mixer fitted with the paddle attachment and beat on low speed until creamy. Add the sugar, almond powder, salt, vanilla, and eggs and still working on low speed, beat to blend the ingredients, scraping down the paddle and the sides of the bowl as needed. The dough may loo cuddled- that's all right. With the machine on low, add the flour in three or four additions and mix only until the mixture comes together to form a soft, moist dough- a matter of seconds. Don't overdo it.

Gather the dough into a ball and divide it into 3 or 4 pieces: 3 pieces for 10 inch (26cm) tarts, 4 for 9 inch (24cm) tarts. Or, press the dough into one big disk and cut off as much as you need at the time that you need it. gently press the dough into disks and wrap them in plastic. Allow the dough to rest in the refrigerator for at least 4 hours or up to 2 days , before rolling and baking. Alternatively, the dough can be freeze for up to 1 month.

For each tart, place a buttered tart ring on a parchment lined baking sheet and keep close at hand. Work with one piece of dough at a time, keep the remaining dough in the refrigerator.

To roll and bake the tart shells:
Working on a lightly floured surface, roll the dough to a thickness of between 1/16 and 1/8 inch (2 and 4 cm), lifting the dough often and making certain that the work surface and the dough are amply floured at all times. (a well floured area makes rolling this rich dough easier) Roll the dough up around your rolling pin and unroll it onto the tart ring. Fit the dough into the bottom and up the sides of the ring, then run your rolling pin across the top of the ring to cut off the excess. If the dough cracks or splits as you work, don't worry- patch the cracks with scraps and just certain not to stretch the dough that's in the pan. Prick the dough all over with fork and chill it for at least 30 minutes in the refrigerator.

Preheat the oven to 350F (180C) and fit a circle of parchment paper or foil into the crust and fill with dried beans or rice. ( i usually skip this step after resting my rolled out dough in the fridge for about 1 hour).

Bake the crust for 18-20 minutes, just until it is very lightly coloured. If the crust needs to be fully baked, remove the parchment and beans and bake the crust for another 3 to 5 minutes, or until golden. Transfer the crust to a rack to cool.

Vanilla pastry cream:

1 cup milk
1 plump, moist vanilla vean, split lengthwise and scraped
3 egg yolks
1/4 cup sugar
1/6 cup cornstarch, sifted. (1/2 of a 1/3 cup.Eyeball it using the 1/3 cup)
1.5 tablespoons unsalted butter, softened

To make the pastry cream:
Bring milk and vanilla bean( pulp and pod) to a boil in a small saucepan. Cover the pan, remove from heat and let the liquid be infused with scent of vanilla, for 10 minutes.

Fill a large bowl with ice cubes and set aside a small bowl that can hold the finished cream and be placed in this ice bath. Allow set aside a fine-meshed strainer.

Whisk egg yolks, sugar and cornstarch in a medium saucepan. While whisking, slowly drizzle a quarter of the hot milk into the yolks. Continue to add in the rest of the milk into the tempered yolks, whisking all the while. Remove the vanilla pod.

Place the saucepan over high heat and whisking vigorously, without stop, bring the mixture to the boil. Continue to whisk another 1-2 minutes, until you notice that the texture of th cream has thicken, and less liquidy, remove from heat. Press the cream through the sieve into the reserved small bowl. Set the bowl in the ice bath prepared earlier, and stirring frequently so that the mixture remains smooth, cool the cream to 140F, as measured on an instant read thermometer. Stir in the butter in two or three additions. Make sure that you don't add the butter in when the mixture is still hot. Or the cream would separate. Stir the cream occasionally until it is completely cool. It is ready to be used at this point or keep refrigerated, until you are ready to assemble the tart.

To assemble the tart:
After the tart shell is completely cool, put some pastry cream in the center and spread it out evenly. You can put as much or as little to your liking. Top it with lots of fruit and devour!

Read more...

Thursday, May 20, 2010

Macarons and my crazy world

macarons

My ex-colleague T used to tease me that I looked pissed when I was busy working.
"No, it is just my face! I am definitely not unhappy even though I am not smiling. I am just FOCUS!"
"oh, ok." to which he sheepishly replied and walked away. Not before stealing a cookie from my cookie truck.

When there's a long list of things to get done by the end of the service, or when I was far behind the tickets that never stopped coming in, the last ounce of energy was saved to propel myself to work faster.

Smiling was not anywhere near the bottom of my priorities. However, when the task involved making macarons, no one could do anything to remove the silly grin on my face.

macarons4

Making macarons never fails to cheer me up. Well, when they turn out well, that is. My heart was broken so many times when the shells had no feet or crack. And my head almost exploded troubleshooting what went wrong.

Since I moved back to Atlanta, a few batches of macarons have been made. In the beginning, the recipe worked for me. And then 2 weeks ago, when I started using almond flour from a different source, things started to go downhill. The macaron shells wont dry even after resting for an hour, there was no distinct feet after baking at the same conditions as previous batches. 3 failed batches later, I was still in the rut.

Looking at these successful batches now made my heart a little sad. Will I ever get it right again?

macarons3

Welcome to my pastry world. I spend a lot of time pondering about things like how protein coagulates in the oven using different meringue making methods and the effect of almond particle size on macaron shells. Good thing that OCT is a scientist, so he doesn't think his wife is crazy.

And speaking of crazy, I landed a job on the spot yesterday. The pastry chef told the HR manager that he liked me. Apparently because I was crazy, so I would fit perfectly in his team. I thought I usually conceal my craziness pretty well during interviews. Anyway.

What are you crazy about?

Read more...

Tuesday, May 11, 2010

My first strawberries picking

strawberry3

The strawberries season at the south has officially began a few weeks ago. Like a child going to Disneyland for the very first time,I was very excited about my first strawberries picking. On the first weekend that the closest farm opened its door for U-Pick, I was ready to jump into the car. With a picnic basket full of macarons and homemade croissants.

Except that the extremely bad weather left us no choice but to postpone our plan for another week.
strawberry2

Sometime in the middle of the week, a bakery that I have applied called and asked me to go in for an interview on Saturday.

"Do you have anything going on this Saturday?" The head baker asked.
"I was planning to go for strawberries picking, but I guess I should still have time to get to the farm after the interview" I replied.

strawberry picking

It was a grey and cloudy Saturday morning, my interview went well. I was asked to stage, which was the last step in landing the job. I was happy and relieved at the possibility of working at a place I like. Until the head baker mentioned the hours. The shift starts at 2 a.m till noon.

I told him that I needed time to consider that. Meanwhile, I needed to make a move before all the strawberries were picked by others.

He looked a little amused at this crazy Asian girl, who has her mind set at strawberries picking on the same day. Nothing could stop her.

077

At its peak season, the picking was easy.Ripe and red berries were everywhere. I tugged one and tentatively bite into it. Like a sunshile. I couldn't help smiling. This was how strawberries should taste!

I remembered those flats of big red strawberries the hotel got during winter months. They tasted as if water has been pumped to make them so big and yet so tasteless! Not these jewels I was holding on my hand. They were the sweetest berries I had tasted.

It didn't take us long to fill up both our buckets with ripe and beautiful strawberries. At which point I was a little sad at the prospect of leaving. I wish I could continue picking, but I knew the 2 buckets we picked would be more than enough for all my baking projects.

I freeze most of the strawberries after making a strawberry cake to bring to a friend's party. I have plans to turn them into strawberry sorbet and strawberry jam soon!
strawberry cupcakes 2
These strawberry cupcakes were made on a whim to use up the buttermilk and strawberry buttercream I had from another baking project. Although they tasted lovely, I could only imagine how great it would taste when I make them again with my homemade strawberry jam!

strawberry cupcakes

I promise myself that I will make the jam soon. Perhaps I will make some macarons with the jam too. Wouldn't that be a tasty idea!

Buttermilk Cupcakes with Strawberry Buttercream

For the cake
2 cups cake flour
2 teaspoons baking powder
1/8 teaspoon baking soda
1/4 teaspoon salt
1 1/4 sticks(10 tbsp) unsalted butter, at room temperature
1 cup sugar
3 large eggs
1 large egg yolk
1 1/2 teaspoons pure vanilla extract
3/4 cup buttermilk

To make the cake,
Center a rack in the oven and preheat the oven to 350F. Line muffin pan with cupcake liners.

Sift together the cake flour, baking powder, baking soda and salt.

Working with a stand mixer, fitted with a paddle attachment, or with a hand mixer in a large bowl, beat the butter on medium speed until soft and creamy. Add the sugar and beat for another 3 minutes. Add the eggs, one by one, and then the yolk, beating for one minute after each addition. Beat in the vanilla; don't be concerned if the mixture looks curdled. Reduce the mixer speed to low and add the dry ingredients alernately with the buttermilk. adding the dry ingredients in 3 additions and the milk in 2 (begin and end with the dry ingredients); scrape down the sides of the bowl as needed and mix only until the ingredients disappear into the batter. Fill the cupcake liners till they are 2/3 full.

Bake for 20 to 25 minutes,rotating the pans at the midway point. When fully baked, the cakes will be golden and springy to the touch and a thin knife inserted into the centers will come out clean. Transfer the cakes to a rack to cool completely before frosting.

Strawberry Buttercream
adapted from Martha Stewart's Baking Handbook
make 5 cups (you dont need this much for the cupcakes, so either half the recipe or keep the rest for another baking project)
4 large eggwhites
1 1/4 cupgranulated sugar
3 sticks butter
1 teaspoon vanilla extract
1 1/2 cups (12 ounces) strawberry jam

In a heatproof bowl of the stand mixer, set over a sauce pan of simmering water, combine egg whites and granulated sugar. Whisk constantly until the sugar has completely dissolve and the mixture is warm to touch. ( about 160F).

Attach the bowl to the mixer fitted with the whisk attachment. Whisk under medium high speed till the mixture hold stiff peak. Lower the speed and continue to beat until the mixture is cool.

Switch to paddle attachment. With the mixer on medium low speed, beat in the butter, a few tablespoons at a time. Making sure all butter has been incorporated before adding more. If the mixture separates after all butter has been added, beat on medium high speed for a few more minutes, the buttercream will become glossy and smooth again. Beat in vanilla and strawberry jam in low speed to eliminate air bubbles.

If you want the buttercream to have a darker color, add red food coloring. The recipe makes a big batch of buttercream, keep the leftover in an airtight container and chill in cooler.

When ready to use, bring the buttercream to room temperature and rewhisk it either by hand or a mixer to bring it to pipe-able consistency.

Read more...

Monday, May 03, 2010

My first fondant cake for a very special friend

One of the objectives I set for myself during this period of unemployment is to practice my cake decorating skills. For people who know me, they know how much I hate and suck at doing that. All the pipings, sugar flowers making and fondant work is my achilles' heel.I absolutely couldn't sit down to decorate cakes with buttercream and fondant.If given a choice,I would rather make cakes with multiple components anytime.

But cake decorating is such an important part of being a pastry chef, so I am determine to better my skills in this aspect.
baby shower cake
So when my friends Cindy and Rika asked if I could make a safari theme baby shower cake for our dear friend Grace, I said yes.


The first thing I did upon accepting the assignment was to look up the safari related pictures on the internet. The cakes that other talented cake decorators made, the shower invitation cards, party decoration materials and everything else. I decided to make something simple since I have zero experience in making a real fondant cake.

Since Grace is going to have a baby boy born in the chinese zodiac year of tiger, I decided to make a tiger gumpaste figurine, among other animals. Then I wanted to cut out some rolled fondant animals to put on the sides of the cake. They were monkeys, giraffes,hippo and elephants. Fairly simple animals to make.
in the making
A simple sketch was drawn as a guide.

sketches

Although the fondant animals I chosed were just some simple designs, it still took me a whole afternoon to make them. Then I went on to make leaves of different sizes.

016 copy

I was certain that I would have enough time to put everything together on Saturday night after I made the cake and filling. After applying a thin layer of buttercream coating I let the cake rest in the cooler. An hour later, I rolled out the fondant to cover the cake. I decided to leave the base white, which I regretted later. It looked like an empty canvas! OCT commented that the cake looked like an incomplete piece of work with the white base.

020 copy
But it's starting to get late and I was having difficulty smoothening the sides of the cake, so changing the base color was not an option. Up till this point, I have only covered fondant over cake dummies in school which were hard, solid and fairly tolerable to vigorous pressing and smoothening.

With a REAL cake with filling and all, I wasn't too sure of the pressure I could apply. And the thought of destroying the cake at the 11th hour was too stressful. So I tried to do my best and made more grass to cover the bottom of the cake.

animal figurines for baby shower cake
When OCT saw my gumpaste figurine, he commented that it didn't have the feature of a tiger. So I made another figurine after putting on all the fondant cut outs on the cake. It was already 2am when I got to that. And it took me a good 30 minutes to make the tiger. Since my first gumpaste figurine was not going to be a tiger, I turned it into a baby bear. Can you see the letter B on his chest? B = BABY also B = BOY! I let the second figurine dry overnight before painting  it.

his or mine?
The next day when we got up, OCT who claimed to be a better artist offered to add the details and paint the tiger. Now that we have 2 figurines, I couldn't decide which one to use. Clearly OCT thought his tiger was better, but I thought my baby bear was really cute too. So I put the two of them in a different container to let Grace choose which one she preferred as the topper. :)

baby shower final

In the end, both of them were put on the cake! It's a happy ending. :)

On hindsight, I should have added more details on top of the cake. But I was trying not to be over ambitious with my first attempt.

It was definitely a good learning experience and I am glad that I did it.:)

Read more...

Wednesday, April 21, 2010

In full bloom and a recipe for coffee cake

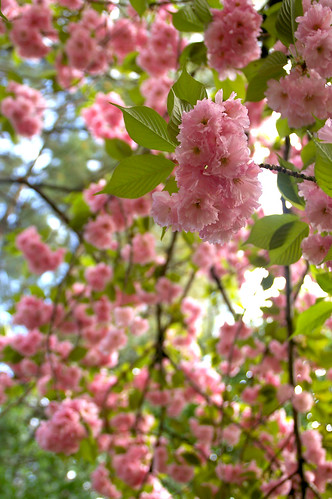
There's a cherry blossoms tree outside my apartment building that I am obsessed about when April rolls around.
The first time I saw it in full bloom, it took my breath away. I remembered standing under the tree, with camera in hand, snapping the most romantic pink kanzan blossoms I have ever seen for hours. I would go in the morning and then in dusk, trying to capture its beauty under different lights.

090


It is one of those things that put a smile on my face.

Last year however, I missed it while attending pastry school. So the first thing I did when I came home in April, was to check out my favorite tree. Lucky for me, the tree bloomed a week later than the years before. So for the first week of April, I waited patiently, passing the tree everyday to check on its blooming progress.

096


Until one day, almost overnight the tree came alive and displayed its full glory in pink blossoms. I stood under the tree and looked up. All I could see was clusters of pink. It's one of nature's most romantic sight.

coffee cake

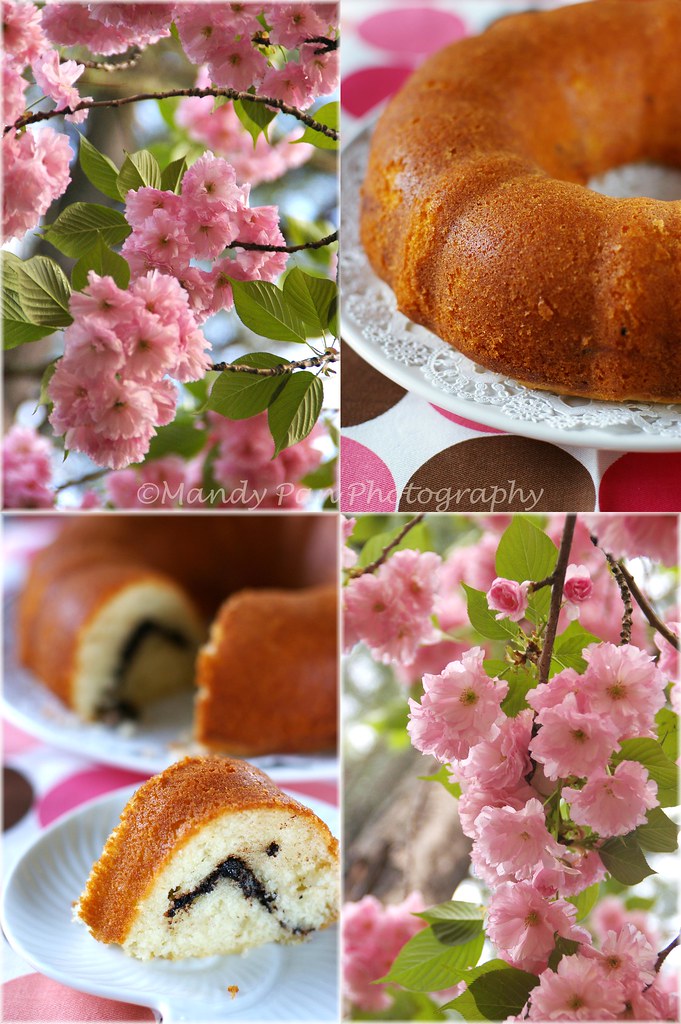
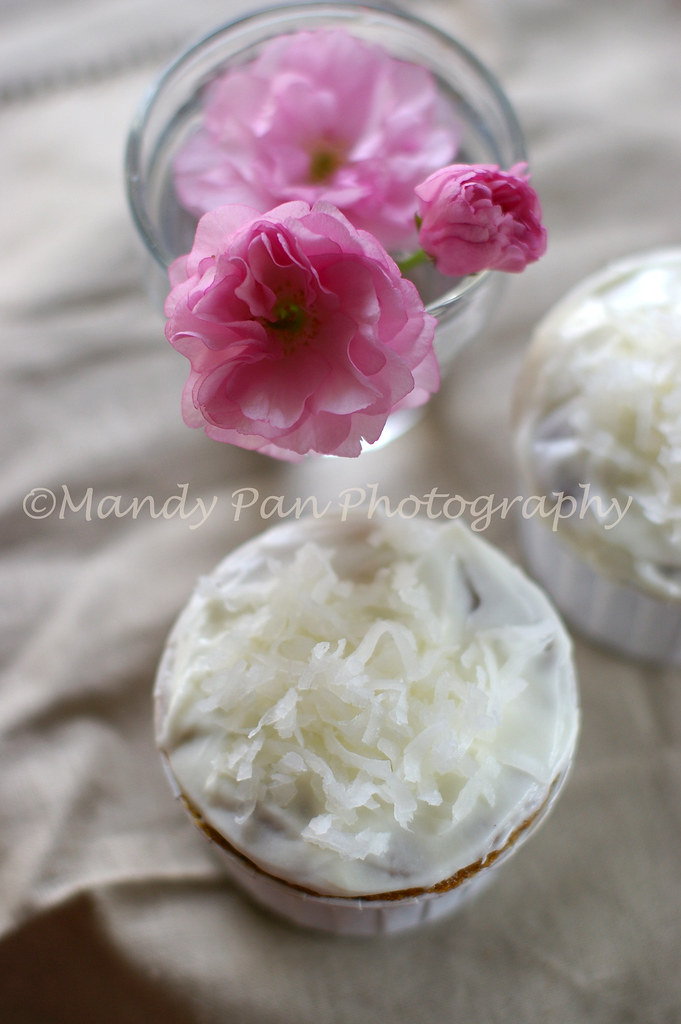
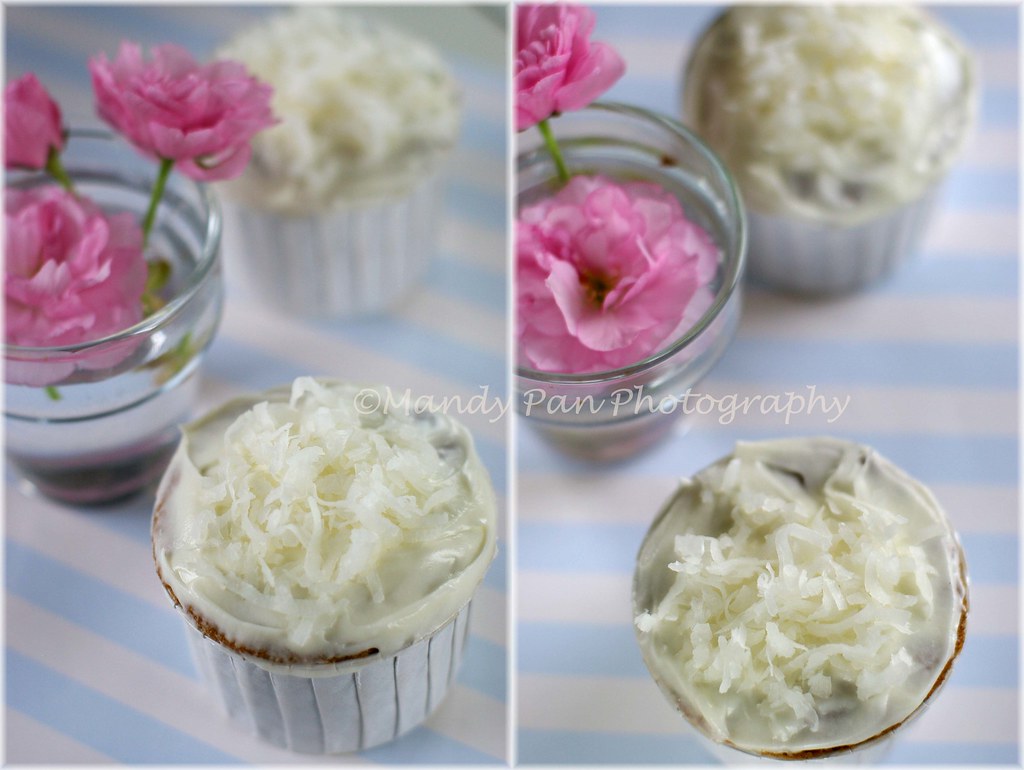
I made this coffee cake sometime ago when I came back for vacation. But I think it would be perfect for a little picnic under the cherry blossom tree, either with my love or just myself. Thinking of all the possibilities that a new season brings.

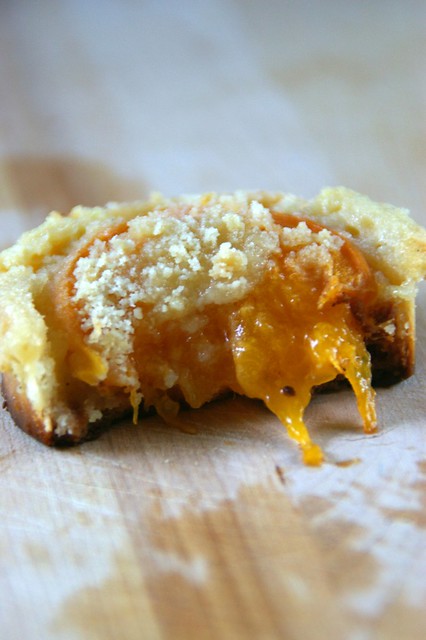
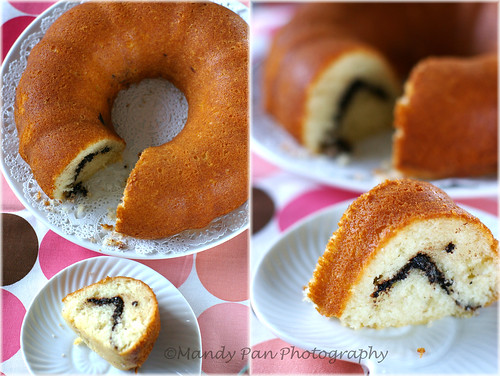
It's a simple cake to make, with chocolate streusel made with brown sugar and cocoa powder that melts into a lovely chocolate tunnel in the middle after baking. The original recipe comes from Chef Claudia Fleming which Rose Levy Beranbaum adapted in her latest book- Rose's Heavenly Cakes. I have been baking a lot from this book, with satisfactory outcomes. So be prepared to see more recipes from this book coming soon on my blog!

coffee cake


Chocolate Streusel Coffee Cake
adapted from Rose's Heavenly Cakes

Chocolate streusel filling
3 tbsp/40g light brown sugar
2 tbsp + 1.5 tsp/ 12g sifted unsweetened (alkalized) cocoa powder
1/4 tsp cinnamon

Combine the ingredients in a small bowl until well blended.

Cake batter
1 3/4 cups / 200g sifted bleached all purpose flour
1 1/2 tsp baking powder
1/4 + 1/8tsp baking soda
1/4 tsp salt
8 tbsp/ 113g unsalted butter, at room temperature
1 cup/ 200g granulated sugar
1 large egg + 1 large egg white, at room temperature
1 1/2 tsp vanilla extract
1 cup/ 242g sour cream

Preheat the oven to 350F and coat a tube pan with baking spray with flour.

In a medium bowl, combine the flour, baking powder, baking soda and salt.

In the mixing bowl of a stand mixer fitted with a paddle, cream the butter on medium high speed for one minute. Slowly add in the sugar. Beat until the mixture looks pale and fluffy, about another 4 minutes.

With the mixer off,pour in the eggs mixture and vanilla. Scrape the sides of the bowl to make sure that all the ingredients are well combined. Beat with medium speed until mixture is well blended. Scape the sides of the bowl as needed.

Add flour mixture in 3 parts on low speed and alternate with the sour cream. Scrape the sides of the bowl after each addition. When adding the last part of the flour mixture, make sure to just mix until well blended, which is at the point when you don't see a trace of flour in the batter. Overmixing will result in a tough and dense cake.

Spoon half of the batter into the greased pan. Sprinkle the chocolate streusel filling evenly in the middle, forming a ring, and avoid the inner and outer edges of the pan. Spoon the remaining cake batter on top, and spread it evenly.

Bake for 40-50 minutes or until the cake just begin to come away from the sides of the pan. you can also test the doneness with a cake tester/skewer. The cake is done when the tester/skewer comes out clean.

Cool the cake in the pan on a wire rack for 10 minutes. With a small metal spatula, gently loosen the edges of the cake and invert it onto a lightly greased wire rack. Cool completely.


Read more...

Thursday, April 08, 2010

A new beginning and a recipe for Carrot cupcakes with cream cheese frosting

Sometime in life, one needs to make difficult decisions. Like leaving the job you love to be with the man you love. And yes, it is very difficult. Especially when you have gotten more comfortable with the daily tasks and started to know your coworkers better. Even more so when the city you love has just begun to show the slightest sign of Spring after the dreadfully long winter.

carrot cupcakes w/cream cheese frosting


I packed and said goodbye to Chicago at the end of March.Off we flew back to Atlanta, where new challenges await.


I must say that it is nice to be home. Amidst the unpacking and cleaning, I found time to reacquint with my long neglected Kitchenaid and caught up with the new cookbooks I barely read.

carrot cupcakes w/cream cheese frosting


Cooking and baking are going to take up most of my time now until I find a new job. I hate that feeling. Of starting all over again. But such is life.

Here's the first thing I baked upon my return. A batch of moist carrot cupcakes from my new favorite baking book- Rose's Heavenly Cake. I frosted them with a simple cream cheese frosting from Dorie Greenspan's Baking.

005


I also used some of the batter to make 2 rabbit cakes with the disposable aluminium tins I bought on sale a few years ago. The decoration was horrible, but I am working on it. Now that I have the free time, it will be perfect for piping practices!


Carrot Cake with Cream Cheese Frosting
adapted from Rose's Heavenly Cake

The original recipe includes a tablespoon of cocoa powder, which I find intriguing. It is also the reason that interested me to try the recipe. However, while mise-en-placing the ingredients, I forgot about it until the cakes were in the oven!

Carrot cake
unbleached all purpose flour 300g
baking powder 1.5 teaspoon
baking soda 1 teaspoon
salt 1 teaspoon
cinnamon 2 teaspoon
granulated sugar 300g
light brown sugar 100g
canola oil 269g
4 large eggs,room temperature 200g
vanilla extract 2 teaspoons
coarsely shredded carrots 454g

Preheat the oven to 350F, and coat the pans with PAM baking spray. Alternatively, you can butter the pan and dusted it with flour.

Sift the unbleached all purpose flour, baking powder, baking soda, salt and cinnamon into a medium bowl.

In a mixer bowl of a stand mixer, beat the eggs, sugars, vanilla extract and oil until well blended, about 1 minute. Add in the flour mixture and beat until well incorporated. Finally add in the shredded carrots. Beat for another 10 seconds.

Because the cake rises quite a bit. Fill the cake pans/cupcake liners to 1/2 full.

Depending on the pan sizes, time to doneness may varies. It takes about 20-25 mins for the cupcakes, and 45-55 minutes for 9 inch pans. Always remember to check for doneness by inserting cake tester/skewer into the cake, instead of following the suggested time. Cake is ready when the cake tester comes out clean and cake springs back when pressed lightly in the center.

Cream Cheese Frosting
adapted from Dorie Greenspan's Baking

cream cheese, at room temperature 8 oz ( 1 block)
butter 4 oz (1 stick)
lemon juice 2 tablespoons
confectioner's sugar,sifted 1 pound (3 3/4cups)
shredded coconut for decoration

Cream butter and cream cheese until well blended. Add in the lemon juice and confectioner's sugar. beat until everything is well incorporated. Use it to frost the carrot cake.

Read more...
Related Posts with Thumbnails