Friday, February 29, 2008

The Daring Bakers Bake French Breads

IMGP7780


This month's Daring Bakers challenge is perfect for me. Ever since the weather turns cold, I have been wanting to horn my skill at bread baking. Of course I occasionally bake dinner rolls, but I am mostly grounded in my comfort zone. Making something like French Bread that takes 7-9 hours has certainly never crossed my mind.

I am really glad that the past challenges have pushed me to bake some cool stuffs that my normal lazy self won't have attempted on my own.

Our hostesses for this month- Sara of I Like to Cook and Mary of The Sour Dough have picked Julia Child's French Bread as this month challenge. It has been a challenge indeed from the very beginning. Even before I dip my measuring cup into the flour. Reading through the looooong recipe, had me feeling exhausted, before I get started.

IMGP7773

But once I got over the reading part, everything else was a breeze. Ok, maybe not as easy as I had envisioned, but hey, after two attempts, I got these batards you see here!

Did I just mentioned I made this recipe twice? Oh yes, that's right. When I first made the recipe on Monday, my dough was unbelievably sticky and the little petits pains that I baked turned out looking anemic. Even though they tasted great, I was quite sure that something wasn't quite right, so I repeated the recipe again on Thursday. Learning from my first experience, I adhered to the recipe more closely, and shaped my dough into batards, like many of my fellow Daring Bakers do.

french bread


Although there are many areas that my french bread can be improved on, I think it will be awhile before I bake french bread again. Don't get me wrong, I love this recipe, and the flavor of this bread is quite addictive. I can eat it without anything topping or spread. It's merely because I have 2 batches of these in the freezer now.

We are going to reheat some petit pains and spread withNutella for breakfast, and the batards, with smoked salmon, apple, spinach and cheese for our weekend dinner and lunch. I wonder how my fellow Daring Bakers are going to eat their French Bread? :)

pink_db


For the recipe of Julia Child's French Bread, see Mary's entry with nice step-by-step photos here

To read about the other Daring Bakers takes on the French Bread Challenge, head over to the Daring Bakers Blogroll.


The past Daring Bakers Challenges:
Tender Potato Bread
Yule Log
Lemon Meringue Pie

Read more...

Tuesday, February 26, 2008

Pork floss buns for the home sick

cny street scene1


*Update: Metric Measurements are now included for the pork floss buns. Enjoy!*

I think I am sick. Ever since I came back from Asia, I have been dreaming about my friends and family every night. Last night, my dream was about me eating packed lunch in my secondary school canteen when some guys came in for extermination. I stood up and told the guys that they should do that after our lunch. But the rest of my friends just continued to eat their food and couldn't seem to care less.

cny street scene

I find it weird that most of the time, my dreams are so absurd and mean absolutely nothing. OCT on the other hand, says he always see whoever he misses in his dream. But his dreams are always filled with wars or other natural disaters he is trying to run away.

cny street scene2

So why am I talking about dreams? Oh, I remember. I am telling you about my sickness. One that I call home sick. I can hardly believe that it will be another 11 months (or longer) before we can head home again. What more with the imminent move to a new city in April, I can't be all optimistic for a longer than 2 weeks stay in Asia next year.

Pork Floss Bun


Whenever I am in Singapore, I like to check out one of the 25 outlets of Breadtalk, and get one of their signature pork floss buns. It is nothing fancy but a sweet bun filled with a secret mayo-like cream and pork floss topping. Upon its induction, many of the local bakeries try to imitate the famous bun and introduce a similar version of their own. All of a sudden, pork floss buns seem to take over the whole island, and became a must have item in all the bakeries. The hype when the pork floss buns were first introduced was only like yesterday. I remember myself joining the beeline of people queuing for the freshly made pork floss buns, choosing one with the most floss on top of the bun, and wouldn't mind eating it for breakfast, lunch and dinner, oblivious to the amount of calories one pork floss bun actually packs. Those were the days. I miss the convenience of having a breadtalk (or other equally good bakeries, for that matter) at every corner I turn.

Pork Floss Bun


This is my version of the pork floss bun. It is by no means comparable to the real deal. But they will work for my craving and oh, the home sick for now.

Pork Floss Bun


Hungry for more bread?

French Bread
Chocolate Babka
Onion Mustard Monkey Bread
Tender Potato Bread

Pork Floss Bun

basic sweet bun dough:(In cups measurement)
3 cups bread flour
1.5 cups all purpose flour
1 pack rapid rise yeast
8 tablespoons granulated sugar
4 tablespoons dry milk powder
300ml warm water (about 105F)
1 egg
1 tablespoon salt
5 tablespoons of unsalted butter, at room temperature

in metric measurement:
480g bread flour
120g all purpose flour
1 pack rapid rise yeast
110g caster sugar
20g dry milk powder
300ml warm water (about 105F)
1 egg
1 tablespoon salt
60g unsalted butter, at room temperature

pork floss
mayonaise

Add yeast to warm water in a medium bowl, and set aside for 10 minutes.

Next, add the bread flour, all purpose flour, granulated sugar and dry milk powder into a large mixing bowl. Slowly mix in the water + yeast mixture with the help of a scraper.

Add in egg and softened butter. Mix well and knead to form a smooth and elastic dough. Because I know it will be easier to show you how to knead in a video, so I asked my boy friend to do just that. Enjoy!

(Ok,so you know he really can't be my boyfriend. But isn't he cute?)

After kneading, leave the dough to prove for 1 hour, or till it doubles in size.

Try pressing a finger into the dough, it should leave a clear mark when it's ready. The dough is now ready to be shaped.

For pork floss bun,
Divide the dough into 60g portion, shape into balls and leave them to rest for 10 minutes.

Shape the dough into oblong shape and put them on a baking sheet lined with parchment paper. Or you can grease the baking sheet without using parchment. Leave the dough to prove for 45 minutes-1 hour.

Brush with egg wash and bake on the middle of the oven at 375F for 12-15 minutes.

When the buns are cooled, spread a thin layer of mayonaise on top of the buns and coat generously with pork floss.

Read more...

Friday, February 22, 2008

Vanilla Bean Cheesecake

vanilla bean cheesecake


I have been wanting to tell you about the last cheesecake I made from Junior's Cheesecake Cookbook before we left for vacation. It was the best vanilla bean cheesecake I have tasted in a long time. I have the recipe neatly typed and saved in the draft but never gotten around posting it. Mostly because the only photo I have taken of the cheesecake was a poorly lit and hideous one. It simply doesn't do the cake justice, let alone convincing you, my friends, that it's the best vanilla bean cheesecake one could ever ask for.

So, upon returning from vacation, I took this mission of capturing the beauty of the best vanilla bean cheesecake upon myself. This cheesecake entry deserves a better photo than the first hideous one I took!But really, if you know me well, you know that this is only half the truth. The bigger motivation for repeating the recipe, I am afraid, is the imminent expiring dates printed on the few bars of cream cheese I overbought on discount. OCT said I am so predictable.

vanilla bean cheesecake2

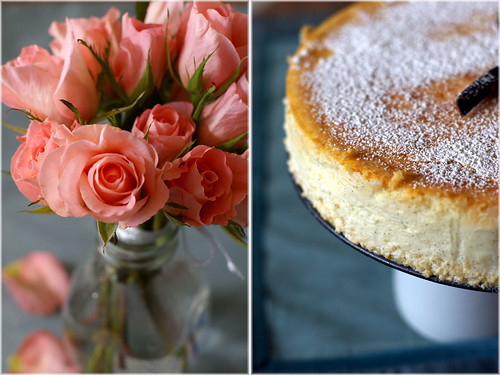
As a trademark of the famous Junior's Cheesecakes, this cake has a sponge cake crust. Although it takes a few more steps to prepare the sponge cake, I find the outcome more than worth the effort it demands. Even if you are a hardcore cookies crust fan, I encourage you to give it a shot. Either way, the real star here is the cheesecake filling speckled with vanilla beans. The original recipe has the vanilla flavor infused by sticking the vanilla pod in the sugar overnight, and uses vanilla extract in the filling. I pumped up the vanilla flavor by scraping out the morsels and added them into the batter after the overnight infusion.

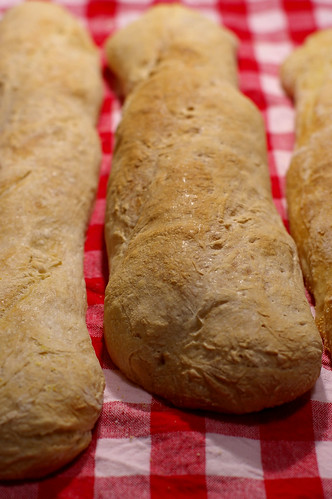
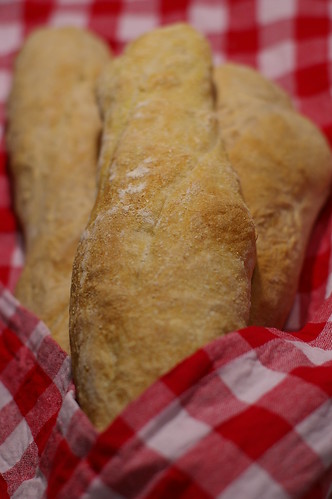
If you love cheesecake, I am sure you will like this one. In fact, all the cheesecake recipes from Junior's Cheesecake Cookbook have garniered nothing but rave reviews from my tasters. I have to wait until Easter for another round of cheesecake baking. Meanwhile, be prepared to see some bread posts ahead!

Have a great weekend and stay warm, y'all!

vanilla bean cheesecake1


You may also like:
Apple Cheesecake
Mango Cheesecake
Tropical Cheesecake

Other cheesecake recipes from the same book:
Little Fellas Raspberry Swirl
Little Fellas Cappuccino
Little Fellas Chocolate Swirl

Vanilla Bean Cheesecake
adapted from Junior's Cheesecake Cookbook

four 8-ounce packages Philidaphia Cream Cheese (I use 3 packages of 1/3 less fat Neufchtel and 1 package of original cream cheese), at room temperature
1 2/3 cup sugar
1 vanilla bean (about 7 inches long)
1 recipe 9-inch Junior's Sponge Cake Crust, recipe below
1/4 cup cornstarch
1/2 tablespoon pure vanilla extract
2 extra large eggs ( 3 large eggs are fine too)
3/4 cup heavy whipping cream
one half pint fresh raspberries (about 6 ounces) (optional)
confectioners's sugar

The night before you plan to make this cake, put the granulated sugar in a small bowl and bury the vanilla bean in it, covering it completely. Cover tightly with plastic wrap and let stand overnight to flavor the sugar. When you are ready to make the cake, set the vanilla bean for later use.

Preheat oven to 350F. (I used 325F)Generously butter the bottom and sides of a 9-inch springformpan. Wrap the outside with aluminium foil, covering the bottom and extending all the way up the sides. Make and bake the cake crust and leave it in the pan. Keep the oven on.

Put one package of cream cheese, 1/3 cup of vanilla flavored sugar, and the cornstarch in a large bowl. Beat with an electric mixer on low until creamy, about 3 minutes, scraping down the bowl a few times. Blend in the remaining cream cheese, one package at a time, scraping down the bowl after each one. Increase the mixer speed to medium and beat in the remaining 1 1/3cups vanilla sugar, then the scraped vanilla beans and vanilla extract. Blend in the eggs, one at a time, beating well after adding each one. Beat in the cream just until it's completely blended. Be careful not to be overmix. Gently spoon the batter on top of the crust.

Place the cake on a large shallow pan containing hot water that comes about 1 inch u the sides of the springform. Bake until the edges are light golden brown and the top is slightly golden tan, about 1 1/4 hours. Remove the cheesecake from the water bath, transfer to a wire rack, and let the cake cool for 2 hours. Leave the cake in the pan, cover loosely with plastic wrap, and refrigerate until completely cold, preferably overnight or at least 4 hours.

Wash and drain the raspberries and place them on paper towels to dry, if using. Release and remove the sides of the springform, leaving the cake on the bottom of the pan. Place on a cake plate. Put some confectioners' sugar in a tea stainer and sift enough over the top of the cake to evenly cover it with a fine dusting. Decorate the top with raspberries. Refrigerate until ready to serve. Slice the cold cake with a sharp straight edge knife, not a serrated one. Cover any leftover cake and refrigerate, or remove the decorations, wrap and freeze for up to 1 month.

Junior's sponge cake crust

for one 9-inch cake crust:
1/3 cup sifted cake flour
3/4 teaspoon baking powder
pinch of salt
2 extra large eggs, separated
1/3 cup sugar
1 teaspoon pure vanilla extract
2 drops pure lemon extract (or zest of half a lemon)
2 tablespoons unsalted butter, melted
1/4 teaspoon cream of tartar

for one 8-inch cake crust:
1/4 cup sifted cake flour
1/2 teaspoon baking powder
pinch of salt
2 extra large eggs, separated
1/4 cup sugar
3/4 teaspoon pure vanilla extract
2 drops pure lemon extract (I used zest from half a lemon)
2 tablespoons unsalted butter, melted
1/4 teaspoon cream of tartar

Preheat the oven to 350F and generously butter the bottom and sides of a 8- or 9-inch springform pan (preferably a nonstick one). Wrap the outsde with aluminium foil, covering the bottom and extending all the way up the sides.

In a small bowl, sift the flour, baking powder and salt together.

Beat the eggyolks in large bowl with an electric mixer on high for 3 minutes. With the mixer running, slowly add 2 tablespoons of the sugar and beat until thick light yellow ribbons form, about 5 minutes more. Beat in the extracts.

Sift the flour mixture over the batter and stir it in by hand, just until no more white flecks appear. Now, blend in the melted butter.

Now wash the bowl and beaters really well (even a little fat is left, this can cause the eggwhite not to whip). Put the eggwhites and cream of tartar into the bowl and beat with the mixer on high until frothy. Gradually add the remainining sugar and continue beating until stiff peaks form (the whites will stand up and look glossy, not dry). Fold about one-third of the whites into the batter, then the remaining whites. It's ok if you see a few white specks, they will disappear during baking.

Gently spread out the batter over the bottom of the pan, and bake just until set and golden (not wet and sticky), about 10 minutes. Touch the cake gently in the center. If it springs back, it's done. Watch carefully and don't let the top brown. Leave the crust in the pan and place on a wire rack to cool. Leave the oven on while you prepare the batter.

Dark Chocolate Sponge Cake Crust
Use the above recipe and technique, except you stir in 2 ounces of melted and slightly cooled bittersweet chocolate when you add the extracts.

Read more...

Monday, February 18, 2008

Vanilla Shortbread & The Simple Pleasure in Life

Shortbread

Not long before I went on vacation, I chanced upon Claire Clark's Indulge: 100 Perfect Desserts on the library's new arrival shelf. I was immediately attracted by the luscious chocolate cake on the cover and had to add it to my avalanche of checkout books.

It was only after reading the foreword, by the much celebrated and revered chef, which also happens to be Clark's employer, Chef Thomas Keller, had I known that Claire Clark is the pastry chef of the extraordinary, award winning, and the best restaurant in the United State- French Laundry.I am so ignorant!

Shortbread

Flipping through the brilliantly written book have me craving to conquer each and everyone one of the gorgeous creations in my tiny kitchen. I wanted to make the Red Wine and Chocolate Cake, Green tea Tiramisu, Rich chocolate ganache tart with salted caramel and candied peanuts, Opera and basically all the rest of the recipes.

But there's a technical problem. All the recipes in the book are written in weight measurement. Clark explains that it is the most accurate way to measure and I couldn't agree more. But an accurate weighing scale is one of the appliance that my tiny kitchen lacks. I was going to buy one months ago, but was promptly distracted to make other purchases and totally forgot about the scale!

Shortbread


With that, all the ambitious attempts have to put on a hold. But I hate to return the book without making a recipe from it. Especially a great book like this. So, I make the first recipe on the book- the Shortbread, which according to Chef Thomas Keller, is what he craves upon returning the restaurant from a trip.

An endorsement like that is undoubtedly assuring. I did a not-too-accurate weght to cup conversion of the recipe and proceeded gingerly. The Shortbread recipe from Clark's mum is simple yet wonderful. As I rubbed the butter with my fingertips into the dry ingredients, my hands were perfumed with the sweet scene of vanilla beans, an aromatic yet satisfying process. All one needs to make the shortbread is just a mixing bowl, a pair of willing hands and a weighing scale (or measuring cups in my case). I am once again reminded that my hands are my most adaptable and flexible tool I have.

Shortbread


The Shortbread was nice when it was fresh from the oven, but I am happy to report that it tasted better after 1 to 2 days of sitting. That is definitely a desirable property in my book. The Shortbread is indeed indulgence in its simplest form.

I packed half of the shortbread with the cookies bag my friend- Happy Home Baking sent me. I wish I could send the cookies to her, but I doubt the delicate shortbread could make it to Singapore un-crumbled. So, they were given to a friend who dropped by my place one night.


Shortbread
adapted from Indulge: 100 Perfect Desserts

225g/8 oz all purpose flour
75g/2 3/4 oz confectioners' sugar
1 vanilla pod
150g/ 5 1/2 oz unsalted butter, at room temperature
50g/1 3/4oz granulated sugar , for dusting

(my not very accurate ingredient list in cup measurement)
1 3/4 cup + 1 tablespoon all purpose flour
1/3 cup confectioners' sugar
1 vanilla pod
11 tablespoons unsalted butter, at room temperature
granulated sugar , for dusting

Preheat the oven to 350F. Sift the flour into a large mixing bowl and add the confectioners' sugar. Using a sharp knife, slit the vanilla pod open lengthways and scrape out the seeds with the tip of the knife. Add the seeds to the bowl, along with the butter. Using your fingertips, rub the butter into the dry ingredient. As the mixture begins to come together, use your hands to help it form a dough (alternatively, you could use an electric mixer with the paddle attachment on a low speed to make the dough.)

Shape the dough into a ball and flatten it slightly. Roll out on a lightly floured surface to about 1cm/1/2 inch thick. Cut into 15 oblongs and place them on abaking sheet lined with baking parchment.

Bake for 15 minutes, then turn the baking sheet around and continue baking for 10 minutes, until the shortbread is golden brown. Remove from the oven and dust with an even coating of granulated sugar. Leave on the baking sheet to cool.

Make 15-16 shortbread fingers.

Read more...

Friday, February 15, 2008

Time flies faster in KK and the Pineapple Tarts recipe

cover cny1

Seriously, I don't feel like I have spent enough time in KK, my hometown, surrounded myself with mum and dad, my aunties, best friends and my parents' friends. The day before I left for Singapore, to spend the Chinese New Year with OCT's family, mum and I tried to recount the stuff we have done for the past 10 days, to recall if we have wasted any seconds.

homecooked dishes

But we couldn't think of anything! We were busy baking, cooking, chatting, eating and meeting up with friends, and watching the TVB series on Astro when the clock struck 8:30p.m! The only reason I could think of, is time flies faster when one is having a good time. I made plans to meet up with more friends and wanted to show OCT some places during his short stay in KK but nothing was materialised. Poor OCT didn't even see the beautiful beaches my hometown is known for! He was flooded by enthuasiastic friends and my extended family with many dinner invites.

mum's homecooked dishes

I am feeling a bit sad that I couldn't spend my new year eve at home, eating the reunion dinner with my folks this year. Reunion dinner on the Chinese New Year eve is a big deal in the eastern culture, and family members, no matter where they are;will usually come back for a sit down feast together. Depending on different dialect groups, the food that are served on the reunion dinner can be quite different. However, most often than not, there will be different dishes that signify good health, longevity and prosperity.

cny snacks21

Mandarin orange/clementines 柑, that sounds like gold in Chinese is a "must have" item during Chinese New Year. There are quite a few varieties, including sweet tangerines but I am no expert in this clementine/mandarin/tangerine business. I would trade the clementine for orange (or better yet-meyer lemon!) anytime. I look uninterested when mum raved about a certain variety of clementines and much less when she bought boxes after boxes of them to give away.

cny1

One of the Chinese New Year item that I actually enjoy eating is the steamed brown sugar cake, which is more well known as nian gao 年糕. It is a combination of brown sugar, water and glutinous rice flour being steamed to perfection in a container made of banana leaves. When done right, the final product should have the right amount of sweetness and just a tad of stickness when one bite into it. I love mum's version of nian gao, where she coated the sliced nian gao in egg batter and panfry them to a light golden hue. It was to my disappointment that OCT's family doesn't eat nian gao during Chinese New Year! Instead, different food are served for breakfast on the first day of Chinese New Year. I would have bought some nice nian gao from KK had I known it earlier..

cny snacks1

On top of the homemade cookies we baked, mum also stocked up with some indispensable snacks we love to eat during Chinese New Year. Among them are a certain well-known Hong Kong brand almond cookies that melt-in-your-mouth and egg rolls. Of course, Chinese New Year will not be complete without the prawn crackers. A snack that even the most resolved dieter couldn't resist a second helping.

cny 11

And now, without further ado, is the recipe for the pineapple rolls/tarts many of you have requested. I like how buttery the rolls turned out and believe the use of a better quality butter does make a difference. As for the filling, we are using the ready-made variety comes from Thailand instead of sweating over the real stuff. Usually,we stick with whichever supplier we have tried instead of switching from one to another. When in US, I used the canned crushed pineapple, drained and cooked down to the desired consistency, with sugar to taste.

pineapple tarts for blog


Pineapple Rolls/Tarts

for the pastry:
220g unsalted butter, at room temperature
375g all purpose flour
1/4 teaspoon salt
2 egg yolks
50g confectioners' sugar/icing sugar
2 tablespoons cornstarch
1 egg yolk, for egg wash

for the pineapple filling (from scratch):
250g grated pineapple
150g sugar (or to taste)
1 tbsp lemon juice
1/2-1 teaspoon cornstarch

for the pineapple filling (from canned crushed pineapple)
1 can crushed pineapple, drained
1/4 cup granulated sugar (or more to taste)
1-1.5 teaspoon cornstarch
1 teaspoon lemon juice (optional)

To prepare the pineapple filling,
(from scratch):
Bring to a boil grated pineapple, sugar and lemon juice. Let it simmer for 30 minutes or until it thickens.Taste to see if it has achieved the desired sweetness. Add more sugar when necessary. Sieve in half a teaspoon of cornflour.

Let the pineapple filling cool to room temperature before using. It can also be kept in refrigerator for 1 week.

Pineapple filling from canned crushed pineapple:
Using low to medium heat, cook the drained crushed pineapple and sugar until most liquid has evaporated, and the mixture turned golden. Stirring constantly using a wooden spoon to avoid burning. Taste, and add more sugar when needed. Add in 1 to 1.5teaspoon of cornstarch to thicken the mixture.

Let cool to room temperature before using.

For the pastry:
Sieve all purpose flour, corn flour, salt and icing sugar into a medium bowl. Beat butter in a mixer until it turns light in color and fluffy.Add in egg yolks until well combined. Slowly beat in the flour mixture until just combined.

To assemble:
Roll pineapple filling into small individual rounds. Turn dough out and roll into small rounds.Flatten the rounds and use it to cover the prepared filling.

Brush the unbaked rolls with egg wash.

Bake in a preheated oven at 350F/180ºC for 10 to 15 minutes or till lightly brown.

cny greet card11

Read more...

Monday, February 04, 2008

Happy Lunar New Year

cny


The Lunar New Year falls on 7 Feb this year, which is less than two days from now. I just want to sneak in for a quick note to wish all who are celebrating the Lunar New Year a happy and prosperous new year. May your stomaches be filled with pineapple tarts, love letters, peanut cookies, nian gao, bak gua and all the delicious food lay in front of you. And those who are single, your pockets be spilled with lots of red packets!

cny2

Instead of meeting up with friends, I spent most of my time in KK baking at our new kitchen. I have lost count on the number of batches of pineapple rolls we baked.Even though we keep baking, the pineapple rolls keep disappearing. Some have undoubtedly ended in our stomachs, but most have been packed and given away to friends and relatives.

pineapple rolls


I also made 3 batches of horlicks animal cookies, in which they are supposed to look like doggies. However, as I was shaping them, the doughs seem to have a mind of their own, and some decided they should be piggy and bears,some wanted to be a hybrid of piggy+ bears, and the rest, hybrid of dog + piggy...Not exactly the way I have set out but I like how unique they each look nonetheless.

Horlick Animal Cookies


I will be bringing some of these back to Singapore tomorrow, hopefully OCT's nieces and nephews will like them.

Horlick Animal Cookies


I enjoy shaping the cookies but not so much on eating them. Horlick is definitely not my cup of tea. Our friends who have tried them thought they taste pretty good though....


Horlicks Animal Cookies
adapted from my blog buddy

180g butter, soften at room temperature
80g Horlicks (original flavour)
200g top flour or cake flour
25g corn flour
25g milk powder
100g chocolate chips (I used Hershey's kissable chips)
some chocolate rice
some Koko Krunch

Pre-heat oven to 140deg C. Line baking tray with baking paper and set aside.

Sieve cake flour, corn flour and milk powder.

Cream butter and Horlicks for about three minutes at low speed. Do not overbeat.
Put in cake flour, cornflour and milk powder and beat for about one minute to form
dough.

Divide dough into 10g each. Put three chocolate chips into each piece of dough and roll into balls.

Insert two pieces of Koko Krunch to form the 'ears', chocolate rice for the "eyes", and a mini chocolate chip in the centre for the 'nose'.

Bake at 140 deg C for about 25 minutes. Depending on your oven, it may take another 5 to 10 minutes more for the cookies to be ready.

Leave to cool on wire rack before storing in an airtight container.

Read more...
Related Posts with Thumbnails