


I love Spring for many reasons. One of them is the abundance of asparagus that Spring brings! Although asparagus is available throughout the year now, those that we ate in Spring was still the best. Not to mention the cheapest. Eventhough Spring is still 4 more months away, a plate of pasta loaded with asparagus will suffice my craving for the time being. A simple and balance meal on a quiet Wednesday night. Yum....
Chicken and Pasta Toss
Adapted from Cookinglight
1 pound uncooked rotini (corkscrew pasta)
2 teaspoons olive oil
1 tablespoon butter
3 cups (1-inch) slices asparagus (I used one pound)
2 cups chopped onion
1 tablespoon hot sauce
1 teaspoon crushed red pepper
1/4 teaspoon salt
1/4 teaspoon black pepper
1 (6-ounce) package precooked chicken strips (used diced turkey kielbasa)
1 (28-ounce) can diced tomatoes, drained (used 16 oz)
3/4 cup (3 ounces) preshredded fresh Parmesan cheese
1 teaspoon paprika (omitted)
* a splash of red wine
Cook pasta according to package directions, omitting salt and fat; drain. Combine pasta and oil in a large bowl, and toss well.
Melt butter in a Dutch oven over medium heat; add asparagus, onion, hot sauce, and red pepper. Cook 5 minutes or until asparagus is crisp-tender, stirring frequently. Stir in pasta, salt, black pepper, chicken,tomatoes and a splash of red wine; cook 2 minutes or until thoroughly heated. Stir in cheese; sprinkle with paprika.
Yield: 7 servings (serving size: 2 cups)
Thursday, November 30, 2006
Give me a plate of spring
Wednesday, November 29, 2006
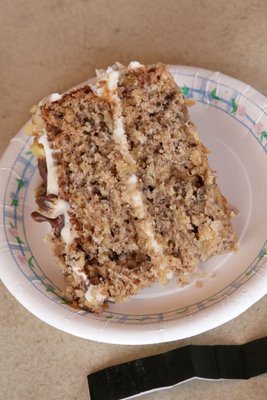
Hummingbird Cake
What a name! I made this cake for my friend BP's birthday lunch last Sunday. It's a cake my friend MY told me so much about, but was readily forgotten until being reminded by Martha Stewart on her Baking DVD. Seeing that woman made the cake on her DVD almost guaranteed the delicious factor of the cake itself. So, I decided to make this moist and light cake for BP. And added heaps of delicious cream cheese frosting as backup. You know, just in case the cake turned out too bland.
The cake proved that my worry was unnecessary. It was moist and tender. Thanks to the mashed banana and crushed pineapple. For the uninitiated, the Hummingbird cake tasted like a cross between banana cake and carrot cake. Martha's version used coconut flakes, which I omitted. I found another version from Southern Living that used almost the same proportion of all ingredients with good reviews and decided to use it instead of Martha's. I think I will give Martha's version a try when I got some bananas again.
I guess I should also mention that it's one of the easiest cake to make because you can stir everything together in a big bowl without the help of a mixer. Perfect for a novice baker like myself!
Hummingbird Cake with Cream Cheese Frosting
3 cups all-purpose flour
1 teaspoon baking soda
1 teaspoon salt
2 cups sugar
1 teaspoon ground cinnamon
3 large eggs, beaten
1 cup vegetable oil
1 1/2 teaspoons vanilla extract
1 (8-ounce) can crushed pineapple, undrained
1 cup chopped pecans
2 cups chopped bananas
Cream Cheese Frosting (see recipe below)
1/2 cup chopped pecans
Combine first 5 ingredients in a large bowl; add eggs and oil, stirring until dry ingredients are moistened. (Do not beat.) Stir in vanilla, pineapple, 1 cup pecans, and bananas.
Pour batter into three greased and floured 9-inch round cakepans. Bake at 350° for 25 to 30 minutes or until a wooden pick inserted in center comes out clean. Cool in pans on wire racks 10 minutes; remove from pans, and cool completely on wire racks.
Spread Cream Cheese Frosting between layers and on top and sides of cake; sprinkle 1/2 cup chopped pecans on top. Store in refrigerator.
Yield: 16 servings
Cream Cheese Frosting
1 (8-ounce) package cream cheese, softened
1/2 cup butter or margarine, softened
1 (16-ounce) package powdered sugar, sifted
1 teaspoon vanilla extract
Beat cream cheese and butter at medium speed with an electric mixer until smooth. Gradually add powdered sugar, beating at low speed until light and fluffy. Stir in vanilla.
Yield: 3 cups
Note: To cut down on fat, the hummingbird cake can be made in a Bundt pan without the frosting, or with a simple drizzle of icing sugar.
Turkey and Thanksgiving
Last Thursday was Thanksgiving. Though we are non Americans, and weren't being invited to any Thanksgiving dinner, that couldn't stop us from celebrating this meaning day with some friends coming over for a traditional Thanksgiving meal.
Thanks to numerous cooking magazines, I know that a typical Thanksgiving meal should include: Turkey, mashed potato, green bean, gravy,stuffing, dinner rolls and pumpkin pie. Of course the list could go on if you were serving more guests. I wouldn't mind cooking for more people if not of the limited space we have in our tiny apartment. Anyway, I guess a simple menu will do for now.
You know, sometime the simplest thing can be complicated when you are given too many choices. There are at least 30 recipes for roast turkey, at least ten types of add-on for mashed potatoes, and apparently countless ways to make stuffing. And whether to stuff the turkey or not. I spent almost a week to decide on whose recipes should I use for the few dishes I made. OCT seemed to be more enthusiastic than I was and kept pestering me with the menu. It's funny that we were more excited about Thanksgiving than the Chinese New Year. Maybe because we are too far away from home. And this place lacks the new year decoration and songs to remind us of the festival.....
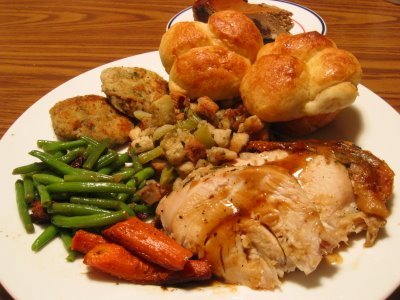
Anyway, the Thanksgiving prep started 3 days before the big day. Apparently it's not to bad compared to our American counterparts here, who prepared for the day way in advance. Here's some self-explanatory photos to show you what we had for our Thanksgiving dinner: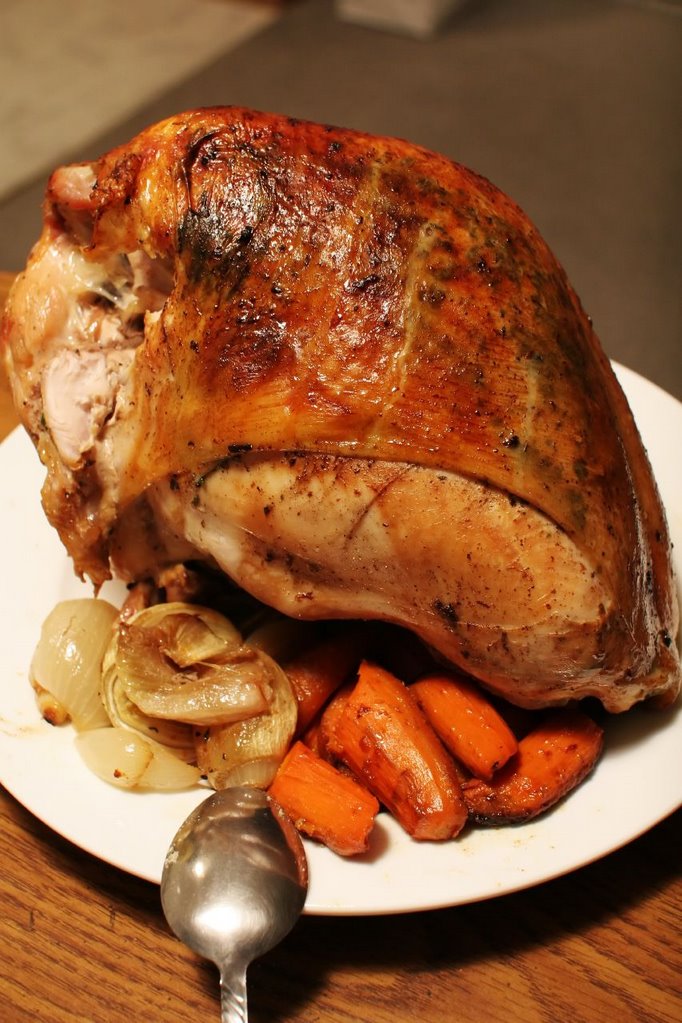


Other than the compulsory roast turkey, green bean and mashed potato, I made lemon horseradish fish cakes as appetizer. It also served as a backup in case the roast turkey didn't turn out fine.
And I almost forgotten about my dinner rolls, which I made the night before. They were tastier the night I made them though.

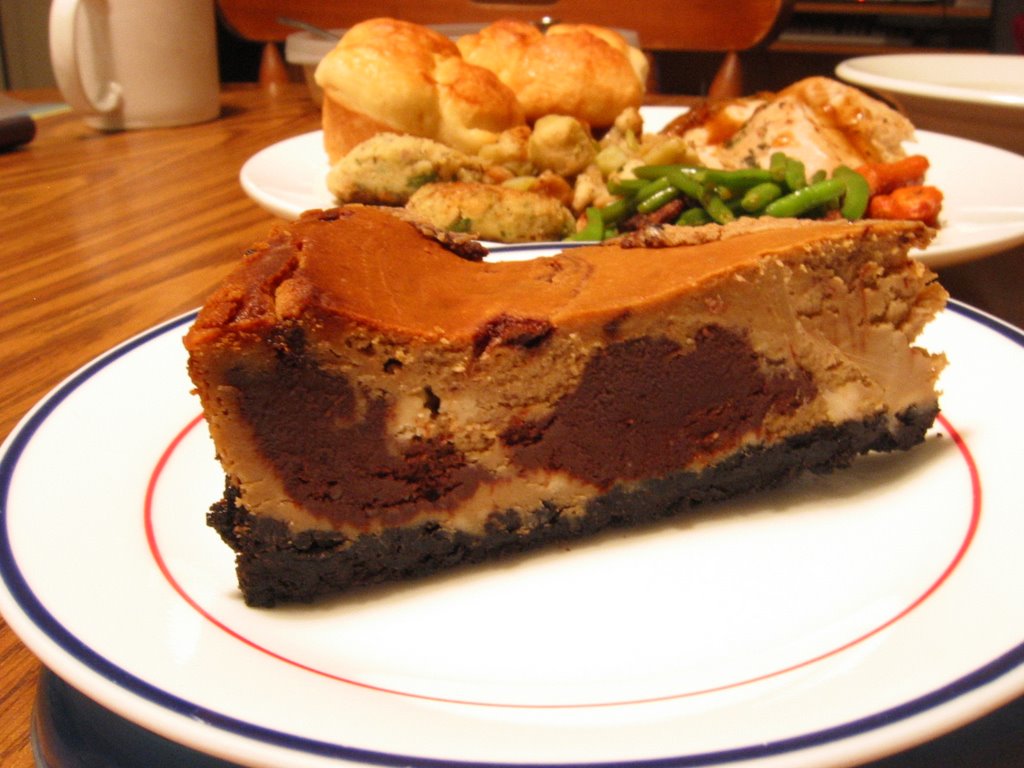
For dessert, I made a espresso and chocolate swirl cheesecake. This was made 2 days before Thanksgiving, so that the flavor had enough time to mend. Unfortunately, 2 days seems not long enough. OCT and I both find that it tasted the best after sitting for 5 days! Anyway, I don't intend to bake this cake anytime soon. There are too many cheesecake recipes waiting for me out there! Nevertheless, this cheesecake which is not too sweet ended our dinner on a good note.

Eventhough it wasn't a feast, we still had plenty of leftover! Which was turned into another mini Thanksgiving meal for just the two of us on the next day. And yes, the photo below was only part of the leftover.
Make Ahead Mashed Potato
adapted from Southernliving
5 pounds baking potatoes
2 (3-ounce) packages cream cheese, softened
1 (8-ounce) container sour cream
1/2 cup butter or margarine, softened
1/2 cup milk
2 teaspoons onion salt
Garnish: paprika or chopped fresh parsley
Peel potatoes, and cut into 1-inch cubes. Cook in a medium saucepan in boiling water to cover 15 to 20 minutes or until tender; drain and place into a large mixing bowl.
Add cream cheese and next 4 ingredients; beat at medium speed with an electric mixer until smooth and fluffy (do not overbeat). Spoon into a lightly greased 13- x 9-inch or 3-quart baking dish.
Bake, covered, at 325° for 50 minutes or until thoroughly heated; garnish, if desired.
Note: Unbaked mashed potatoes may be chilled up to 2 days. Let stand at room temperature 30 minutes, and bake as directed.
Yield: 10 servings
Cloverleaf Dinner Rolls
adapted from Fine Cooking
1 package dry yeast (I used rapid rise yeast)
1/4 cup warm water (100° to 110°F)
1/4 cup sugar
3/4 cup milk
6 Tbs. butter
1 lb. (3-1/2 cups) all-purpose flour
2 Tbs. vegetable oil
1 egg, lightly beaten
1 tsp. salt
3 Tbs. butter, melted (for shaping)
For the egg glaze:
1 egg yolk
1 Tbs. milk
Pinch sugar
Making the dough:
Sprinkle the yeast over the warm water. Add a pinch of the sugar. Stir and let the mixture sit until it's foamy, about 5 min. (If the mixture doesn't foam, the yeast may be inactive. Throw out the mixture and begin again with new yeast.)
Heat the milk and butter just until the butter melts. Let the mixture cool until it's tepid.
Measure the flour into a large bowl and make a well in the center. Pour in the tepid milk and the yeast mixture. Add the rest of the sugar and the oil, egg, and salt. Mix the ingredients thoroughly, gradually drawing in the flour to form a soft dough. Turn the dough onto a lightly floured work surface.
(For a variation, make whole-wheat rolls with orange and coriander. Orange zest makes these rolls particularly fragrant, and the whole-wheat flour gives the rolls a pleasantly hearty flavor. Use the recipe above, but substitute 1/2 cup of whole-wheat flour for 1/2 cup of the white flour. After the salt is added, add the grated zest of 1 orange and 1/2 tsp. ground coriander. Proceed with the remainder of the recipe as written.)
Knead the dough:
Push the dough away from you with the heels of your hands, then fold the dough over itself and give it a quarter turn. Repeat this pushing, folding, and turning, adding only enough flour to keep the dough from sticking to the table, until the dough is smooth and elastic, about 5 min. The dough will be softer than ordinary bread dough. Put the dough in a greased bowl and then turn the dough over so the greased side faces up. Press plastic wrap onto the surface of the dough and leave it to rise until doubled in volume, 45 min. to 1 hour. Gently punch down the dough and then let it rest for 5 min. before shaping.
Shape the rolls:
Lightly butter a standard 12-portion muffin tin. With your hands, roll the dough into a long cylinder about 18 in. long. Use a dough cutter to divide this in half and then cut each half into six equal portions. Divide each of these 12 portions into three sections for a total of 36 pieces. Each piece should be approximately the same size.
With your palms, lightly roll each piece of dough into a smooth ball. Cluster three balls of dough in each cup of the muffin tin. Brush with a little melted butter. Allow to rise for 40 to 50 min., or until doubled in volume.
Yield 12 dinner rolls
Espresso and Chocolate Swirl Cheesecake
adapted from Bon Appetite
Crust
1 9-ounce package chocolate wafer cookies (used oreo cookies)
6 tablespoons (3/4 stick) unsalted butter, melted, cooled
Filling
2 tablespoons instant espresso powder
1 tablespoon water
3 8-ounce packages cream cheese, room temperature
1 cup sugar
3 large eggs
1/4 cup (1/2 stick) unsalted butter, melted, cooled
1 tablespoon finely ground coffee (used one tablespoon of instant espresso powder)
6 ounces bittersweet (not unsweetened) or semisweet chocolate, chopped
1/4 cup whipping cream
For crust:
Position rack in center of oven and preheat to 400°F. Grind cookies in processor. Add butter and process using on/off turns until crumbs are moist. Press crumbs on bottom and 1 1/2 inches up sides of 9-inch-diameter springform pan with 2 3/4-inch-high sides. Wrap outside of pan with aluminum foil.
For filling:
In small bowl, dissolve instant espresso in 1 tablespoon water. Using electric mix, beat cream cheese in large bowl until smooth. Add sugar and continue beating until mixture is light and fluffy. Add eggs 1 at a time, beating well after each addition. Mix in espresso mixture, butter and ground coffee beans.
Combine chocolate and cream in heavy small saucepan. Stir over low heat until chocolate melts. Pour half of cheese filling (about 2 1/2 cups) into prepared crust. Drop 5 tablespoons melted chocolate mixture by tablespoons around edge of filling, spacing evenly. Use small sharp knife to swirl chocolate into filling. Carefully pour remaining cheese filling over. Drop remaining chocolate mixture by tablespoons into center 6 inches of filling, spacing evenly. Swirl mixtures together using tip of knife.
Bake cheesecake until edges are puffed and beginning to crack and top is golden brown, about 40 minutes (center will not be set). Cool on rack. Chill overnight. (Can be prepared 3 days ahead.)
Run small sharp knife around edge of pan to loosen cheesecake. Release pan sides. Let stand at room temperature 30 minutes. Transfer to platter and serve.
Serves 10.
Read more...
Wednesday, November 22, 2006
Another week has passed
and I haven't done any updates on my blog. Sometime I am not motivated to write because most of my friends don't read this blog. It feels like talking to the air and myself most of the time.
Anyway, I guess I will blog less often from now on, but I still need a space to record the new recipes I try from time to time. Sometime we tried so many new recipes a week that we hardly remembered what we had for dinner few days ago!
The main breakthrough for me last week was definitely the chinese turnip cake. And I made a nice batch of cookies using a new-to-me ingredient- peppermint chips! I used a basic chocolate cips cookies recipe, and added in some peppermint chips for colour.

 I gave some to the maintenance guy who came and worked on our bathroom tiles for 2 days. He seemed to like them, and told me that his 3 kids liked the cookies too!
I bought the peppermint chips from Target sometime ago, believing that I could use that in my Christmas cookies baking. Speaking of Christmas cookies, I have a hard time deciding what to bake. And whether I should make the tried and tested recipes or something new and interesting....
After having Turkey on the covers of most cooking magazines I subscribed in November, they were either cakes or cookies on their December issues. I can't complain. Afterall, I prefer cake or cookies to turkey!
Tuesday, November 14, 2006
First attempt on Chinese Turnip Cake
I have craving for chinese turnip cake for weeks, and I had even bought the necessary ingredients 2 weeks ago, all set to have my first try on turnip cake. Honestly, I am not too confident when it comes to making chinese pastries. All the recipes I googled seem to be vague. And there's no way I can determine the "workability" of the recipes except of trying it myself. Because of this, I hesistated. For the fear of failure and the disappointment that follows.
Anyway, I went ahead and made my first ever chinese turnip cake, after comparing a few sources, and plenty of courage and some common sense. It turned out ok, but could definitely be improved on. See the "wrinkles" on the surface? I still don't know what the problem is.
After a few days, I tried to make it again, the objective was to improve the texture. Turned out the texture was hugely improved, but the appearance and taste needed some fine tuning. I guess I will post the recipe after I get it right. But first, I need another trip to the chinese grocery store....
I guess the turnip cake can be kept in refrigerator for a couple of days. But it didn't last that long. For I fried some with garlic and egg to eat as lunch,and the rest for dinner. OCT wasn't as crazy as I was on turnip cake, but he seemed to enjoy his share too.

Friday, November 10, 2006
Oven Fried Chicken and Broccoli with hot bacon dressing
I love our dinner yesterday! The oven fried chicken was the best fried chicken I have ever tasted in my life. Ok, I exaggerated, but it was because the chicken was really tasty and healthy. Maybe healthy is not the right word too. But if you can use only 2 tablespoons of oil to get 6 huge pieces of crunchy chicken thighs, you can call that healthy right?
This is a recipe from October issue of Cookinglight magazine. The idea of using oven to fry chicken is intriguing, definitely too good to be true. I thought if it really turned out like the real thing, then it will be the next best thing other than the crispy roast potatoes, another favorite of mine which I cook to curb my craving for french fries.
Because I had such a high hope on the recipe, I decided to check out the reviews of others who have tried this recipe, and see what they thought of the final outcome and what could have been done to make it even better. After the "research", I decided to adopt some of the ideas. Like soaking the chicken in buttermilk for almost an hour rather than a simple dip instructed in the recipe. I also added salt and pepper quite generously to the flour mixture, because someone complainted that the chicken was a bit bland. I also left the chicken in the oven for 15 minutes longer because I didn't bone the thigh. Otherwise, I followed the recipe to the letter. (or so I thought, because I normally just read the ingredient list, and selectively find the key words like oven temperature and time required. )
The chicken turned out to be a winner! It was everything a fried chicken should be. Crispy, crunchy and tasty. With this recipe, I have another excuse to buy cheaper cut of chicken more often! OCT who is a fried chicken fan will not be deprived of having some "fingers licking good" stuff anymore!
Another new recipe for last night was broccoli with hot bacon dressing. It was a good alternative to our otherwise simple version of chinese style broccoli with mixed veggie and oyster sauce. I like the idea of using rice vinegar + raisin+ bacon + garlic as dressing. It was an interesting combination.
Oven Fried Chicken
adapted from OCT 2006 Cookinglight
1 cup low-fat buttermilk
2 large egg whites, beaten
1 cup all-purpose flour (about 4 1/2 ounces)
1/3 cup cornmeal
1 teaspoon salt, divided
3/4 teaspoon freshly ground black pepper
1/4 teaspoon ground red pepper
2 chicken breast halves, skinned (about 1 pound)
2 chicken thighs, skinned (about 1/2 pound)
2 chicken drumsticks, skinned (about 1/2 pound)
2 tablespoons canola oil
Cooking spray
Preheat oven to 425°.
Cover a large baking sheet with parchment paper. Combine buttermilk and egg whites in a shallow dish; stir well with a whisk. Combine flour, cornmeal, 1/2 teaspoon salt, black pepper, and red pepper in a separate shallow dish; stir well. Sprinkle chicken evenly with remaining 1/2 teaspoon salt. Dip chicken in buttermilk mixture; dredge in flour mixture.
Heat oil in a large nonstick skillet over medium-high heat. Add chicken to pan; cook 4 minutes on each side or until lightly browned. Place chicken on prepared baking sheet; lightly coat chicken with cooking spray. Bake at 425° for 30 minutes or until chicken is done.
Yield: 4 servings (serving size: 1 chicken breast half or 1 drumstick and 1 thigh)
Broccoli with Hot Bacon Dressing
adapted from Oct 2006 Gourmet
2 lb broccoli, trimmed and cut into 1-inch florets (reserving stems)
1/4 lb sliced bacon (about 4 slices), cut crosswise into 1/4-inch-wide strips
1 garlic clove, finely chopped
1/3 cup raisins
1/4 cup distilled white vinegar (I used rice vinegar)
2 tablespoons olive oil
1/2 teaspoon salt
1/4 teaspoon black pepper
Peel broccoli stems with a vegetable peeler, then cut crosswise into 1/4-inch slices.
Cook bacon in a 12-inch heavy skillet over moderate heat, stirring occasionally, until browned and crisp, 4 to 5 minutes. Transfer bacon with a slotted spoon to several layers of paper towels to drain, leaving fat in skillet. Add garlic and raisins to skillet and cook over moderate heat, stirring, until garlic is pale golden, about 1 minute. Stir in vinegar, oil, salt, and pepper, then remove from heat.
Meanwhile, cook broccoli florets and stems in a large pot of boiling salted water until just tender, 4 to 5 minutes. Drain broccoli well and transfer to a bowl.
Bring dressing to a simmer, then cook, stirring, 1 minute. Pour hot dressing over broccoli and sprinkle with bacon, tossing to combine.
Makes 4 servings.
Thursday, November 09, 2006
Experiment with a new scone recipe
I am perfectly happy with the scone recipe I found in Martha Stewart Baking Handbook. In fact, it's the recipe I always go back to whenever I need to make scones. There are other recipes that I have tried with satisfactory result, but they were too rich for my lifestyle. You see, heavy cream is used in the traditional scone. Though they are tender, sweet and everything that a good scone should be, I feel a bit guilty to eat them on a regular basis. Martha's version on the other hand, uses buttermilk. It gives the scone an equally tender and light texture, which I like, plus something more. A little something that you can't pinpoint, but leaves you going "Hmm..."(in a good way, of course). In short, I am contented with my reliable recipe. So why risk my previous ingredients to try another new recipe?
Because this recipe uses buttermilk too! You know, "great minds think alike"! I believe whoever this person is, she must be thinking the same thing as Martha, and me! (ahem) And that is to cut down on the calories of the scones. It's a recipe for Meyer Lemon and dried blueberry scones. I love anything with lemon! I love it in cake, I love it in cookies, but how could I not think of adding it to my scones?! Clearly, it showed that I am not a creative person. Anyhow, I knew I got to do make the scones immediately. Eventhough I didn't have any dried blueberry on hand. Luckily, we were on our way out, so I managed to grab a bag of it from Trader Joes!
But there's still another problem. The recipe used self rising flour. I know there's a substition for it using all purpose flour and baking powder. But the buttermilk is an acidic ingredient, which it required something alkaline to neutralise it. Or the scones may tasted very sour-y. So I shall add some baking soda. In that case, some salt too. It's a chemistry thing, which I shall spare you the detail. In a gist, I need to make sure that the scones will rise beautifully, and taste right.
The recipe doesn't require any egg which I find weird. So I added one egg in my modified recipe. I get more and more confused with the use of ingredients in this recipe the more I think about it. It's like the kind of organic chemistry exam questions I got in Uni days. At the first glance, you thought the question was pretty straightforward, but when you started to answer the question, it just doesn't seem right.
Anyway, I baked the scones adopting Bon Appetit concept with many modification. The scones tasted a bit bland. Although the perfume of lemon filled my apartment while the scones were baking, I could hardly taste it in the final products. The concept of putting lemon and dried blueberry in scone is excellent, but the recipe definitely needs more adjustment.
Yesterday, after baking a batch of orange chocolate oatmeal cookies, I have some orange zest leftover. So it gave me a perfect excuse to try another version of the lemon and dried blueberry scone. This time, I used orange zest with dried cranberries, and added in some chocolate chips. Since I was experimenting with the recipe, i decided to omit the egg, as the recipe advised and decreased the amount of baking soda.
This time, it is much nicer. Although the orange flavor isn't obvious enough to be detected. That is a simpler problem to solve. I will either add more zest or add a tablespoon of orange juice next time.
 left: lemon and dried blueberry scone; right: orange,dried cranberry and chocolate chips scone
I know this is a boring entry for anyone who isn't in the mood to make scones. But in case any of you, my friends want to know what I have been up to lately, this is the kind of stuff that's is going on in my mind right now. Of course, I am also thinking of what to bake for OCT's lab meeting tomorrow. And what's for dinner later!
Meyer Lemon and Dried Blueberry Scones
adapted from Dec 2006 Bon Appetite
3 cups self-rising flour
1/2 cup plus 1 1/2 tablespoons sugar
3/4 cup (1 1/2 sticks) chilled unsalted butter, cut into 1/2-inch cubes
1 1/2 cups dried wild blueberries (about 10 ounces)
1 cup plus 1 tablespoon buttermilk
1 1/2 tablespoons finely grated Meyer lemon peel or regular lemon peel
Position rack in top third of oven and preheat to 425°F. Line large baking sheet with parchment paper. Whisk self-rising flour and 1/2 cup sugar in large bowl. Using fingertips, rub in chilled butter until pieces are size of small peas. Add dried wild blueberries and toss to coat. Mix 1 cup buttermilk and finely grated lemon peel in glass measuring cup. Pour buttermilk mixture into dry ingredients and stir until dough begins to form (some of flour will not be incorporated). Transfer dough to lightly floured work surface and gather together. Knead dough briefly, about 5 turns. Divide dough in half. Form each dough half into ball and flatten into 1-inch-thick disk. Cut each disk into 6 wedges.
Transfer scones to prepared baking sheet, spacing 1 inch apart. Brush tops with remaining 1 tablespoon buttermilk and sprinkle with remaining 1 1/2 tablespoons sugar. Bake until scones are golden brown on top and toothpick inserted into center comes out clean, about 25 minutes.
Makes 12 servings.
Note: I halved the recipe, and used 1.5 cup of all purpose flour+ 2 tsp baking powder + approximately 1/2tsp baking soda + 1/4tsp salt in place of self-rising flour.Added 1/2 cup of chocolate chips and 1 tbsp orange peel in the second attempt. Read more...
Wednesday, November 08, 2006
Confession of the slacker
I haven't being updating my blog lately. I guess I just lost the momentum after I stopped blogging for a few days. Also, I thought I could do more "life-enriching" stuff, like reading, when I was offline. But I was wrong! I ended up spending most of my time on youtube, the addictive Hongkong series people uploaded kept making me to go back for more. And the book that I started two weeks ago was still lying at the spot I left it, collecting dust. So this is what I have been doing lately.
Luckily for me, and for OCT, dinners were still streaming out readily from kitchen. I managed to try a few new recipes the past weeks and are planning for more in the coming weeks! But before that, let me recall what I have made last week. 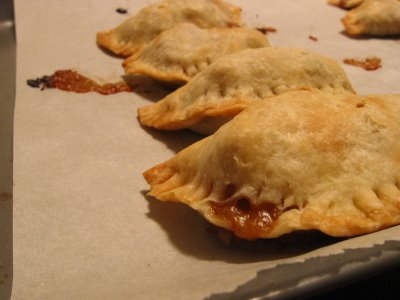
A batch of sao pao that leaks, unfortunately. So my quest for the ultimate sao pao hasn't ended yet. There were tasty though. But I need to work on the dough, so that it will not burst open again in the oven. Initially I thought it's either because I didn't seal them tight or I didn't poke holes on top of the pie, so pressure built up and it burst. But the second experiment that involved the same dough, but with apple pie filling proved that it's none of the above. My mum guested I may have overworked the dough or the oven temperature was too hot. Or maybe the dough was intended for quiche not turnover, etc. I decided to look for another recipe. I have given the dough enough chances, so it's time for it to go.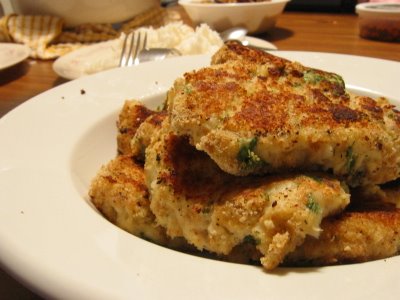 One night, we had lemon horseradish fish cake. You can't see the horseradish from the picture because they were subtly mixed into the fish cake. OCT who didn't know what he was eating and raved about this dish. I got this recipe from Oct issue of Everyday Food. You can also freeze the patties individually and cook them on another occasion. Say when you have special guests over for dinner. Of course you can get this kind of stuff from the grocery store's freezer section, but at least you know what you put in the fish cake and how long it has been frozen. And it's a flexible recipe. You can use any fish here, I think. All you need to do, is to first roast the fish in the oven for 15-20 minutes until it's cooked. Then use a fork to flake it, and add mayo, prepared horseradish, lemon juice, some chopped parsley, eggs, bread crumbs, and salt and pepper to taste. Form them into small cakes and coat with extra bread crumb and they can be cooked immediately, or freeze for another day. I know the instructions are lame, so if you are really interested, drop me a comment, and I will type out the recipe. :)
 Tuesday night, I had a suddenly craving for sushi, so I made some for myself. But I overestimated the amount and ended up having 5.5 rolls! It's going to be my Tuesday dinner and Wednesday lunch and dinner. I brought 2 rolls to school so that I could have lunch with OCT on Wednesday, but we changed our minds when the lunch hour approached and went for the nearby Greek restaurant for gyro and roast leg of lamb. So the sushi was left in OCT's lab. I asked him to give some to his colleagues, but he was a bit skeptical about my sushi. As a result, he decided to taste the sushi first before offering to anybody. Good for him! He ended up polishing up more than half of the sushi I brought! And of course he shared the rest proudly with his colleagues, including his Japanese colleague. Later he told me that sushi wasn't as awful as he imagined. And he thought my sushi was pretty tasty too! Great improvement for someone who doesn't like seaweed, vinegar, pickle radish and avocado. hahaha.

 Finally, I made a batch of espresso walnut tiles for the Friday meeting last week. It was basically espresso walnut brownie, with cream cheese and chocolate frosting. We had a lot from one recipe, which was enough for 2 labs (one for his lab and another for the collaborator's lab, since they were having meeting on Friday too) and some leftover for us. Using almost a pound of bittersweet chocolate, these treats were really yummy. I gulped down a few pieces myself because the temptation was simply too great!