Wednesday, May 28, 2008

May Daring Bakers Challenge and My Fallen Opera Cake

I was really excited when the May Daring Bakers Challenge was revealed in the beginning of the month. It is L'Opera, the cake that I have always wanted to tackle, but have constantly putting off because of the many components it requires. Now that our hostesses Ivonne and Lis, together with co-hosts Fran and Shea have chosen it as our May challenge, it gives me the necessary nudge to make it. No excuse to sit on it anymore.

My Opera Adventure

Except, I actually did sit on it until the last minute. Even though I have gone through the possible flavor combinations of the Opera cake for no less than 10 times in my mind, I didn't get to tackle it until 2 days before the posting date. Life is so unpredictable, and May just happens to be a month full of emotional roller coaster rides.

Unlike the classical Opera, in which chocolate and coffee are the dominating flavors; Our hostesses stressed that only light colors are allowed in this challenge. The reason? We want to dedicate our individual Opera Cake to Barbara of Winos and Foodies, the force behind "A Taste of Yellow", a food blog event that unites food bloggers around the globe to rally for LiveStrong Day. "It is Lance Armstrong Foundation's one day initiative to raise awareness and fund for the cancer fight". You can read more about LiveStrong Day here

slices of opera

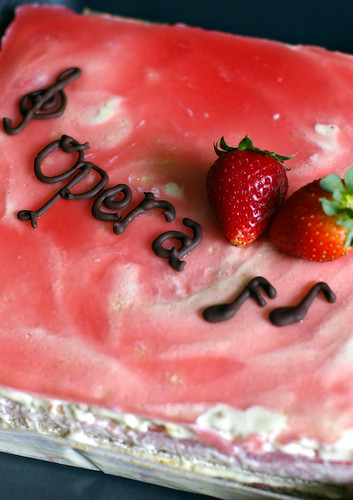
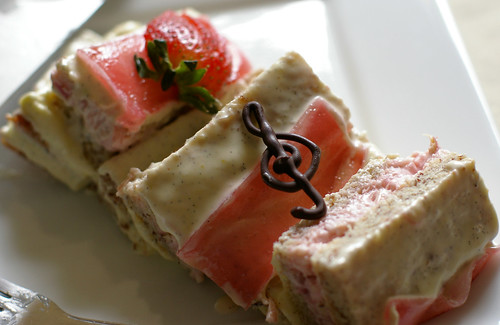
I settled on a french vanilla buttercream and rhurbarb mascarpone mousse combination for my L' Opera. They tasted exquisite on their own, so I have high hope that the cake would turn out a huge hit. The buttercream was on the runny side when I made it on Monday midnight, but I thought it would firm up once it's chilled. And with that optimistically naive mindset, I charged on and assembled the cake.

slices of fallen opera

As you can see, the buttercream didn't firm up, and I have a fallen Opera cake. Did I tell you that I didn't halve the recipe? The original recipe is good for 20 servings. Arghhhh...I am debating what to do with the rest of the cake. I hate to waste food, so I am risking my reputation (even though I doubt I have any)to shove the cake to OCT new colleagues.

So my first Opera Cake adventure isn't as successful as I have hoped for, but I certainly have fun putting it together. I finally tasted Pierre Herme's French Vanilla Buutercream and the Tartelette inspired rhurbarb mousse. I will certainly try making it again because I love all the components here, or perhaps I will do one with coffee and chocolate, or one with Asian inspired flavors. The flavor combinations are endless if you check out the Opera Cakes our 1000+ Daring Bakers have come up with for this month's challenge. You can check out their fascinating Opera Cakes here

Read more...

Monday, May 19, 2008

Looking at the bright side: Mango Mascarpone Mousse Cake

mango mascarpone mousse cake

Just the other day, OCT and I lamented on the higher cost of living here in Atlanta, compared to our previous stint in St Louis. Not only do we pay a steeper rent, we also find the price of grocery here more expensive. We could no longer find the one dollar a bunch asparagus, nor 3 for two dollar red bell peppers that we were spoilt with at St Louis Soulard market. The rice which is a staple in our household is five dollars more per bag; even the all purpose flour demands fifty cents more than before.

mango cake

Surviving on a postdoc fellow income, we certainly feel the pinch. But what good does it serve to whine about things we couldn't change right? Looking at the bright side, I have found some juicy sweet mangoes that could rival those from my childhood. Not to mention, they come with an endearing price tag too. They were fifty cent each in the Dekalb Farmer's Market the last time I looked. I told OCT that I intended to eat mango for breakfast / lunch / dinner / dessert from now on. Like any mango deprived people would do, I loaded a dozen of them into my shopping cart. At the same time, I started to think of all the wonderful things I'd do with them. Sorbet is definitely on the menu. Maybe a tropical tart or pavlova loaded with mango? OCT however, requested for a mango mousse cake. Sure, I can do that. It's only once in a blue moon that my rice-craving husband asks for something sweet for a change.

IMGP9058

I don't really have a recipe for the mousse and mango mirror, I simply tasted and adjusted the flavor as I moved along. However, I want to bring your attention to the sponge cake base. The recipe comes from none other than Christopher Kimball, the editor of Cook's Illustrated. He calls it the fool-proof sponge cake. The method of mixing is new to me, and I doubt it would work. But who am I to argue with the editor of Cook's Illustrated, who has all the answers to the perfect recipes of everything under the sun? So I sceptically followed the recipe as it was written. To my surprise, the recipe yielded the most amazing sponge cake I have ever whipped out. Plus it doesn't require much folding, which could intimidate many novice bakers. I highly recommend anyone who needs a fool proof recipe for sponge cake to give this a try.

IMGP9056

As for the mango mascarpone mousse and mirror, I promise the recipe will follow, after I have infiltrated my blood stream with enough caffeine tomorrow morning. Or afternoon. ;p Meanwhile, checkout the fool proof sponge cake recipe below.

Foolproof Sponge Cake
adapted from Christopher Kimball'sThe Kitchen Detective

Softened unsalted butter for the pans
1/2 cup cake flour
1/4 cup all-purpose flour
1 teaspoon baking powder
1/4 teaspoon table salt
2 tablespoons milk (I used soy milk)
4 tablespoons unsalted butter
1/2 teaspoon vanilla extract
5 large eggs, at room temperature
3/4 cup granulated sugar
1/4 teaspoon cream of tartar

Adjust an oven rack to the lower-middle position and heat the oven to 350°F (175°C). Grease two 8-or-9-inch cake pans and cover pan bottoms with rounds of parchment paper.

Whisk/sieve the flours, baking powder, and salt together in a medium bowl and set aside. Heat the milk and butter in a small saucepan over low heat until the butter melts. Take the sauce pan off the heat and add in vanilla extract; keep the mixture covered and warm.

Separate the eggs, placing the whites in the bowl of a standing mixer fitted with the whisk attachment (or a large mixing bowl if using a hand mixer or whisk) and reserving the yolks in a small bowl. Beat the whites on high speed until foamy. Gradually add 6 tablespoons of the sugar and the cream of tartar and continue to beat the whites to soft, moist peaks. If using a standing mixer transfer the beaten egg whites to a large bowl and add the egg yolks to the standing mixer bowl (you don't need to clean the bowl).

Beat the egg yolks with the remaining 6 tablespoons sugar on medium-high speed until the mixture is very thick and turns a pale lemon color, about 5 minutes. Add in the beaten egg whites to the yolks, but do not mix.

Sprinkle/sieve the flour mixture over the egg whites and mix on low speed for 10 seconds. Remove the bowl from the mixer, make a well in one side of the batter and pour the melted butter mixture into the bowl. Fold gently with a large rubber spatula until the batter shows no trace of flour and the whites and yolks are evenly mixed, about 8 strokes. Also make sure that you have incorporated the butter into the mixture. There should not be visible grease/oil as you pour the mixture into the cake pans.

Immediately pour the batter into the prepared pans. Bake until the cake tops are light brown and feel firm and spring back when touched, about 16 to 18 minutes for 9-inch cake pans and 20 to 22 minutes for 8-inch cake pans.

Cool completely on racks. Run a thin knife around the inside of the cake pans and then invert them onto the racks (or onto cardboard rounds or tart pan bottoms) to release the cakes from the pans. Remove the parchment paper.

To make the Mango Mascarpone Mousse
2 cups mango puree, from 2 large ripe mango
1 teaspoon of lime juice
3/4 cup heavy cream,
3/4 cup mascarpone,
1 (1/4oz)pack of gelatin powder,
1/4 cup sugar or more to taste

Puree flesh of 2 large mango in a blender to obtain 2 cups of mango puree. Add in the lime juice.

Sprinkle the gelatin powder in 1/4 cup of water, set aside for 5 minutes. After that, heat the mixture in microwave for 10 second, until the gelatin has dissolved.

Using the whisk attachment of a stand mixer/hand mixer, beat the mascarpone and sugar until it becomes light, add in the mango puree mixture and beat for another 3 minutes to combine. Taste, make sure that it's slightly sweeter than how you would like the mousse, keep in mind that the heavy cream fold in later will somehow dilute the flavor. Add in extra sugar, one tablespoon at a time until the desired sweetness. Pour the mango-mascarpone mixture to another big bowl, gently stir in the gelatin mixture. Mix well to combine.

Without washing the whisk attachment and mixing bowl, beat heavy cream until medium peak form. Fold the heavy cream into the mango mascarpone mixture.

To assemble:

Using a 8/9-inch sprinform pan or ring, layer one sponge cake at the bottom of the pan, and pour half of the mousse in. Use an offset spatula to smoothen the mousse. Next, layer the second sponge cake on top of the mousse. Follow by the remaining mousse. Cover the mousse with saran wrap and chill the cake while preparing the mirror.

To make the Mango Mirror:
1 cup of mango puree, from one ripe mango
1/2 teaspoon lime juice
2 to 3 tablespoons granulated sugar
1/2 a pouch of gelatin powder

Sprinkle the gelatin powder in 1/4 cup of water, set aside for 5 minutes. When the gelatin is softened, microwave the mixture for 10 seconds, until the gelatin has fully dissolved.

In a medium bowl, combine 1 cup of mango puree with 1/2 teaspoon of lime juice and 2 to 3 tablespoons of sugar, to taste. Mix in the gelatin powder. Once the mirror is made, immediately pour on top of the mousse. Chill in fridge for at least 4 hours.


Read more...

Sunday, May 18, 2008

Breads Distraction

I guess I just wanted to distract myself, so I baked a batch of bread. They were meant to be plain, like dinner rolls, but I thought they would be more photogenic with some embellishments.

IMGP8972

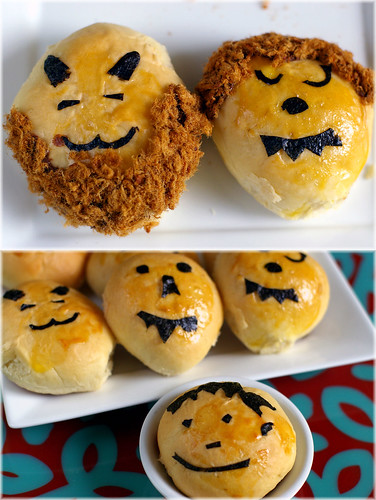
I cut half a sheet of nori into random shapes and pieces,not exactly knowing how I want to decorate the dough. The thought of shaping them into cute animals has briefly crossed my mind, unfortunately the breads have made up their minds against that idea. Instead of adorable animals, they turned out looking more like characters from a halloween party than anything. Spooky, I tell you!

bread family

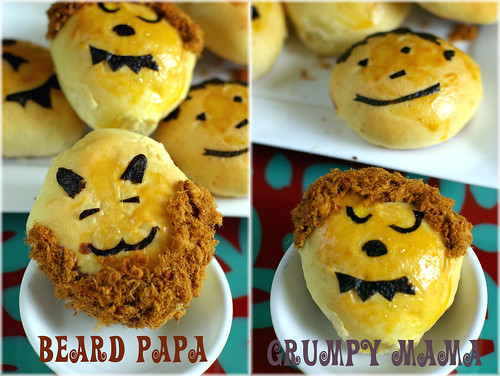
To make the bread less scary and more comical, I adhered some pork floss on them after they have cooled down. The first two turned out looking like a kind beardy old man, and a grumpy lady with a bad hair day.

family2


The bread recipe is the same one I used for caterpillar bread and pork floss bun. The "adhesive" was simply nutella. (It shouldn't surprise anyone that Nutella is one of the staples in this household, given my obssesion with it.) I was going to use mayonaise, but was too lazy to open a new bottle just for that. I am sure melted butter or even jam would work in a pinch too.


Read more...

Wednesday, May 14, 2008

To Aunt Mary

Last Sunday when I was all ready to post a recipe for Mother's Day, brother dropped me a message about my beloved aunt Mary critical condition in the cancer ward back home. She was admitted to the hospital on Sunday afternoon, the day when mothers around the world received tribute and recognition from their children.

IMGP8935

Aunt Mary, my father's younger sister is one of my favorite aunts. Growing up, she used to tell me that I bear resemblance to her in so many ways. We share the same love for dark chocolate, romantic novels, TVB dramas, traveling and good food. Both of us are vocal, and wouldn't hesitate to give the rest of our family members a piece of our minds when the necessary occasions arise.

IMGP8925


There is one story which I always request her to repeat. It was about her brother (dad) tearing up her textbook because aunt Mary refused to lend her immaculately completed homework to him! She gets all animated everytime she recounts the story(opps, sorry dad!)It makes me laugh so hard that my stomach hurts.

Aunt Mary is more than an aunt for me. She is a good friend who listens and understands me. She would secretly shove money into the hands of her needy college niece whenever I came home for vacation. It was a gesture of love and generosity and understanding. And I would never forget the love she has bestowed upon me.

IMGP8931

As I look back, I realise that I have never told her how much she means to me, and that I love her so much. Sure, we catch up whenever I go home. Always remember to get her the imported chocolate that she loves but couldn't find in KK. We would chat for hours, and she would update me on the gossips of our extended family, until it's the airing time for her favorite tv show, then she would leave. But I never once utter the three magical words. And I kept to myself the disappointment when she couldn't attend my wedding due to the chemo sessions, and the fear I felt 3 months ago, when I visited home for Chinese New Year. The fear that it would be the last good bye we bid.

IMGP8922


I wish I could tell her all of these now. I wish I could hear her laughter that bears such curious resemblance to ah po (to aunt Mary dismay). I wish we could hang out, gossip and pretend to be chocolate snobs, criticizing the inferiority of Kitkat and Cadbury made in SEA . But all these are just wishful thinking.

Aunty Mary, this one is for you. For all the memories, love, laughters and tears we share. Thank you for playing an important part in my life. I couldn't ask for a better aunt. I love you.


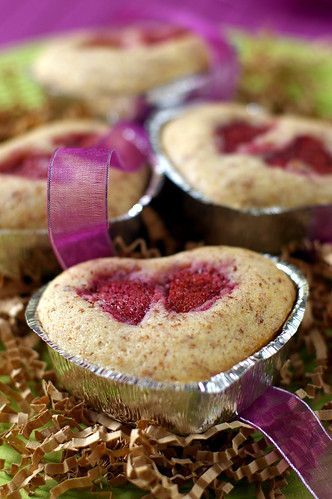
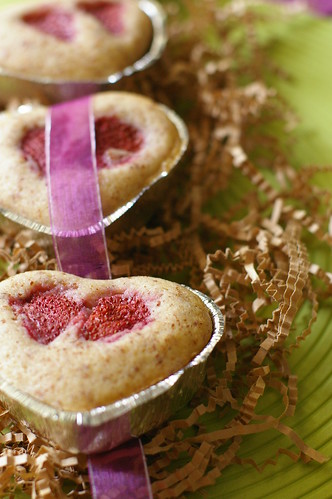
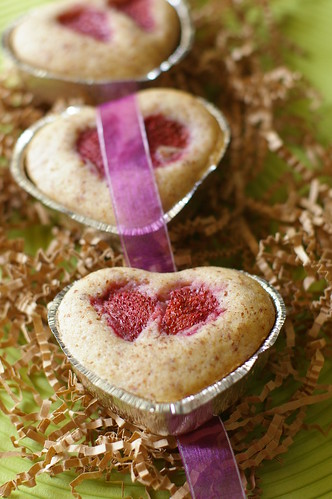
Strawberry Friands
adapted from Donna Hay's Modern Classics Book 2

9 tbsp butter, at room temperature
1 cup almond meal
1 2/3 cups icing sugar, sifted
3/4 cup all purpose flour, sifted
1/2 teaspoon baking powder
5 large egg whites
5 medium size strawberries, hulled and quartered.

Preheat the oven to 350F. Place the butter in a saucepan over low heat and cook until melted and a very light golden colour. Set aside.

Place the almond meal, icing sugar, flour and baking powder in a bowl and stir to combine. Add the egg whites and stir to combine. Add the butter and stir to combine.

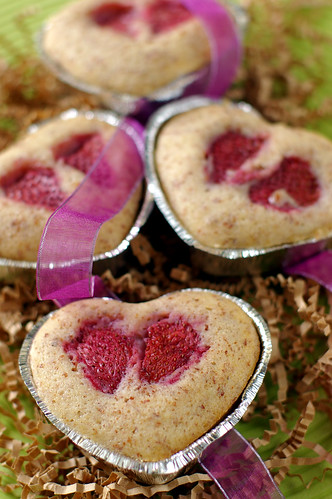
Grease 10 x 1/2 cup capacity muffin tins. Spoon 2 tablespoons of the mixture into each tin and carefully place the berries over the top. Bake for 15-20 minutes or until golden and springy to touch but moist in the centre.

note: I find the friands to be too sweet for my liking. I will probably decrease the amount of icing sugar used and incorporate some chopped berries in the batter next time.

Read more...

Wednesday, May 07, 2008

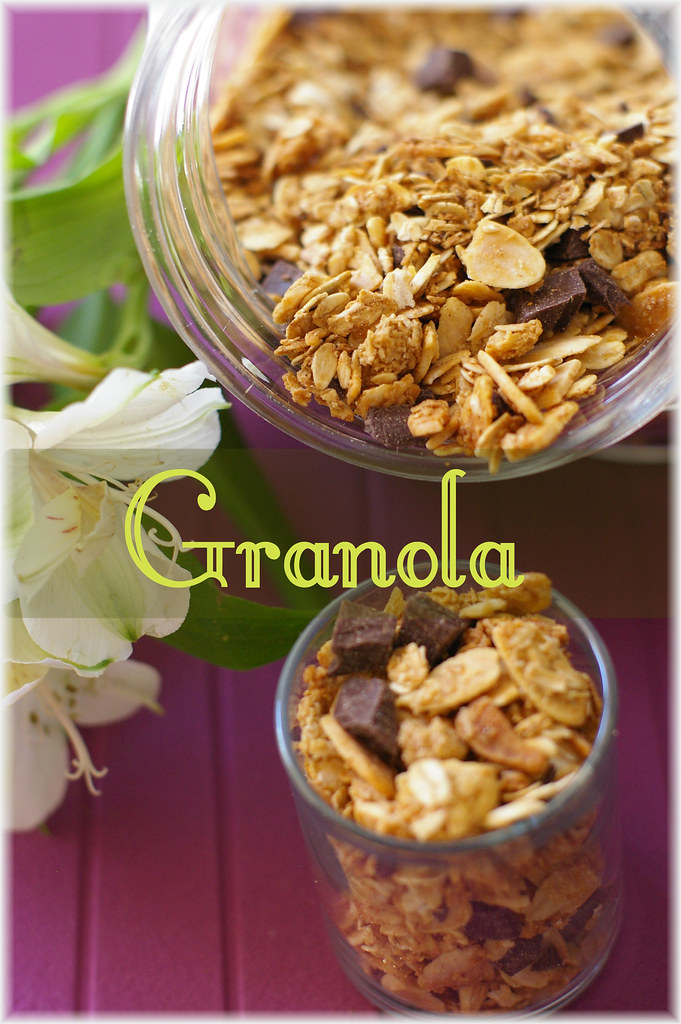
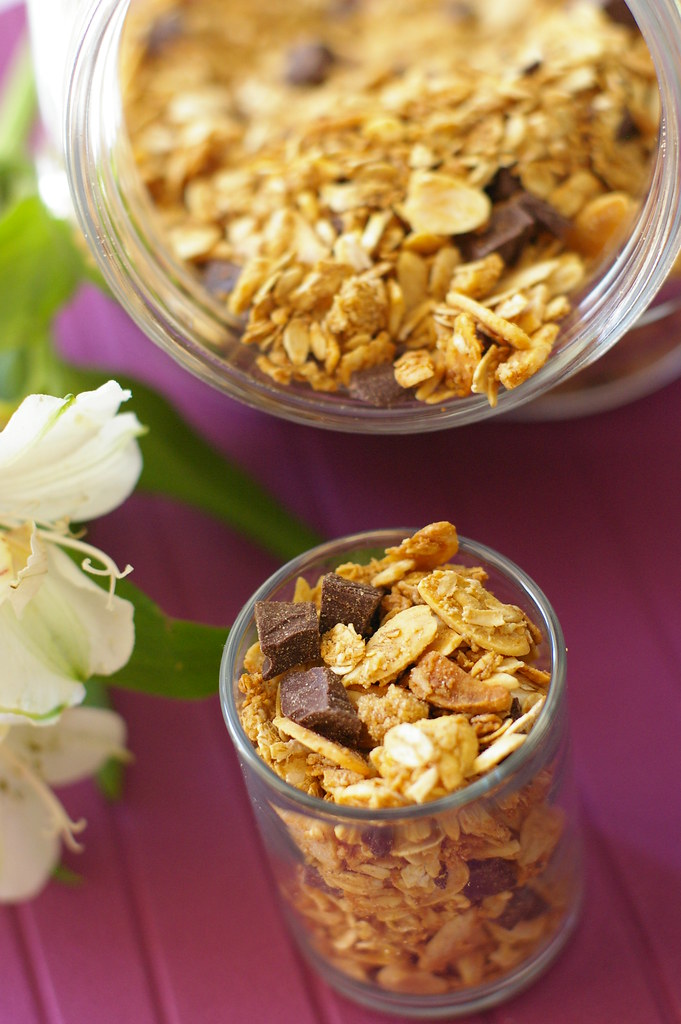
Learning to eat breakfast : Almond and Dark Chocolate Granola

I feel terrible confessing to the world that I don't eat breakfast in my blackberries and mango clafoutis post. The more I think about, the worse I feel. Mum would be sad if she knows that I skip breakfast, wouldn't she? I mean, mothers alway tell their children not to skip breakfast. And here I am, shamelessly proclaiming my undisciplined life. Very bad.

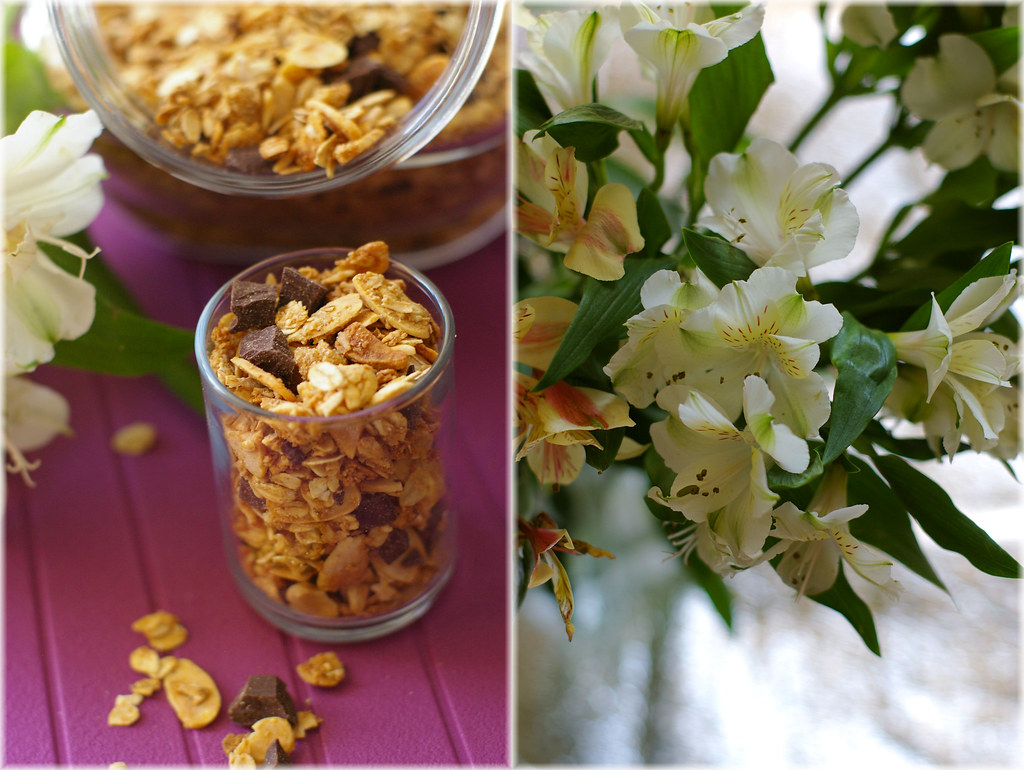
granola


Although a quarter of 2008 has passed, I am going to squeeze "eating breakfast" into my 2008 resolution.It is never too late to add another resolution as long as I can keep it right?

Where are we? Oh yes, da breakfast. Something nutritious, healthy, easy and tasty. After some googling and tastespotting, I decided on granola. One with 70% dark chocolate, just to make sure I will stick with the regime. The granola inspiration comes from one of my favorite bloggers- Molly, who posted a granola recipe, which was in turn inspired by the granola she had in Paris.


granola


If Parisan can eat chocolate for breakfast, why can't I, right? I adapted Molly's recipe to use whatever I have on hand and enjoy eating. She recommended Trader Joe's bittersweet chocolate, but I opt for half a block of the Green and Black 70% chocolate that I got from Target (while it was on sale, of couse). Mostly because the thick slab of Trader Joe's bittersweet chocolate is too hard to chop finely. And using 70% chocolate makes the granola slightly healthier.

I have also grinded half of the rolled oats, for texture,a tip I learned from The Traveler's Lunchbox post on granola. I have just started my breakfast regime this morning, with a cup of granola. Tomorrow, I am eating it with a cup of plain soy milk, as Molly suggested. One thing you need to know about this granola- it's great for snacking too. Definitely make a double batch!

Granola


Almond and Dark Chocolate Granola
inspired by this recipe

3 cups rolled oats
1 cup sliced almonds
2 tbsp light brown sugar
Pinch of salt
5 tbsp mild honey
1 tbsp maple syrup
2 tbsp vegetable oil
1/2 block of 3.5oz 70% chocolate or more, finely chopped

Preheat the oven to 300°F.
In a food processor, coffee grinder or blender, grind half the oats to a fine powder.

In a large bowl, combine the grinded oats, oats, almonds, brown sugar, and salt. Stir well to blend.

Warm the honey, maple syrup and oil over low heat, whisking occasionally –until the honey is loose, this should not take long, about 15 seconds. Pour over the dry ingredients, and stir to combine well.

Spread the mixture evenly on an oiled baking sheet. Bake for about 20 minutes, or until golden. Stirring the granola half way through for even baking. When it’s ready, remove the pan from the oven, stir well – this will keep it from cooling into a hard, solid sheet – and cool completely.

When cool, transfer the granola to a large bowl, storage jar, or zipper-lock plastic bag. Add the chocolate, and stir (or shake, if using a jar or bag) to mix.

Makes about 5 cups.

Read more...

Friday, May 02, 2008

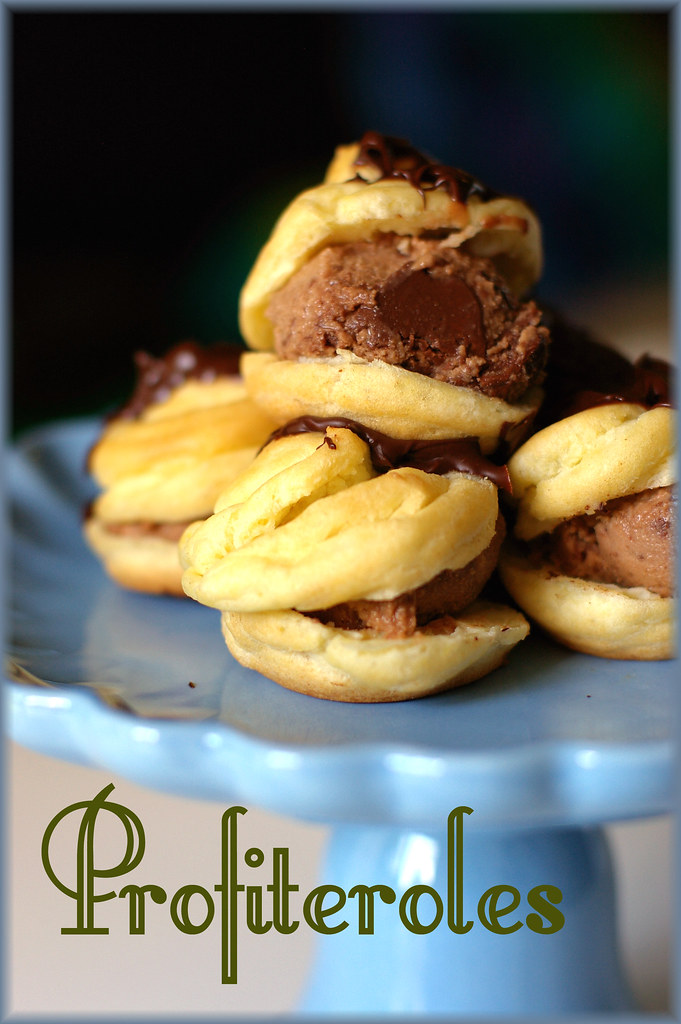
Try anything new lately? - Profiteroles with Gianduja Gelato

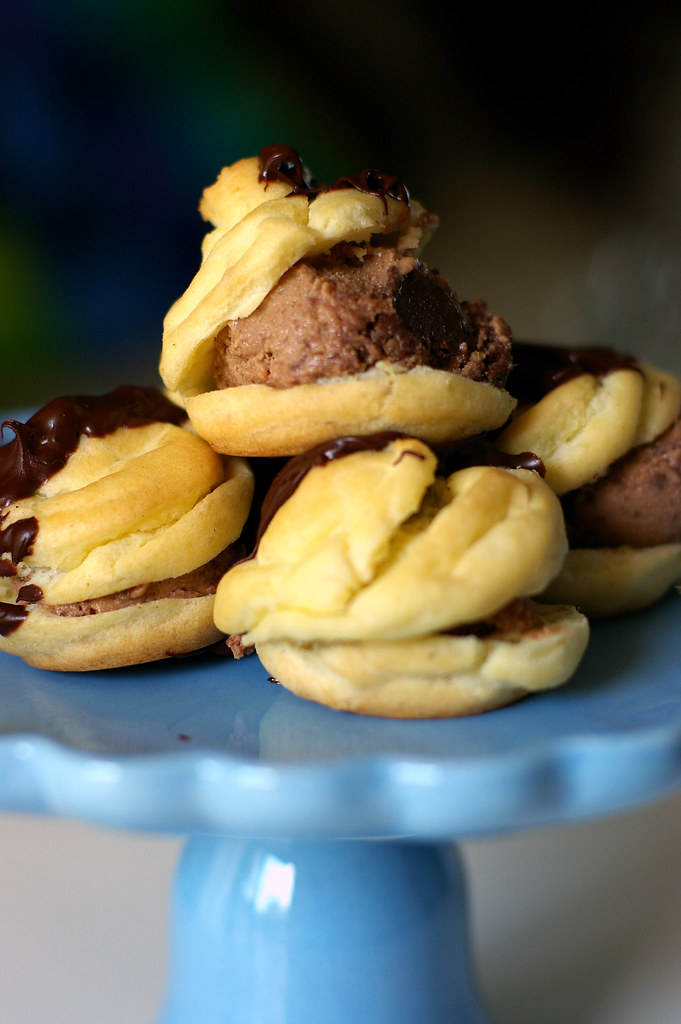
Profiteroles with Gianduja Gelato

Pate a Choux has always been on my " things to conquer" list. For some inexplicable reason, I avoid making it for a very long time. The mere thought of making Pate a Choux is unnerving;what with the boiling of butter and water, stirring in flour all at once until the whole mixture comes together like a ball, piping and baking. Doesn't reading this makes you feel a little dizzy? And making the task sounds insurmountable?

profiterole2

Then the lovely profiteroles grace the cover of March 2008 Gourmet magazine, and I was seriously smitten. Have you seen that cover? It made me want to run into kitchen and whip up a batch right there and then. But I was too busy packing for our move in March, so the profiterole project was put on hold. Also, I haven't gotten my red hot Ice Cream Maker in March yet, so there was no rush for the profiteroles.

This is until I churned out a batch of Gianduja Gelato with Nutella on Wednesday night. Oh, you must have heard rave reviews of Mr Lebovitz's said gelato here, here,here and here. And I just want to add that all of them are right! The gelato is delizioso.Since gianduja connotes Nutella to me, I decided to swirl some into the gelato instead of Stracciatella that David suggested. In my overzelous, I probably use more Nutella than I should.(ok, that's almost a jar), And my gelato turned out to be richer than Oprah. So I think I will try to use melted bittersweet chocolate next time, and pairing the Nutella with some other flavors.

IMGP8866

Having said that, the Gianduja Gelato with Nutella is perfect, when nested inside the crisp puff of pastry in the form of profiteroles. Surprisingly when I confronted my fear of choux pastry face on, it wasn't half as daunting as I made it out to be. To the contrary, it was quite a breezy process. Just make sure that you read the instructions CAREFULLY. The first batch I made was inedible, because I misread the amount of butter. The recipe says 3/4 stick of butter. I misread it and used 3/4 cup of butter. Major mistake! The puffs were sizzling and sweating oil in the hot oven. I wasted 3 eggs and 1.5 sticks of butter, but there is no point crying over oily puffs. Moving on, the second batch rose beautifully and voila, I can now cross off pate a choux from my list.

Since my mini ice cream scoop is used to get the perfect amount of gelato in these profiteroles, I am submitting this entry to the Tasty Tools: Scoop Challenge, hosted by Joelen's Culinary Adventures. Check out Joelen's blog on 5 May to read about many more delicious treats that others scoop out with their ice cream scoops!

Have a great weekend, everyone!

Profiteroles with Gianduja Gelato with Nutella Swirl
adapted from gourmet.com and Perfect Scoop

1 qt Gianduja Gelato with Nutella Swirl
3/4 stick unsalted butter, cut into pieces
3/4 cup water
1/4 teaspoon salt
3/4 cup all-purpose flour
3 large eggs

Chill a small metal baking pan in freezer. Form 20 gelato balls with scoop and freeze in chilled pan at least 1 hour (this will make serving faster).

Preheat oven to 425°F with rack in middle. Butter a large baking sheet.

Bring butter, water, and salt to a boil in a small heavy saucepan, stirring until butter is melted. Reduce heat to medium, then add flour all at once and cook, beating with a wooden spoon, until mixture pulls away from side of pan and forms a ball, about 30 seconds.

Transfer mixture to a bowl and cool slightly, 2 to 3 minutes.

Add eggs 1 at a time, beating well with an electric mixer after each addition.
Transfer warm mixture to pastry bag and pipe 18 mounds (about 1 1/4 inches wide and 1 inch high) 1 inch apart on baking sheet.

Bake until puffed and golden brown, 20 to 25 minutes total. Prick each profiterole once with a skewer, then return to oven to dry, propping oven door slightly ajar, 3 minutes. Cool on sheet on a rack.

Read more...

Monday, April 28, 2008

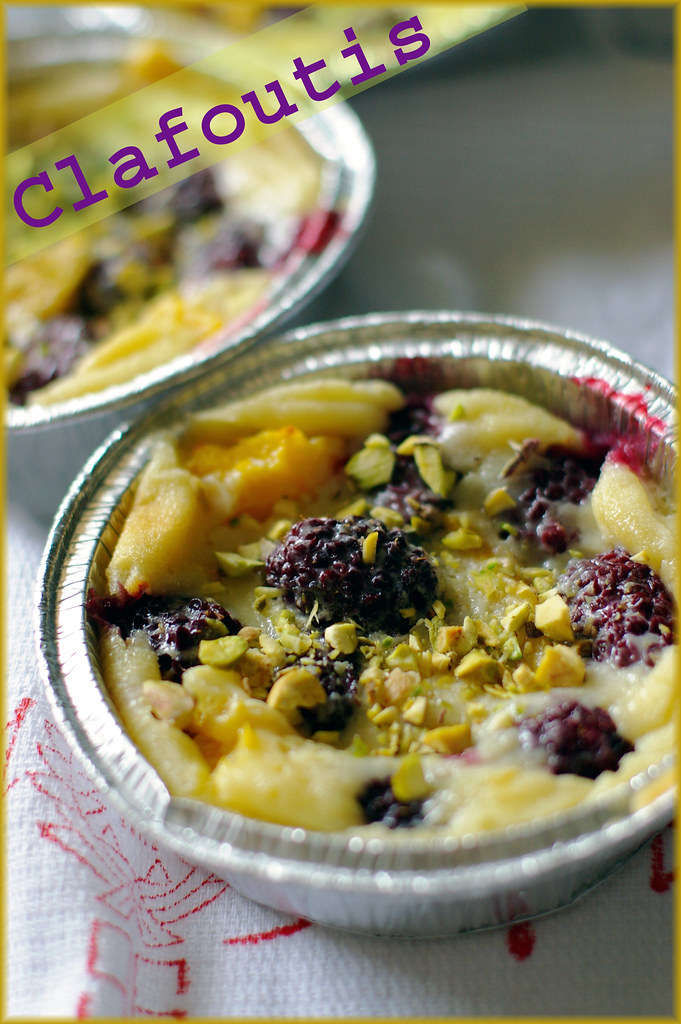
Blackberries and Mango Clafoutis

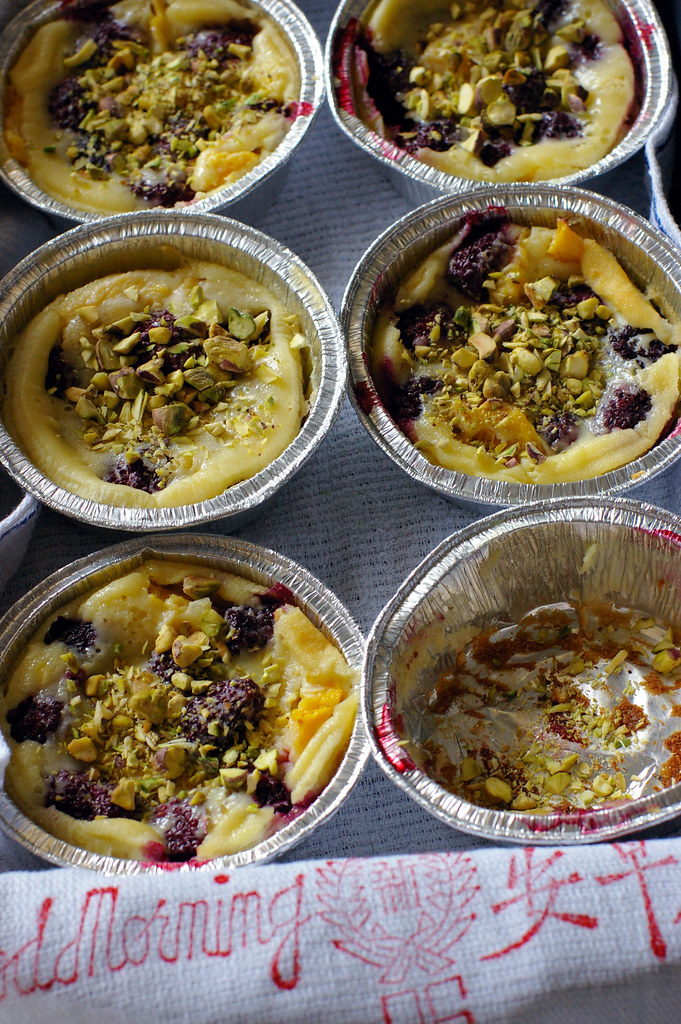
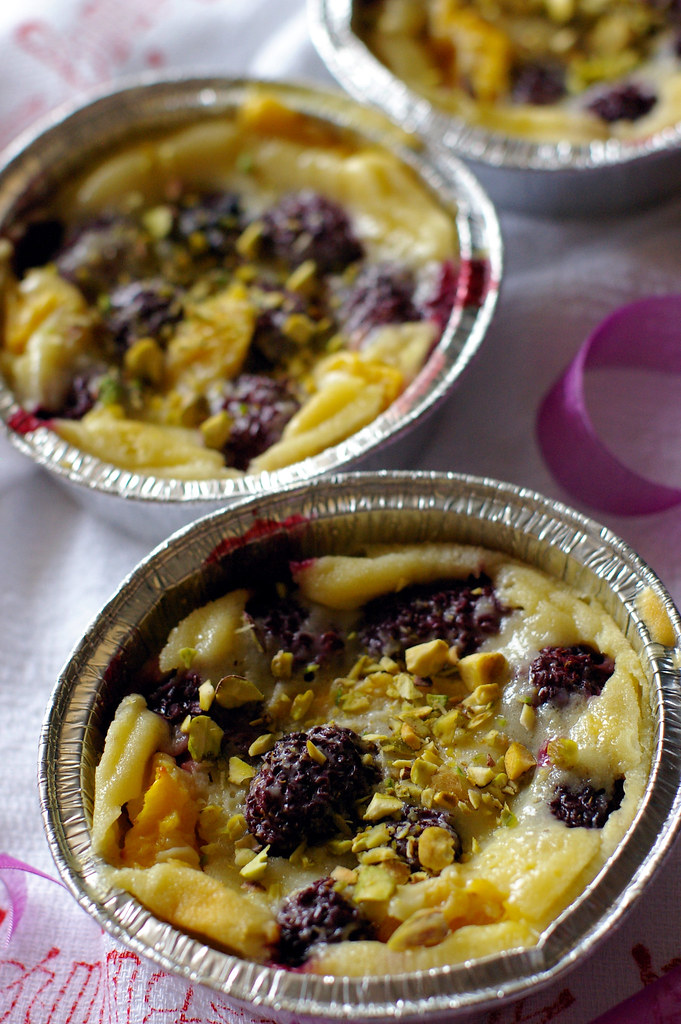
Blackberries and mango Clafoutis


Blackberries and Mango Clafoutis was what I had for breakfast last weekend. Man, I feel so proud of myself when I eat breakfast on rare occasions! Although I know it's important and it will fuel me until lunch time, and helps me to focus etc, I am used to skipping breakfast. It's bad, I know. You see, I am not a milk drinker. So the milk+ granola combo that most people eat for breakfast doesn't work for me. And fruits? No, they help in digestion, and probably will make me hungrier than full later on. How about bread? Yes. I ate that for 13 years while growing up, so No thanks. Normally, a cup of coffee is all I have for breakfast.

Blackberries and mango Clafoutis

To rectify the situation, I try to make something that would pique my interest for breakfast on weekends. Pancakes work for awhile, then it lost its appeal. This month, thanks to Bron, who is hosting the latest round of Hay Hay It's Donna's Day, I am reminded that clafoutis is perfectly acceptable for breakfast. And I should bake a batch before I miss the deadline again! Oh, I am terrible at keeping deadlines. Or other important dates/numbers in general.

Blackberries and mango Clafoutis


Although I enjoy eating cherry clafoutis, they are just not available this time of the year, (depressing, I know). Instead, I spied some mangoes and blackberries on sale in the grocery store. Not entirely sure if the two would go well together, I know there's just one way to find out- whipping up a batch myself. Which I clearly did. The lovely thing about this clafoutis batter is, it is highly adaptive. It works for cherries, plums and berries + mango! Now I have a recipe for blackberries & mango clafoutis! I topped the clafoutis with chopped pistachio, which added a nice contrasting texture and flavor to the clafoutis.

I love it, I am now a good girl who eats her breakfast! (on weekends :p) So do you eat breakfast ? What do you eat for breakfast everyday? I need some inspiration here.


Blackberries and Mango Clafoutis
adapted from Ceres and Bacchus

3 eggs
1/2 cup sugar
1/2 cup butter, melted
1 cup all purpose flour
1 cup milk
1/2 tsp. vanilla
2 6 oz pack blackberries
1/2 sweet mango, diced (you can use more mango and less berries too)
some chopped pistachios


Preheat the oven to 400 F. With a mixing bowl, beat the sugar and eggs with a wire whisk until they turn lighter in color. Gradually add in the melted butter, beating to incorporate. Add the flour all at once and whisk until the batter is a homogeneous mixture.

Slowly pour in the milk and vanilla,whisking to combine. The batter should be very smooth and shiny.

Distribute the berries and diced mango in 7 disposable aluminium dishes,(or you can also use a buttered glass or earthenware baking dish, cake pan (9 or 10 inches in diameter) or skillet, as the original recipe suggests). Pour the batter over the fruit. Bake for approximately 20-30 minutes (longer if you can using a bigger pan), until slightly browned and almost completely set in the middle. Serve warm, at room temperature or cold. (I baked them at night, had one before sleep and another one for breakfast the next morning.)

Top some chopped pistachio on the clafoutis before serving.

Make 7 individual size clafoutis for weekend breakfast.

Read more...

Sunday, April 27, 2008

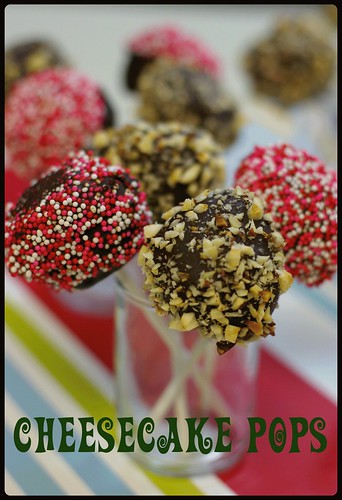
Daring Bakers Challenge: Cheesecake Pops

cheesecake pops

More than 1000 cheesecakes pops are landing on the food blog world today, because this is the Daring Bakers challenge for April! It is no secret that cheesecake is one of my favorite desserts, seeing that I have made quite a few varieties in the past. I would even stock up on cream cheese when they are going on sale in the grocery stores!
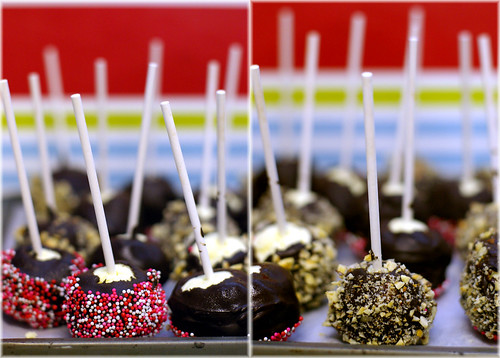
cheesecake pops

Instead of baking one big cheesecake, our hostesses Elle of Feeding My Enthusiasms and Deborah of Taste and Tell have chosen the Cheesecake pops from Jill O'Connor's Sticky, Chewy, Messy, Gooey: Desserts for the Serious Sweet Tooth as our April challenge. Readers, you will soon hear the resounding "YUM" from other fellow DBers that this is one delicious and fun challenge.
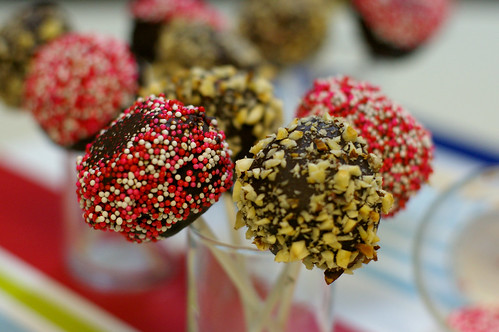
more cheesecake pops

The original recipe makes 30 to 40 pops, which would be great for party. But seeing that we won't have any party going on anytime soon, I have scaled the recipe down to 3/5. Most of them are brought to OCT lab, but I save some for snacking in the afternoon. I love that they are of the perfect size to nibble. It will still be less than the calories of 1 slice of cheesecake if I have eaten 2 cheesecake pops. And if I only eat one, that's practically no calories consumed. (yeah, right..)
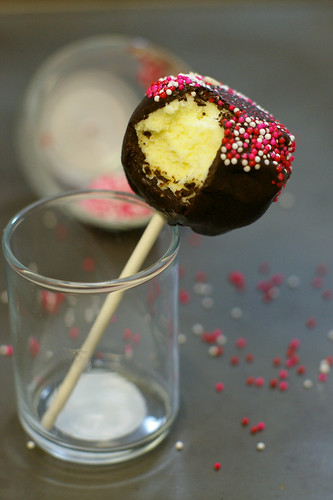
IMGP8636

I have posted two recipes below; one is my scale-down version and one is the original. Remember to check out other fabulous cheesecake pops from my fellow Daring Bakers here. Thanks Deborah and Elle for the fun and delicious challenge. This recipe has both thumbs up from this cheesecake lover! xoxo.
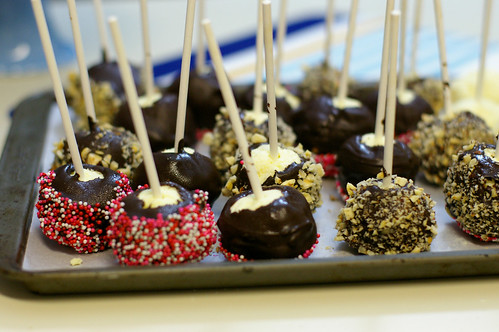
IMGP8598


Cheesecake Pops
from Sticky, Chewy, Messy, Gooey: Desserts for the Serious Sweet Tooth by Jill O’Connor
Makes 30 – 40 Pops

5 8-oz. packages cream cheese at room temperature
2 cups sugar
1/4 cup all-purpose flour
1/4 teaspoon salt
5 large eggs
2 egg yolks
2 teaspoons pure vanilla extract
1/4 cup heavy cream
Boiling water as needed

Thirty to forty 8-inch lollipop sticks

1 pound chocolate, finely chopped – you can use all one kind or half and half of dark, milk, or white (Alternately, you can use 1 pound of flavored coatings, also known as summer coating, confectionary coating or wafer chocolate – candy supply stores carry colors, as well as the three kinds of chocolate.)

2 tablespoons vegetable shortening
(Note: White chocolate is harder to use this way, but not impossible)

Assorted decorations such as chopped nuts, colored jimmies, crushed peppermints, mini chocolate chips, sanding sugars, dragees) - Optional


Position oven rack in the middle of the oven and preheat to 325 degrees F. Set some water to boil.

In a large bowl, beat together the cream cheese, sugar, flour, and salt until smooth. If using a mixer, mix on low speed. Add the whole eggs and the egg yolks, one at a time, beating well (but still at low speed) after each addition. Beat in the vanilla and cream.

Grease a 10-inch cake pan (not a springform pan), and pour the batter into the cake pan. Place the pan in a larger roasting pan. Fill the roasting pan with the boiling water until it reaches halfway up the sides of the cake pan. Bake until the cheesecake is firm and slightly golden on top, 35 to 45 minutes.

Remove the cheesecake from the water bath and cool to room temperature. Cover the cheesecake with plastic wrap and refrigerate until very cold, at least 3 hours or up to overnight.

When the cheesecake is cold and very firm, scoop the cheesecake into 2-ounce balls and place on a parchment paper-lined baking sheet. Carefully insert a lollipop stick into each cheesecake ball. Freeze the cheesecake pops, uncovered, until very hard, at least 1 – 2 hours.

When the cheesecake pops are frozen and ready for dipping, prepare the chocolate. In the top of a double boiler, set over simmering water, or in a heatproof bowl set over a pot of simmering water, heat half the chocolate and half the shortening, stirring often, until chocolate is melted and chocolate and shortening are combined. Stir until completely smooth. Do not heat the chocolate too much or your chocolate will lose it’s shine after it has dried. Save the rest of the chocolate and shortening for later dipping, or use another type of chocolate for variety.

Alternately, you can microwave the same amount of chocolate coating pieces on high at 30 second intervals, stirring until smooth.

Quickly dip a frozen cheesecake pop in the melted chocolate, swirling quickly to coat it completely. Shake off any excess into the melted chocolate. If you like, you can now roll the pops quickly in optional decorations. You can also drizzle them with a contrasting color of melted chocolate (dark chocolate drizzled over milk chocolate or white chocolate over dark chocolate, etc.) Place the pop on a clean parchment paper-lined baking sheet to set. Repeat with remaining pops, melting more chocolate and shortening (or confectionary chocolate pieces) as needed.

Refrigerate the pops for up to 24 hours, until ready to serve.

more cheesecake pops


Mandy's 3/5 low fat version

3 8-oz. packages cream cheese at room temperature (I used 2 blocks of Neufatchel and 1 block of original)
1 cup sugar
1/4 cup all-purpose flour
1/2 teaspoon salt
3 large eggs
1 egg yolks
1.5 teaspoons pure vanilla extract
1/8 cup heavy cream
Boiling water as needed

Proceed as mentioned in the recipe above.
Note: I bake the cheesecake in a 9x3 loaf pan for about 45 minutes, depending on the temperature of your oven, it may need shorter or longer time. Check your cheesecake after 25-30 minutes.

Read more...

Thursday, April 24, 2008

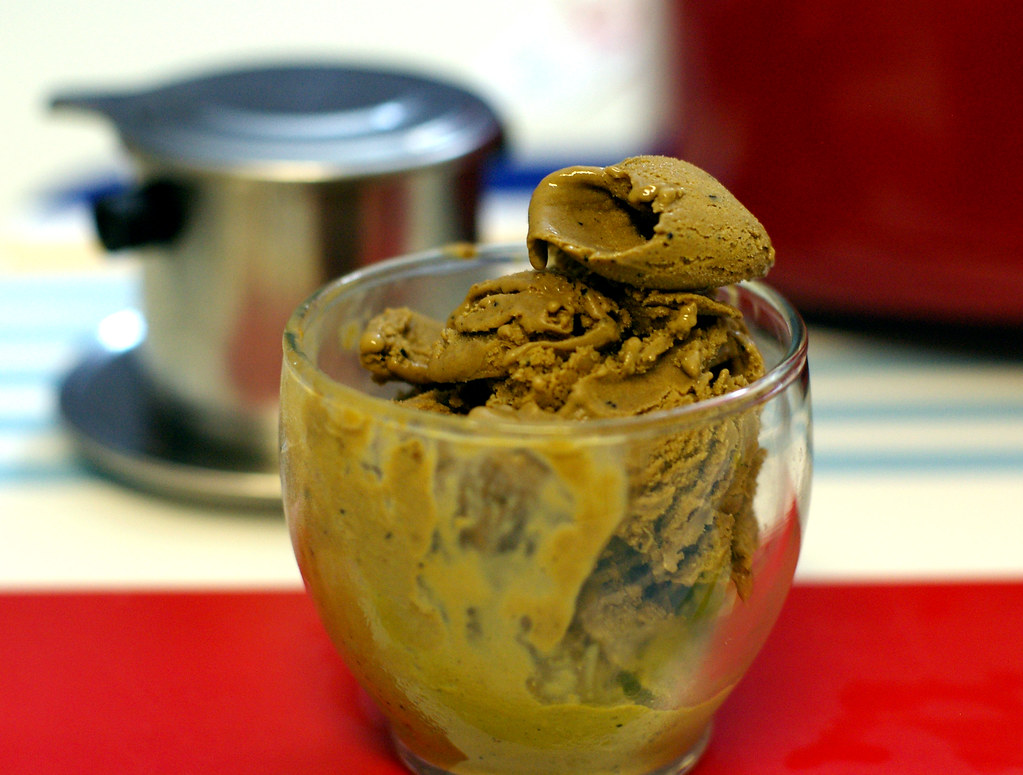
Pichet Ong's Vietnamese Coffee Ice Cream and Meet My New Ice Cream Maker

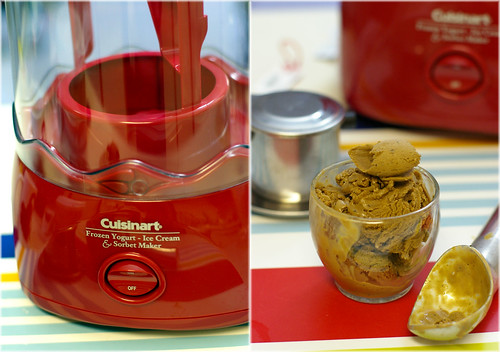
ice cream1

An ice cream maker has been on my "to-buy-list" for the looongest time. Everytime I go into the Bed Bath and Beyond store, I tell OCT that I am going to get it once we moved to Atlanta.

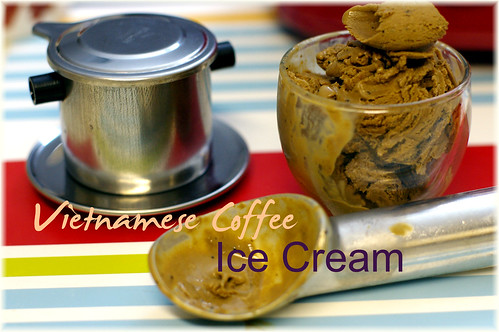
You proud owners of ice cream makers out there have no idea how tortured I was, watching these talented and imaginative people posted their ice creams photos on their blogs. If it's not for the move, I would have gotten mine loooooooong ago. OCT never understood my fascination with ice cream maker. "What's wrong with store bought ice creams?" He asked. Nothing, honey. But I just want to make my own wacky flavors. Like this Vietnamese Coffee Ice Cream.

I am inseparable from my nifty Vietnamese coffee filter ever since I bought it few weeks ago. That potent little cup of coffee is all I need to stay alert for the whole day. Because I use much less condensed milk than the restaurants, I don't feel too guilty drinking on a daily basis. Oh,I digress.

ice cream

So I decided it would only be fitting to make my first batch of ice cream with my latest obsession- Vietnamese Coffee. The ice cream tastes almost like the iced Vietnamese Coffee, and that's the way I like it. OCT, being a non-coffee drinker, thinks that it is not sweet enough, and the coffee flavor is too overpowering.I guess that means more for me, which is always better:D)

Not the perfect scoop yet, but at least it is a start.

IMGP8586


p/s: The lovely Tartelette made a version of Vietnamese Coffee Ice Cream sometime ago, and here's her version.

Pichet Ong's Vietnamese Coffee Ice Cream
from foodandwine.com

2 cups whole milk
1 cup plus 2 tablespoons sweetened condensed milk
1/2 cup ground Vietnamese coffee
Pinch of salt
6 large egg yolks

In a medium saucepan, combine the whole milk, condensed milk, ground coffee and salt and bring to a simmer. Remove from the heat and let stand for 20 minutes. Strain through a fine sieve lined with several layers of moistened cheesecloth.

Return the steeped milk to the saucepan and bring to a simmer. In a bowl, whisk the egg yolks until slightly pale. Gradually whisk in the hot milk; refrigerate until cold. Freeze the custard in an ice cream maker. Transfer the ice cream to a container and freeze until firm enough to scoop.

Read more...

Saturday, April 19, 2008

A Taste of Yellow: Steamed Fish Rolls

yellow_logo_3

A taste of yellow is a food blogging event started by Barbara of Winos and Foodies last year in support of the LiveStrong Day. 149 bloggers participated by making dishes with an element of yellow food last year. I have no doubt that the numbers will increase this year as cancers have affected more people in all walks of life.

taste of yellow


I first learned about cancer when I was 9 years old. It affected my grandpa, the person I love the most in the entire world. It's hard to talk about grandpa without having tears welling up in my eyes. Although he has passed on for almost 20 years now, I still miss him a lot. More so on the special moment in my life, like my graduations and wedding. And I know how much he wished to see me in my wedding gown. But cancer took him away, even before he saw me graduating from primary school.

Grandpa was a joyous person and he knew how to enjoy life. He traveled whenever he could, and he and grandma were regulars in clubs where they loved to go and dance. Yes, my grandpa was a great dancer. Unfortunately, he never passed on that gene to any of his children or grandchildren. When I think of grandpa, I think of his infectious laughter, his positive outlook on life, the jokes we shared, the story about tiger and a little girl that I asked him to repeat one too many times and the delicious chinese meals he cooked.

IMGP6762


When grandpa was alive, egg used to be one of his favorite foods. I think it's only appropiate for me to make something with eggs as my contribution for this year's A Taste of Yellow. So steamed fish rolls it is. I first saw the recipe on Chubby Hubby, and then my friend Rasa Malaysia made it too. The locals in my hometown have a similar version of this dish, but between you and me, I like the bloggers' version better.

Steamed Fish Rolls
adapted from Rasa Malaysia

3 extra large eggs (makes about 6 small fish rolls)
6 sheets of roasted nori or seaweed
1/2 pound fish paste or half a box of frozen fish paste (get it from any Asian Grocery store)
4 or 5 medium shrimps, shelled and deveined, finely minced
1 stalk scallions (chopped into tiny bits)
1/4 teaspoon sesame oil
3 dashes white pepper powder
1/8 teaspoon salt
1 teaspoon Japanese mirin (optional)

Defrost the frozen fish paste and add in minced shrimps, scallions, sesame oil, and white pepper. Mix well and set aside. Beat the eggs and add mirin, if using and salt. Heat up a non-stick omelet pan (any nonstick pan with 8-9-inches in diameter is fine) and make about 6 thin omelets. Set the omelets aside to let cool.

After the omelets are fully cooled, transfer one onto a dry and clean chopping board. Lay a piece of roasted seaweed or nori on top of the omelet. Cut the edges of the seaweed sheet off with a kitchen shear, so they match the shape of the omelet perfectly. Then, spread a thin layer of the fish paste mixture evenly on top of the roasted seaweed sheet and roll the omelet up firmly. Seal the omelet with the fish paste so the fish roll is nice and tight. Repeat the same for the remaining omelets.

Transfer the fish rolls onto a plate and steam in hot boiling water for 8-10 minutes or until the fish paste fillings turn opaque. Cut the fish rolls into small pieces and serve immediately with chilli sauce.

note: for step by step illustrations, check out my fellow Malaysian-My Kitchen Snippet's post

Read more...

Thursday, April 17, 2008

Moscato and Vanilla Poached Pears and Getting to Know My Oven

spring


Growing up, I have never been the girliest girl among friends. I probably checked the content of the fridge more often than checking myself out in the mirror. Yes, I am one who doesn't even look into the mirror when I wash hands, after going to the bathroom. Especially so in the the public bathrooms.

Given my total negligence on my appearance, I turn out to be slighly above average as an Asian female homo sapiens, thanks to my parents excellent genes. However, beneath my tomboy-ish skin, my favorite color happens to be pink. The girliest color among all.

spring1

When I see this tree blooming with pink flowers in front of my new apartment, I go crazy taking hundreds of photos of it, at different angles, once in the morning and once before sunset. It is a good omen, I tell myself. I shall get into the kitchen to bake something marvelous and fill our new house with delicious scent.

Here comes the problem.

Despite my enthusiasm of a new and bigger kitchen, my first few collaborations with the oven don't turn out as well as I have anticipated. A failed batch of Pandan chiffon cake, chocolate and pear clafoutis and Nutella cupcakes later, I know I need more time to get to know the oven.

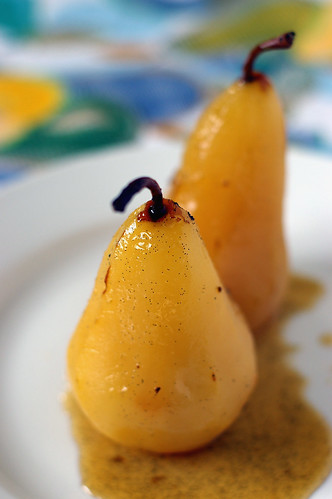
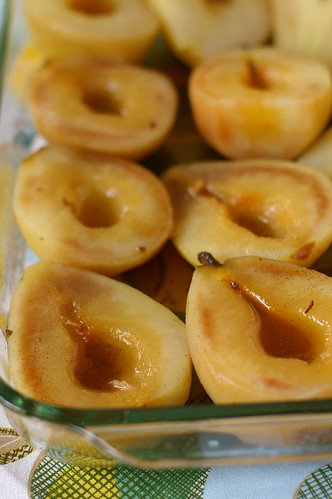
sweet wine poached pears

It is time like this that reminds me of the poached pears I made for a dinner party not long ago. Tired of thinking what else to bake, and the prospect of cleaning many bowls, I decided to bring something different this time. With a few pears sitting in the refrigerator, it would be a perfect occasion to try my hand at poaching. The delicious pears have then be devored (with some premium quality ice-cream), with photos taken as proof, then promptly forgotten and burried in one of the picture folders. Until now. This effortless dessert would be perfect at time like this.

sweet wine poached pears

Poaching is a simple and healthy technique to impart flavors. As fancy as the term sounds, poaching is nothing more than immersing the desired fruits or meat into a flavorful simmering liquid. I poached the pears roughly based on a recipe from Epicurious.com. But one could easily substitute any components of the poaching liquid to obtain the desirable taste. This is the kind of dessert one needs when the oven is not cooperative. :)

Note: If you come via feeds, click through to check out my new layout. I get bored and decided to give my blog a facelift, again.


Moscato and Vanilla Poached Pears
adapted from epicurious.com

6 firm but ripe large Bosc/Anjou pears, peeled, halved, cored
2 tablespoons fresh lemon juice
2 cup water
1.5 cups Moscato
12 tablespoons honey
1 vanilla bean, split lengthwise

Toss pears with lemon juice in large bowl. Set aside. Combine water, Moscato and honey in large saucepan. Scrape in seeds from vanilla bean; add bean. Stir over medium heat until honey dissolves. Add pears. Cover mixture with round piece of parchment paper. Reduce heat to medium-low. Simmer until pears are just tender when pierced, turning when half-way through cooking, about 15-25 minutes.

Using slotted spoon, transfer pears to large bowl. Boil poaching liquid until reduced to half. Cool syrup. Pour syrup over pears. Cover and refrigerate until cold, at least 8 hours or overnight. Remove vanilla bean.

Halved the pears, removing the cores with stem attached. Or thinly slice each pear half lengthwise, leaving slices attached at stem end for a fancier presentation. Using metal spatula, transfer pears to plates. Spoon some syrup over pears. Serve with ice cream or enjoy the poached pears as they are.

Read more...

Saturday, April 12, 2008

For The Sack of Nostalgia- A recipe of Caterpillar Bread

Caterpillar bread


Growing up, the time that we kids looked forward the most was when the bread van pull into the neighborhood. We usually called the man behind the wheel- "the bread van uncle". Sadly, I don't recall having another nicer name for the movable vendor who sells various kinds of Asian breads, pastries and snacks out of the back of his van. Normally, we could hear the unmistakable rumbling of his weathered engine with the loud and clear honking miles away, and would patiently wait for it to arrive at its designated stop, usually under a shady tree, 2 houses down from ours at 4p.m.

IMGP7866


My younger brother Alan would always get a hot dog bun, I think he is a devoted hot dog buns follower. Sometime I would get something chocolatey, such as a chocolate cream bun, or sometime I would join him and get a hot dog bun.

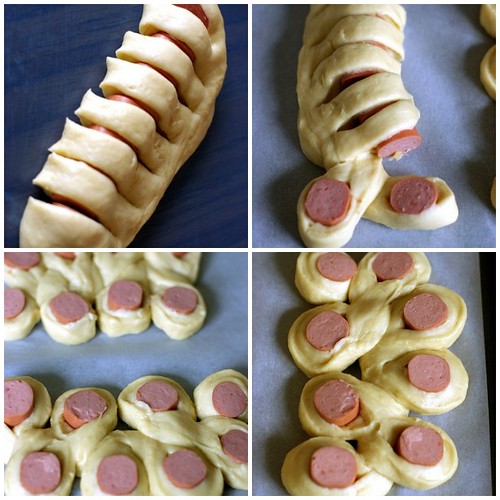
So where is this going and what does this have to do with the Caterpillar Bread, you ask? Well, I believe that this caterpillar breads that surfaced and proliferated in many Asian bakeries in late 90's was a derivative of my brother's favorite hot dog bun. And wouldn't it be fun if I could recreate his childhood favorite bread and surprise him when we meet again? I have a feeling that the hot dog bun may still be his favorite bun now. Some things just never change. :p

hotdog bun


My creation


I don't think mine turned out looking like caterpillars, they looked more like turtles, but it was a fun project to undertake on a weekend nonetheless! OCT like to bring them to work on busy days when he doesn't have time for a proper lunch.

IMGP7871


I used the basic sweet dough from the pork floss bun recipe, and squeezed light mayo and ketchup on top of the breads, together with pork floss before baking. A taste which is reminiscent of home.....

*I will type out the detailed recipe soon, but trust me, the step by step instructions above is easier to follow. :)*


Caterpillar Bread

one batch of basic sweet bun dough
1 pack of sausages/franks
mayonaise
ketchup

Divide the basic sweet dough into 70g pieces and mould them into balls. Let them rest for 10 minutes, then roll them flat with a rolling pin.

Put the sausage on the center of the dough and fold the dough into halves. Lightly pinch to seal. Cut each folded dough into 8 small portions, leaving 1/3 from the sealed edges uncut. (The dough should resemble a comb at this point.)

Twist first cut portion to the left, and second to the right, repeat this for the rest of the portions. Place the shaped dough onto a greased baking sheet and press each lightly. Let the dough prove for 45 minutes.

Brush with egg wash, and drizzle ketchup, followed by mayonaise on top.

Bake at 375F for 15-20 minutes or until the breads look golden brown. You can pipe some mayonaise and ketchup on top if desired (for presentation) and sprinkle the optional pork floss.

Read more...

Tuesday, April 08, 2008

Blogging from Atlanta and My Discovery of Nutella Cupcakes

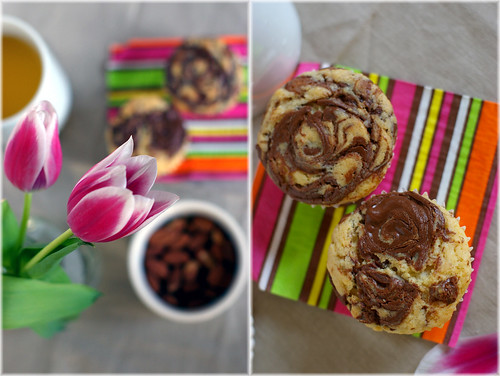
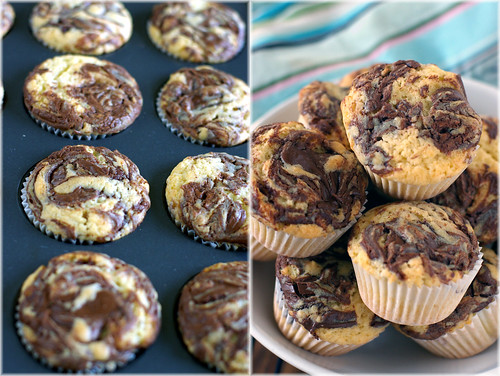
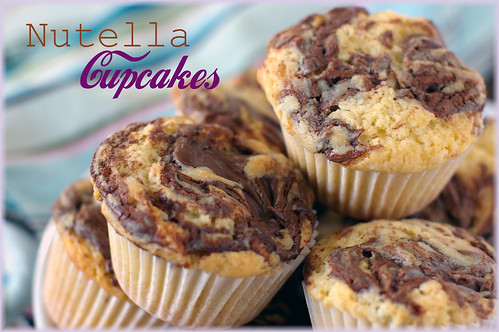
nutella cupcakes

Hello, friends and readers! I couldn't believe I left you without a word for so long. Packing for the move after Easter and some last minute baking had occupied almost all of my waking hours. Could you believe that we were still frantically packing on our last day before the move? Packing one week prior to the moving date is definitely not a good idea. Anyway, lesson learnt. On April 1st, we left St Louis for Atlanta. Another round of unpacking and furniture shopping ensued. To my surprise, I actually enjoy the unpacking process. It almost feels like presents opening on Christmas morning. Except there isn't new things that I don't already own. That,in a gist, explains my silence for the past weeks. I hope everyone is enjoying Spring, and no one notice my temporary absence.

Coming to a new city is exciting. I discover something new about this place everyday and nothing thrilled me more than knowing there's a few Malaysian restaurants in the vicinity. Although I haven't gotten the chance to visit them, but they will surely be on my "to-eat-list" once we have settled down.

nutella cupcakes


I haven't done any baking in my new kitchen yet, but there were a few things that I baked before our move. Most of them were given away before photographed.You can find them in my past posts like here, here and here. One of the recipes I got to try in an attempt to use up the jar of Nutella was Self Frosting Nutella Cupcakes from Nicole's blog- Baking Bites.

I have read rave reviews about it from other bloggers, but never gotten round making it until the last week before our move. What a treat these cupcakes are. And I couldn't believe it took me so long to make it.To be honest, I kind of regretted sending them off after eaten only one of them. One thing for sure, the Nutella cupcakes are going to make an appearance here once I have my kitchen all set up and perhaps I will not share so generously this time. We'll see.

nutella cupcakes


Nutella Frosted Cupcakes
from Baking Bites

10 tbsp(140 grams) butter, softened
3/4 cup white sugar
3 large eggs, at room temperature
1/2 tsp vanilla essense
1 3/4 cups (200 grams) sifted all purpose flour
1/4 tsp salt
2 tsp baking powder
Nutella, 12 teaspoons. (1 teaspoon for each cupcakes)

Preheat oven to 325F. Line 12 muffin tins with paper liners.

Cream together butter and sugar until light and fluffy,about 2 minutes. Add in eggs one at a time, until fully incorporated. Don’t worry if the batter doesn’t look smooth. Add vanilla. Stir in flour, salt and baking powder until batter is uniform and no flour remains.

Using an ice cream scoop or spoon , fill each muffin liner with batter. They should be 3/4 full, if you’re not using a scoop. Top each cake with 1 heaping teaspoon of Nutella. Swirl Nutella in with a toothpick, making sure to fold a bit of batter up over the nutella.

Bake for 20 minutes or until a cake tester comes out clean.

Remove to a wire rack to cool completely.

Makes 12 delicious cupcakes.

Read more...
Sunday, March 23, 2008

Happy Easter and a Sweet Gift of Chocolate Truffles

Happy Easter everyone! :)


I am one who is bad at sending greeting cards on time. More often than not, my friends receive birthday cards and presents from me long after their actual birthdays. And my Christmas cards only arrive in January!

So I just want to quickly sneak in and wishes everyone who celebrate Easter a blessed Easter!

I haven't eaten a single chocolate egg yet since they make their debut on 15 Feb, a day after all valentine merchandises were off the shelves. Simply because I am a cheapskate who rather wait for massive clearance sale after Easter! I wonder if any of you will go for the after holiday sale for more chocolate eggs? Hopefully not, that means there will be more left for me! :)

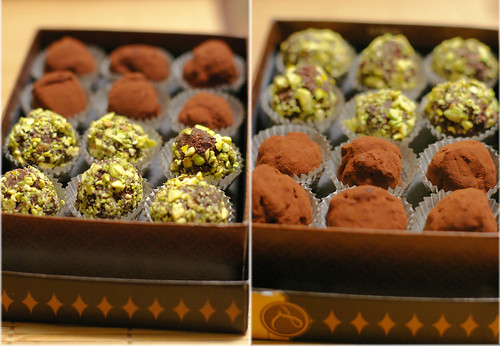
truffles

Meanwhile, here's a sweet little something I made for OCT's colleagues this week,as a gesture of appreciation for the fantastic farewell party they threw us. (ok, his PI, Prof RK paid and hosted us, but still everyone made an effort to turn up and the company was great!)This truffle recipe which I saved since Christmas from Warda of 64 sq ft kitchen makes a perfect edible gifts. I made them with the leftover egg yolks from another recipe and they were delicious.

truffle2

This truffle recipe from Chef Jacques Pepin is different from the one that I am accustomed to, in which heavy cream is used insteads of egg yolks. However, upon reading Christine's rave review after making the truffles, I know I need to try it when the right occasion arises. I ended up making 2 flavors- Irish Cream and Grand Marnier. Some modifications were adopted to utilise what I had on hand. For instant,Bailey Irish Cream was used instead of espresso because I love Bailey in everything and was simply too lazy to brew espresso at that point. I also omitted orange zest that the original recipe suggested, because guess what? I had run out of orange. On hindsight, I should have added some meyer lemon zest into it. Because the flavor of the grand marnier truffles was milder than what I like. Maybe a little more booze would help. I need to try that again later this week.

truffle


I am also sending these bittersweet gifts over to Danielle of Habeas Brulee who is hosting this month's Sugar High Friday. Be sure to check back her on 28 March to read about the sweet gifts other bloggers have whipped up for the event!

Delicious truffles from other blogs:
Matcha White Chocolate Pralines with Pistachios
Orange Truffles
Marble Swirl Truffles

Read more...
Related Posts with Thumbnails