
Showing posts with label Daring Baker Challenge. Show all posts

Monday, January 28, 2008

Daring Bakers do Lemon Meringue Pie : Sunshine on a winter day

IMGP6888


Because I will be vacationing until mid Feb, I completely this month's challenge the week before we left. I am glad that our host for this month- Janet of Canadian Baker has chosen Lemon Meringue Pie as January challenge. As much as I love lemon, I have never made lemon meringue pie before. So this is indeed a great challenge to conquer.


Since we have an early morning flight to catch, I will cut short the rambling and get straight to my experience with this month's challenge.

making lmp


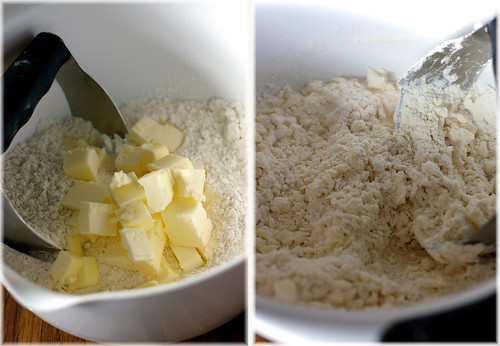
The recipe is a straightforward one, although it involves 3 steps: crust, filling and meringue. It should be a breeze if I wasn't feeling unwell. I suspect I may have added 1 cup more of flour while making the crust. My crust turns out dry and hard.

lmp process


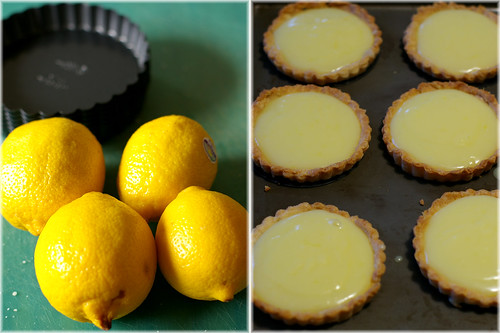
The filling is on the loose side, but firm up upon cooling. Although I find the filling too sour initially, upon topped with meringue, the tart has the perfect balance of flavor.Surprisingly the sweet meringue pairs really well with the tart filling.

Instead of making one big lemon meringue pie, I opt for the mini version and make 6 3-inches tarts. OCT ends up passing two tarts to a stranger who asks him for change to buy food. I am not entirely sure if it's because the tart doesn't appear to him or he is just a kind person. :)


IMGP6891


As I have limited internet access, I will have to check out the rest of the Daring Bakers' Lemon Meringue Pies when I return from vacation. You can check out my fellow Daring Bakers lemon meringue pies by clicking the pink Daring Bakers logo on my right side bar. These pies have brighten up my otherwise gloomy winter day, and I hope they would do the same to you too!


lmp cut section


Lemon Meringue Pie
Makes one 10-inch (25 cm) pie

For the Crust:
3/4 cup (180 mL) cold butter; cut into ½-inch (1.2 cm) pieces
2 cups (475 mL) all-purpose flour
1/4 cup (60 mL) granulated sugar
1/4 tsp (1.2 mL) salt
1/3 cup (80 mL) ice water

For the Filling:
2 cups (475 mL) water
1 cup (240 mL) granulated sugar
1/2 cup (120 mL) cornstarch
5 egg yolks, beaten
1/4 cup (60 mL) butter
3/4 cup (180 mL) fresh lemon juice
1 tbsp (15 mL) lemon zest
1 tsp (5 mL) vanilla extract

For the Meringue:
5 egg whites, room temperature
1/2 tsp (2.5 mL) cream of tartar
1/4 tsp (1.2 mL) salt
1/2 tsp (2.5 mL) vanilla extract
3/4 cup (180 mL) granulated sugar

To Make the Crust:
Make sure all ingredients are as cold as possible. Using a food processor or pastry cutter and a large bowl, combine the butter, flour, sugar and salt.Process or cut in until the mixture resembles coarse meal and begins to clump together. Sprinkle with water, let rest 30 seconds and then either process very briefly or cut in with about 15 strokes of the pastry cutter, just until the dough begins to stick together and come away from the sides of the bowl. Turn onto a lightly floured work surface and press together to form a disk. Wrap in plastic and chill for at least 20 minutes.

Allow the dough to warm slightly to room temperature if it is too hard to roll. On a lightly floured board (or countertop) roll the disk to a thickness of 1/8 inch (.3 cm). Cut a circle about 2 inches (5 cm) larger than the pie plate and transfer the pastry into the plate by folding it in half or by rolling it onto the rolling pin. Turn the pastry under, leaving an edge that hangs over the plate about 1/2 inch (1.2 cm). Flute decoratively. Chill for 30 minutes.

Preheat oven to 350ºF (180ºC). Line the crust with foil and fill with metal pie weights or dried beans. Bake for 20 to 25 minutes. Carefully remove the foil and continue baking for 10 to 15 minutes, until golden. Cool completely before filling.

To Make the Filling:
Bring the water to a boil in a large, heavy saucepan. Remove from the heat and let rest 5 minutes. Whisk the sugar and cornstarch together. Add the mixture gradually to the hot water, whisking until completely incorporated. Return to the heat and cook over medium heat, whisking constantly until the mixture comes to a boil. The mixture will be very thick. Add about 1 cup (240 mL) of the hot mixture to the beaten egg yolks, whisking until smooth. Whisking vigorously, add the warmed yolks to the pot and continue cooking, stirring constantly, until mixture comes to a boil. Remove from the heat and stir in butter until incorporated. Add the lemon juice, zest and vanilla, stirring until combined. Pour into the prepared crust. Cover with plastic wrap to prevent a skin from forming on the surface, and cool to room temperature.

To Make the Meringue:
Preheat the oven to 375ºF (190ºC). Using an electric mixer beat the egg whites with the cream of tartar, salt and vanilla extract until soft peaks form. Add the sugar gradually, beating until it forms stiff, glossy peaks. Pile onto the cooled pie, bringing the meringue all the way over to the edge of the crust to seal it completely. Bake for 15 to 20 minutes, or until golden. Cool on a rack. Serve within 6 hours to avoid a soggy crust.


Free-Style Lemon Tartlets
(from "Ripe for Dessert" by David Lebovitz)

Prepare the recipe as above but complete the following steps:

To roll out tartlet dough, slice the dough into 6 pieces. On lightly floured surface, roll each circle of dough into a 5 inch disk. Stack the disks, separated by pieces of plastic wrap, on a plate, and refrigerate for 30 minutes.

To bake the dough, position rack in oven to the centre of oven and preheat to 350ºF (180ºC). Place the disks of dough, evenly spaced, on a baking sheet and bake for 20 to 25 minutes, until golden brown. Cool completely.

To finish tartlets, first place oven rack in the upper third of the oven and increase heat to 425ºF. Divide the lemon filling equally among the disks, mounding it in the centre and leaving a 1-inch border all the way around. Spoon the meringue decoratively over each tartlet, right to the edges, in dramatic swirling peaks.

Return tartlets to oven and bake for about 5 minutes, until the meringue is golden brown.

Read more...

Saturday, December 22, 2007

Daring Bakers December Challenge : Yule Log

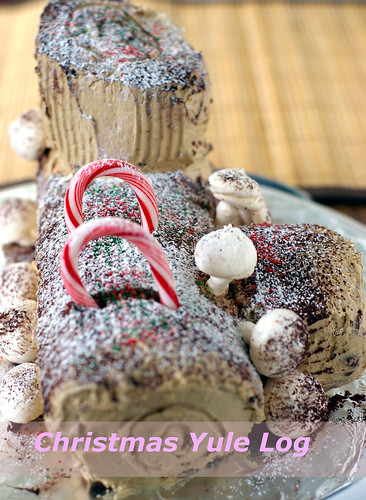
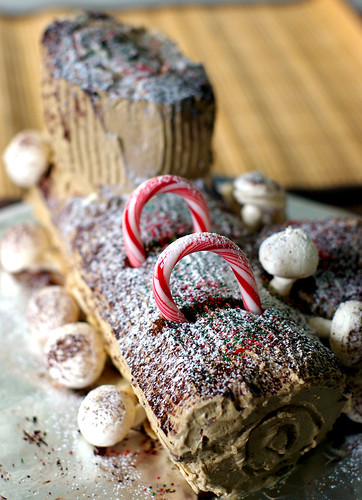
yule log

I am excited when I knew that we are making Yule Log for our December Daring Baker challenge.I have been toying with the idea of making one for Christmas since November but just isn't sure if I will have the determination to follow through. Since our hosts Ivonne and Lis have chosen Yule Log as our December challenge, I have no reason not to make it this year!

yule log


After much procastination, I made my yule log last Monday for OCT department Christmas party on the next day. Initially I was planning to play around with the filling, but I love coffee flavor so much that I decided to just stick with the coffee buttercream as filling and frosting. I added Kahlua in the buttercream instead of brandy, which the recipe suggested. I also added a thin layer of Nutella in the filling to make it extra decadent. That was the creativity I have left after many rounds of cookie recipes testing.

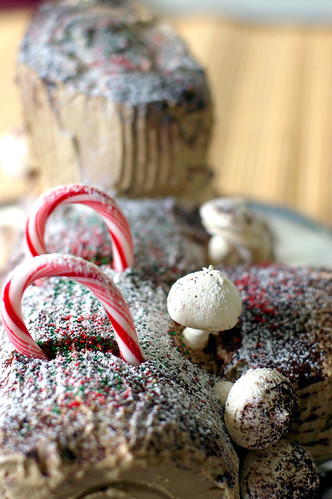
The Yule Log was well received at the party and I wished I brought my camera along. The meringue mushrooms piqued the interest of a few children in the party and they are intrigued by its appearance and "melt in the mouth" texture.

yule log


The Yule log is a fun and rewarding challenge and I can't wait to meet the other 400+ yule logs. Be sure to check out the Daring Bakers Blogroll to see other beautiful creations my fellow Daring Bakers come up with! Maybe you will get inspired to make one for Christmas too.

IMGP6302

Genoise cooling and waiting to be filled

I wish I could tell you more about this month challenge, but time is of the essence around here. There's a cheesecake baking in the oven and many cookies that needed to be decorated and packed for our party tomorrow. OCT is helping me pack some of the cookies while I sneak out to blog here. I should have started the cookies baking earlier. Maybe I will start in October next year.Or maybe June, given my snail-like speed.


Yule Log
from Perfect Cakes by Nick Malgieri and The Williams-Sonoma Collection: Dessert

Plain Genoise:

3 large eggs
3 large egg yolks
pinch of salt
¾ cup of sugar
½ cup cake flour - spoon flour into dry-measure cup and level off (also known as cake & pastry flour)
¼ cup cornstarch
one (1) 10 x 15 inch jelly-roll pan that has been buttered and lined with parchment paper and then buttered again

(note: I made a chocolate genoise. To make a chocolate genoise, use 1/3 cup cake flour, 1/3 cup corn starch and 1/4 cup cocoa powder)

1.Set a rack in the middle of the oven and preheat to 400 degrees F.

2.Half-fill a medium saucepan with water and bring it to a boil over high heat. Lower the heat so the water is simmering.

3.Whisk the eggs, egg yolks, salt and sugar together in the bowl of a heavy-duty mixer. Place over the pan of simmering water and whisk gently until the mixture is just lukewarm, about 100 degrees if you have a thermometer (or test with your finger - it should be warm to the touch).

4.Attach the bowl to the mixer and, with the whisk attachment, whip on medium-high speed until the egg mixture is cooled (touch the outside of the bowl to tell) and tripled in volume. The egg foam will be thick and will form a slowly dissolving ribbon falling back onto the bowl of whipped eggs when the whisk is lifted.

5.While the eggs are whipping, stir together the flour and cornstarch.

6.Sift one-third of the flour mixture over the beaten eggs. Use a rubber spatula to fold in the flour mixture, making sure to scrape all the way to the bottom of the bowl on every pass through the batter to prevent the flour mixture from accumulating there and making lumps. Repeat with another third of the flour mixture and finally with the remainder.

7.Scrape the batter into the prepared pan and smooth the top.

8.Bake the genoise for about 10 to 12 minutes. Make sure the cake doesn’t overbake and become too dry or it will not roll properly.

9.While the cake is baking, begin making the buttercream.

10.Once the cake is done (a tester will come out clean and if you press the cake lightly it will spring back), remove it from the oven and let it cool on a rack.

Coffee Buttercream:

4 large egg whites
1 cup sugar
24 tablespoons (3 sticks or 1-1/2 cups) unsalted butter, softened
2 tablespoons instant espresso powder
2 tablespoons rum or brandy (I used Kahlua)

1.Whisk the egg whites and sugar together in the bowl of an electric mixer. Set the bowl over simmering water and whisk gently until the sugar is dissolved and the egg whites are hot.(around 160F)

2.Attach the bowl to the mixer and whip with the whisk on medium speed until cooled. Switch to the paddle and beat in the softened butter and continue beating until the buttercream is smooth. Dissolve the instant coffee in the liquor and beat into the buttercream.


Meringue Mushrooms:

3 large egg whites, at room temperature
¼ teaspoon cream of tartar
½ cup (3-1/2 ounces/105 g.) granulated sugar
1/3 cup (1-1/3 ounces/40 g.) icing sugar
Unsweetened cocoa powder for dusting

1.Preheat the oven to 225 degrees F. Line 2 baking sheets with parchment. Have ready a pastry bag fitted with a small (no. 6) plain tip. In a bowl, using a mixer on medium-low speed, beat together the egg whites and cream of tartar until very foamy. Slowly add the granulated sugar while beating. Increase the speed to high and beat until soft peaks form when the beaters are lifted. Continue until the whites hold stiff, shiny peaks. Sift the icing sugar over the whites and, using a rubber spatula, fold in until well blended.

2.Scoop the mixture into the bag. On one baking sheet, pipe 48 stems, each ½ inch (12 mm.) wide at the base and tapering off to a point at the top, ¾ inch (2 cm.) tall, and spaced about ½ inch (12 mm.) apart. On the other sheet, pipe 48 mounds for the tops, each about 1-1/4 inches (3 cm.) wide and ¾ inch (2 cm.) high, also spaced ½ inch (12 mm.) apart. With a damp fingertip, gently smooth any pointy tips. Dust with cocoa. Reserve the remaining meringue.

3.Bake until dry and firm enough to lift off the paper, 50-55 minutes. Set the pans on the counter and turn the mounds flat side up. With the tip of a knife, carefully make a small hole in the flat side of each mound. Pipe small dabs of the remaining meringue into the holes and insert the stems tip first. Return to the oven until completely dry, about 15 minutes longer. Let cool completely on the sheets.

Assembling the Yule Log:

1.Run a sharp knife around the edges of the genoise to loosen it from the pan.

2.Turn the genoise layer over (unmolding it from the sheet pan onto a flat surface) and peel away the paper.

3.Carefully invert your genoise onto a fresh piece of parchment paper.

4.Spread with half the coffee buttercream (or whatever filling you’re using).

5.Use the parchment paper to help you roll the cake into a tight cylinder.

6.Transfer back to the baking sheet and refrigerate for several hours.

7.Unwrap the cake. Trim the ends on the diagonal, starting the cuts about 2 inches away from each end.

8.Position the larger cut piece on each log about 2/3 across the top.

9.Cover the log with the reserved buttercream, making sure to curve around the protruding stump.

10.Streak the buttercream with a fork or decorating comb to resemble bark.

11.Transfer the log to a platter and decorate with your mushrooms and whatever other decorations you’ve chosen.

Read more...

Monday, November 26, 2007

My first DB Challenge: Tender Potato Bread!

tender potato bread


Yes, with the christening of this potato bread, I am now a proud member of Daring Bakers! The fabulous online baking community that doesn't require further introduction, in my opinion. If for any reason you haven't heard of them, click here.

pink_sil


I am just happy that I finally get my act together and join these amazing bunch of bakers in the DB family. As for my first challenge, I completed it in record time. Not that I completed it the first week when I learn of the challenge, but it was actually the third week when I dug my hands deep into the sticky potato bread dough. Not exactly prompt compared to lots of DBers, but hey, for those who know me personally (like OCT and my previous sales managers), they know what a procastinator I am! I almost always complete whatever assignments at the very last minute. So, completing this first challenge a week ahead of the deadline is a major improvement for me. :)

On top of becoming a better baker, I think I have become a better person, which is a double bonus for joining Daring Bakers.


tender potato bread


Now let's get on to the Potato Bread, shall we? Instead of a sweet recipe, Tanna of My Kitchen in Half Cups has chosen a savory bread recipe as the November challenge. Honestly, it is a relief to me. Knowing that I will certainly be baking a few sweet recipes in November, I can definitely use a break from all the butter and sugar.

When I told OCT about this month's challenge and asked if he had eaten a potato bread before, he surprised me by saying yes! So has mum, who told me that it was one of grandma's favorite bread. I can't help but wonder if I was the last person alive who have never eaten a potato bread before. Even thoughI have read about potato bread from other's blogs, I keep missing the opportunity to attempt one myself. In fact, I have to confess that I am somewhat intimidated by yeast. And as such, would usually hide behind layers of cakes and tarts when the suggestion of baking bread arises.

But being a Daring Baker to me, is about confronting and conquering my fear. It also helps that they are lots of experienced and helpful bakers, who shared their experiences on the daring bakers blog. All these make the process less intimidating and so much more fun. I enjoy the "sneak previews" everyone posted after their breads were out from the oven.


potato roll


After seeing the many excellent "previews", I tackled my challenge on an early Monday morning. The dough as the rest have warned, was a sticky one. And one shall resist the temptation to add more flour to it. I think I managed pretty well with the help of a bench scraper. Instead of quick to dig my fingers into the sticky dough, I used the scraper to mix and knead the first few turns. I used about 5.5cups of flours, from the 8 cups of flour allowed.


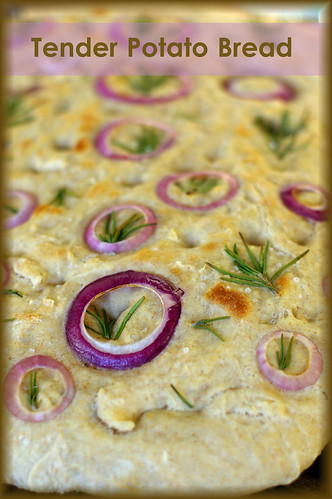
Potato foccacia


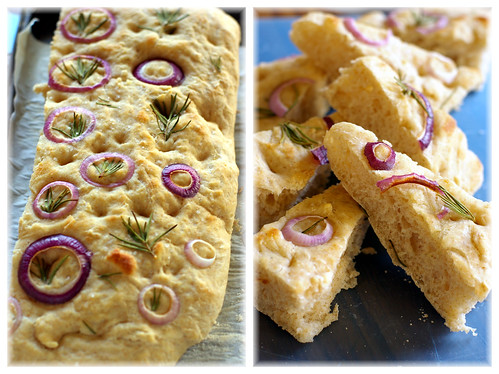
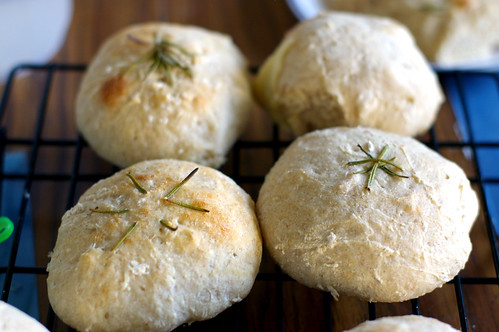
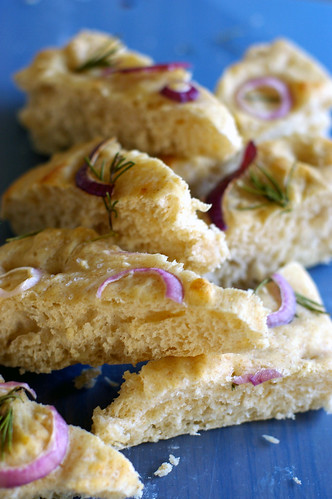
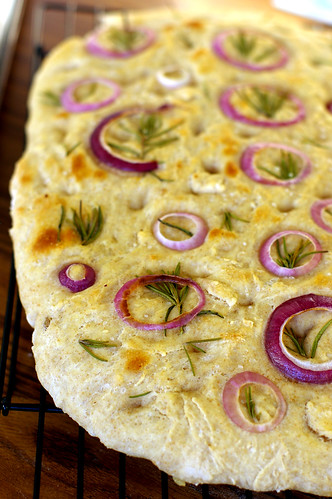
As you can see, I shaped my dough into some dinner rolls and a large focaccia with red onion, rosemary and sea salt. The end products were tender, with a bit of chew and flavorful. I am quite surprised that there isn't a faintest hint of potato in the potato bread! I used 10 oz of potato in my batch from the 8-16 oz potato suggested. I believe the inclusion of potato played an important role in keeping the tender texture of the breadrather than exerting its flavor. With the abundance of sweet potatoes at the farmer's market this time of year, I wonder if that would work as an substitute? I shall undertake it as the next potato bread project. It will be interesting to see how the sweet potatoes manifest in potato bread.

foccacia


This recipe yields quite a large batch of bread for a small family like ours. We ate 1/3 of the focaccia with some Tom Yum tuna filling as dinner on the first night, and I nibbled a few pieces after slicing some for photo shoot. The dinner rolls which I sneaked in some muenster cheese in them were saved as our breakfast and lunch on the subsequent days. OCT brought half of the foccacia as lunch the next day and we still have some in the fridge now, waiting to be transformed into a yummy sandwich. I think I will top it with slices of tomatoes, avocados and the leftover turkey from Thanksgiving.

pink_db


To read more about the other Daring Bakers' take on this month challenge, please visit The Daring Bakers Blogroll. I can't wait to see what the rest have come up with!


For the recipe of this month's Tender Potato Bread challenge, check out Tanna's post

Read more...
Related Posts with Thumbnails