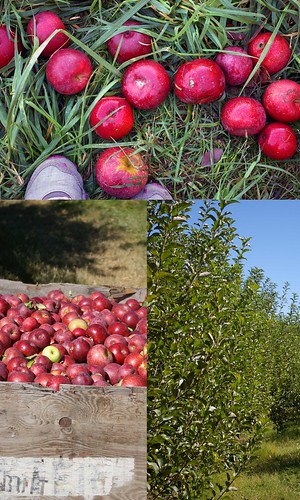
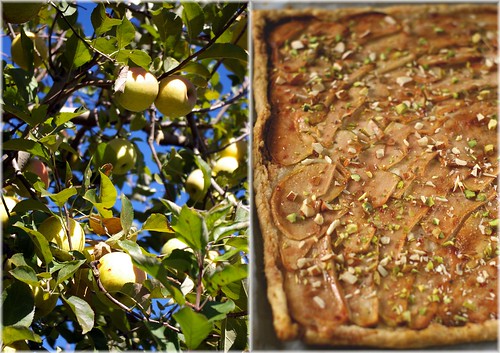
I love fruits picking. There's an indescribable satisfaction of biting into the ripe fruit that one just picked from the tree. A few weeks ago, I persuaded my friends who have never been to fruits picking for an apples picking session at an apple orchard 2 hours drive from Atlanta. Needless to say, we had a great time that day.
Upon returning with a lot more apples than we could consume, my friends C and T turned to me for an apple pie demonstration. Instead of teaching them the classic apple pie, I opted for a simple apple galette recipe from Cook's Illustrated. A recipe source I know will not disappoint. And I am happy to report that the crust is one of the flakiest I have made. The video demonstation on the site is easy to follow and helpful for bakers of all experience levels.
Although the recipe used food processor, we made the dough by hand, with a pastry cutter. I offered my friends C and T who have never worked with pie dough the following pointers, which I hope you will find them helpful too:
1. Remember to have all the starting ingredients COLD. (the butter, water and flour).
2. Add the ice water slowly. One tablespoon at a time, until a dough ball is almost formed, but not quite yet. There will be some flour left at the bottom of the bowl, but that's ok. You can easily incorporate them into the dough when wrapping it into a circle for chilling later.
3. Handle the dough with a light hand and as little as possible. You don't want to overwork the dough or it will turn out tough after baked.
4. Let the dough rest and chill,for at least 30 minutes, after mixing and forming.
5. Don't be afraid of the dough and have fun!
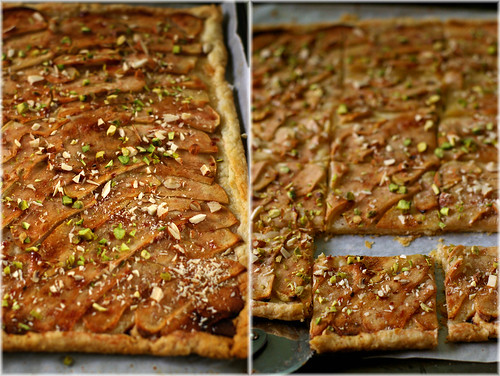
Although we had a little problem cutting and arranging the apple slices in an appealing fashion like the video demonstration,our apple galette turned out just as delicious. I didn't have apricot preserves, so I substituted it with raspberry preserves which explains the dark hue of the galette. That maybe the only aspect that could be improved on. That could easily be fixed with some chopped nuts scattered on top for color constrast.
The Apple Galette is a simple and elegant alternative to the classic American Apple Pie. You will be amazed by how fast it's disappearing from the plate. And if you are like me, you'd regret not cutting a bigger slice for yourself first before serving the others.
Apple Galette
adopted from Cook's Illustrated
Dough
2 cups all-purpose flour (7 1/2 ounces)
2 tablespoons cornstarch
1/2 teaspoon salt
1/2 teaspoon sugar
12 tablespoons cold unsalted butter , cut into 5/8-inch cubes (1 1/2 sticks)
7-9 tablespoons ice water
Apple Filling
1 1/2 pounds apples (3-4 medium or 4-5 small-use granny smith, empire or golden delicious)
2 tablespoons unsalted butter , cut into 1/4-inch pieces
1/4 cup sugar
2 tablespoons apricot preserves ( I substituted with raspberry preserves)
1 tablespoon water
CUT IN BUTTER:
Using Food Processor: Combine flour, cornstarch, salt, and sugar in food processor with three 1-second pulses. Scatter butter pieces over flour, pulse to cut butter into flour until butter pieces are size of large pebbles, about 1/2 inch, about six 1-second pulses.
Using pastry cutter: Mix all dry ingredients in a big bowl, scatter butter pieces over flour, and cut the butter into flour until butter pieces are the size of large pebbles.
ADD WATER:
Using Food Processor: Sprinkle 1 tablespoon water over mixture and pulse once quickly to combine; repeat, adding water 1 tablespoon at a time and pulsing, until dough begins to form small curds that hold together when pinched with fingers (dough should look crumbly and should not form cohesive ball).
Using pastry cutter: Sprinkle water over mixture and lightly mix with hand, adding water 1 tablespoon at a time, until dough begins to form small curds that hold together when pinched with finger. It is ready when it looks crumbly and should not form cohesive ball.
FORM MOUND:
Empty dough onto work surface and gather into rough rectangular mound about 12 inches long and 5 inches wide.
FRAISAGE AND CHILL:
Starting at farthest end, use heel of hand to smear small amount of dough against counter, pushing firmly down and away from you, to create separate pile of dough (flattened pieces of dough should look shaggy). Continue process until all dough has been worked. Gather dough into rough 12 by 5-inch mound and repeat smearing process. Dough will not have to be smeared as much as first time and should form cohesive ball once entire portion is worked. Form dough into 4-inch square, wrap in plastic, and refrigerate until cold and firm but still malleable, 30 minutes to 1 hour.
CUT APPLES:
About 15 minutes before baking, adjust oven rack to middle position and heat oven to 400 degrees. Peel, core, and halve apples. Cut apple halves lengthwise into 1/8-inch-thick slices.
ROLL AND TRIM DOUGH:
Place dough on floured 16 by 12-inch piece of parchment paper and dust with more flour. Roll dough until it just overhangs all four sides of parchment and is about 1/8 inch thick, dusting top and bottom of dough and rolling pin with flour as needed to keep dough from sticking. Trim dough so edges are even with parchment paper.
FORM BORDER:
Roll up 1 inch of each edge and pinch firmly to create 1/2-inch-thick border. Transfer dough and parchment to rimmed baking sheet.
LAYER APPLES AND BAKE:
Starting in one corner, shingle sliced apples to form even row across bottom of dough, overlapping each slice by about one-half. Continue to layer apples in rows, overlapping each row by half. Dot apples with butter and sprinkle evenly with sugar. Bake until bottom of tart is deep golden brown and apples have caramelized, 45 to 60 minutes. Check the bottom of the galette halfway through baking-it should be a light golden brown. If it is darker, reduce the oven temperature to 375 degrees.
GLAZE:
While galette is cooking, combine apricot preserves and water in medium microwave-safe bowl. Microwave on medium power until mixture begins to bubble, about 1 minute. Pass through fine-mesh strainer to remove any large apricot pieces. Brush baked galette with glaze and cool on wire rack for 15 minutes. Transfer to cutting board. Cut in half lengthwise and then crosswise into individual portions; serve.


14 comments:
You galette looks amazing! I love that you picked your own fruit for this :)
Hey I know this one!! Not super-sure if I saw it on CI or somewhere else, though. I'm very impressed-- great job! It looks like a huge apple pizza. I would certainly not make the mistake of being modest with my own serving, heh :)
I would love to go apple picking! And to eat that gallete as well! ;)
What a fun way to reinvent a classic!
We're big apple lovers and only have to drive about 15 minutes to get to an amazingly pretty orchard where we can pick about 1/2 dozen kinds of apples.
Looks delicious! I'm feeling inspired to make a little apple something of my own.
Wow they look fabulous and delicious
i bet freshly picked apples are really flavourful and nice. the galete looks delicious i love it. :)
Gorgeous Galette! And how fun you went apple picking!
I just bought a bag of Minnesota grown apples. This looks like it could be easily eaten out-of-hand.
Oh, I really love those apple orchard shots. And as for galettes, I can't turn them down.
It's really nice to know that you use just the fresh ingredients.
Ohh..it make me hungry..
Let me taste first..Thanks for sharing..
cheers,
magnetic bracelet clasp
Sounds great fun to me to go for apple picking. Tks for the video link. It gave me have a clearer pic of the baking method. :)
Looks wonderful! I've made pie crust only a handful of times, and will definitely refer to your tips next time. Beautiful pictures of apple-picking!
Post a Comment