


 I have been staring at my lemon cream tart pictures for almost half an hour, thinking of a suitable way to start this blog entry. But nothing came. I can't find a way to tell you how much I love lemon, and everything that has to do with lemon.

It has been awhile.I have absolutely zero resistant for any lemon recipes. And this one, is from Pierre Herme, the France's most acclaimed pastry chef. I got the recipe from Dorie Greenspan's Baking: From my home to yours, in which there are many recipes that caught my eyes and I can't wait to try them all. But I decided to make this promising lemon cream tart before everything else. One of the reasons is because Dorie Greenspan described the lemon cream as the "ne plus ultra of the lemon world". Trust me, no lemon lover can resist a description like this.

Usually, I am not a tart-person. I prefer cakes and cookies. I detest making tarts, because it is simply too much a hassle to make the dough without a food processor. It's always messy, with no guarantee of success. Still, I went ahead. I want to know what a "ne plus ultra" tastes like.


Instead of making one big tart, I used the tart recipe to make 7 tartlets. I thought it would be easier to give most away so that I won't overeat. My initial plan was to eat just ONE, but I couldn't contain myself! I finished half of the tarts within 2 days! And I am happy to report that the lemon tart is everything that it promised. A buttery tart with velvety smooth lemon cream. The only downside is the two and a half sticks of butter used in the cream. Isn't the amount of fat appalling? No wonder people say love is blind. I am entirely oblivious of my increasing waistline in the name of lemony love....

The Most Extraordinary French Lemon Cream Tartadapted from Dorie Greenspan's :Baking From My Home to Yours
Lemon Cream
1 cup sugar
grated zest of 3 lemons
4 large eggs
3/4 cup fresh lemon juice (from 4-5 lemons)
2 sticks plus 5 tbsp (10.5 ounces) unsalted butter, cut into tablespoon size pieces, at room temperature
sweet tart dough (see recipe below)
Have an instant read termometer, a strainer and a blender (first choice) or food processor at hand. Bring a few inches of water to a simmer in a saucepan.
Put the sugar and zest in a large heat proof bowl that can be set over the pan of simmering water. Off the heat, rub the sugar and lemon zest together until the sugar is moist and fragrant.Whish the eggs, followed by lemon juice.
Set the bowl over the pan and start stirring with the whisk as soon as the mixture feels tepid to the touch. Cook the lemon cream until it reaches 180F. As you whisk, you must whisk constantly to keep the eggs from scrambling- you see that the cream start out light and foamy, then the bubbles will gets bigger, and then, as it gets closer to 180F, it starts to thicken and the whisk will leave tracks. Heads up at the point- the tracks mean the cream is almost ready. Don't stop whisking or checking the temperature, and have patience- depending on how much heat you're giving the cream, getting to temp can take as long as 10 minutes.
As soon as it reaches 180F, remove the cream from the heat and strain it into the container of the blender; discard the zest. Let the cream stand, stirring occasionally, until it cools to 140F, about 10 minutes.
Turn the blender to high and with the machine running, add the butter about 5 pieces at a time. Scrape down the sides of the container as needed as you incorporate the butter. Once the butter is in, keep the machine going- toget the perfect light, airy texture of lemon cream dreams, you must continue to blend the cream for another 3 minutes.
Pour the cream into a container, press a piece of plastic wrap against the surface to create an airtight seal and refrigerate for at least 4 hous or overnight. (The cream will keep in the fridge for 4 days or tightly sealed, in the freezer for up to 2 months; thaw it overnight in the refrigerator)
When you are ready to assemble the tart, just whisk the cream to loosen it and spoon into the tart shell. Serve the tart, or refrigerate until needed.
Sweet Tart Dough
1.5 cups all purpose flour
1/2 cup confectioners' sugar
1/4 teaspoon salt
1 stick plus 1 tbsp (9 tbsp) very cold (or frozen) unsalted butter, cut into small pieces
1 large egg yolk
Put all the dry ingredients into the food processor and pulse a couple of times to combine. Scatter the pieces of butter over the dry ingredients and pulse until the butter is coarsely cut in-you should have some pieces the size of oatmeal flakes and some sizes of peas. Stir the yolk, just to break up, and add a little at a time, pulsing after each addition. When the egg is in, process in long pulses- about 10 seconds each- until the dough, which will look granular soon after the egg us added, forms clumps and curds. Just before you reach this stage, the sound of the machine working the dough will change- heads up. Turn the dough out onto a working surface and very lightly and sparingly, knead the dough just to incorporate any dry ingredients that might have escaped mixing.
Butter a 9-inch fluted tart pan with a removable bottom (or 7-8 mini tart moulds). Press the dough evenly over the bottom and up the sides of the pans. Save a little piece of dough in the fridge to patch up any crack after the crusts are baked. Freeze crust for at least 30 minutes, preferably longer, before baking.
To bake:
Center a rack in the center of the oven and preheat the oven to 375F. Butter the shiny side of a piece of aluminium foil, and fit the foil, buttered side down, tightly against the crust. (if you are baking in a 9-inch tart pan) If the individual tart molds are used, simply cover with a layer of aluminium foil on top of the molds. Bake the crust for 25 minutes (shorter time for the small tarts). Remove the foil. If the crust has puffed, press it down gently with the back of the spoon. Bake for another 8 minutes or so, or until the crust is firm and golden brown.
Transfer the tart pan to a rack and cool the crust to room temperature before filling.
Saturday, March 31, 2007
For the love of lemon
Friday, March 30, 2007
My first madeleine!

Remember I mentioned how excited I was about my new madeleine pan yesterday? Well, I forgot to tell you that I had whipped up a batch of madeleine at midnight too.
OCT went back to work after dinner and I suddenly had a few hours to kill. After I made a batch of lemon poppy seed muffins for his lab meeting, I decided that I had to make madeleines. Nevermind that it was almost 10p.m and the batter had to be chilled for at least 3 hours, and the author strongly advises consuming the madeleine on the same day that it is baked. I am an impulsive baker, and I know when I want something done, I want it done now. Housework however, is exception, which I always find excuses to do it later.
I chose the traditional madeleine from Dorie Greenspan's Baking: From My Home to Yours to commemorate my foray in madeleine baking. It was a wise choice! Eventhough I had never tasted the real thing before, but I must say mine was pretty decent.
The adorable madeleines were tender, fluffy and light, with a hint of lemon flavor. They were really delicious while eaten warm. The originally plan was to let OCT brought some for the lab meeting. But the glutton promptly gobbled a few pieces when he learnt that it was best eaten fresh. There were very few left over after that, and we decided it would be best for us to keep them for our own consumptions.
I ate some this morning after the photo shoot, and I think they still taste reasonably good. Strictly speaking, I am still eating these madeleines on the day they are baked. So there should not be any surprise here. I wonder how they will taste tomorrow. For the interest of experiment, I keep some aside for tomorrow. If they get too dry by then, I can always soak them in my coffee. That's another way of eating madeleine according to Dorie Greenspan!
I think I may even bake a batch this Sunday for breakfast and tea!
Traditional Madeleines
adapted fromDorie Greenspan's Baking: From my home to yours
2/3 cup all purpose flour
3/4 teaspoon baking powder
pinch of salt
1/2 cup sugar
grated zest of 1 lemon
2 large eggs. at room temperature
2 teaspoons pure vanilla extract
3/4 stick (6 tbsp)unsalted butter, melted and cooled
confectioner sugar, for dusting
Whisk together the flour, baking powder and salt.
working in a mixer bowl, rub the sugar and lemon zest together with your fingertips until the sugar is moist and fragrant. Add the eggs to the bowl. Working with the whisk attachment, beat the sugar and eggs together on medium high speed until pale, thick and light, 2 to 3 minutes. Beat in the vanilla. With a rubber spatula, very gently fold in the dry ingredients, followed by the melted butter. Press a piece of plastic wrap against the surface of the batter and refrigerate it for at least 3 hours, or for up to 2 days. (You can also spoon the batter into the greased and floured madeleine molds, cover and refrigerate, then bake the madeleines directly from the fridge.)
Center a rack in the oven and preheat the oven to 400F. Butter and flour the madeleine mold and place the pan on a baking sheet.
Spoon the batter into the molds, filling each one almost to the top. Don't worry about spreading the batter evenly, the oven's heat will take care of that. Bake the madeleines for 11-13 mins, or until they are golden and the tops spring back when touched. Remove the pan from the oven and release the madeleines from the mold by rapping the edge of the pan using your fingers or a butter knife. Transfer the madeleines to a rack to cool to just warm or to room temperature.
If you are making minis and have more batter, bake the next batch, make certain that you cool, then properly prepare the pan before baking.
Just before serving, dust the madeleines with confectioners' sugar.
makes 12 large or 36 mini madeleines
note: although the batter can be kept in the refrigerator for up to 2 days, the madeleines should be eaten soon after they are made. You can keep them overnight in a sealed container, but they are better on day1. If you must store them, wrap them airtight and freeze them; they will keep for 2 months.
Thursday, March 29, 2007
Shrimp and Scallop Arrabbiata

I was surprised to see OCT at home when I got back from grocery shopping. Normally we would go shopping together on weekend, but I had a dream last night. A dream about the madeleine pan I didn't buy last week, and how happy I was in the dream making madeleines using that madeleine pan. I take it as a sign, a sign that I MUST go and buy the pan today. No, I can't wait until weekend. There was only 3 pans left when I saw it last week, what if 3 other people had the same dream went to buy all the pans? Then there will be none left for me..
Luckily, when I finally reached Bed Bath Beyond today, there were exactly 3 madeleine pans left on the shelf. Apparently, nobody dreamt or obsessed about madeleines except me. It must be this book that I am currently reading- Baking: From my home to yours, by Dorie Greenspan. There are a few madeleine recipes that sounds pretty promising. I can't wait to try the one with lavender, earl grey tea and chocolate filled madeleine. Actually that's pretty much almost all of the madeleine recipes in the book....It's funny that I have never eaten a madeleine in my life and hold such a high hope on madeleine.
I think I digress. I was going to talk about tonight's dinner actually. OCT was home early today to take a nap. Poor him got up really early today to work on his dissertation. Unfortunately, before he could fall asleep, his wife came back and insisted that he must eat an early dinner before he went back to work again.
I needed something that can come in a flash. And what could be more convenience that pasta! (no, instant noodle doesn't count, although we will eat it when we need something in a blink) In the spirit of trying something new, I opted for the Shrimp and Scallop Arrabbiata.
It's definitely one of the nice pastas I have eaten in a long time. But maybe I am biased, there's nothing much with seafood in it that I don't adore. So, this recipe scored pretty well in my book. I reckon this is also a good recipe for winter because all the ingredients could be found in the pantry and freezer. I hardly used any fresh produce in this recipe. More importantly, the bright colour of this pasta would sweep away whatever bad mood you may have on a gloomy, cold winter day. And on happy day like today, when I become the proud owner of a madeleine pan, the dish is scrumptious enough to commemorate the event. (I am easily satisfied!)
Shrimp and Scallop Arrabbiata
adapted from Cookinglight, for original recipe, seehere
1 (9-ounce) package fresh linguine
1 tablespoons olive oil
8 ounces peeled and deveined large shrimp
8 ounces bay scallops
black pepper and salt
1 cup chopped onion
3 teaspoons minced garlic
1/4 teaspoon fennel seeds, crushed
1/4 teaspoon crushed red pepper
1 ounce pancetta, chopped (I used bacon)
1 can diced tomatoes
2 tablespoons chopped fresh Italian parsley
Cook pasta according to package directions, omitting salt and fat. Drain. Set aside and keep warm.
Heat 1 tablespoon oil in a large nonstick skillet over medium-high heat. Cook bacon until crisp. Drain, set aside and keep warm. Keep some of the bacon fat to saute onion and garlic. Add fennel seeds and red pepper to the skillet when the onion garlic mixture gives out fragrant aroma. Add shrimp and scallops to pan; sprinkle with black pepper. Sauté 3 minutes or until almost done. Add bacon back to the skillet.
Stir in tomatoes; bring to a boil.Remove from heat. Serve shrimp mixture over pasta. Sprinkle with parsley.
Serves 2 hungry men.
Wednesday, March 28, 2007
Pizza mess

Not too long ago, I promised myself to try another pizza dough recipe in search for the perfect pizza dough. I had my eyes on the one from Food and Wine Magazine. Afterall, it was also their staff's favorite for March issue.


Read more...
Tuesday, March 27, 2007
Asparagus Melt with Pesto Spread
I have been a happy girl lately. Maybe it's the pleasant weather. Maybe it's the blooming trees everywhere given that it's officially Spring now. Or maybe because I have been eating asparagus almost every single night last week!
Just when I thought I have run out of ideas of using the asparagus, I saw this recipe. In which, asparagus are piled up on sourdough bread, together with pesto spread, tomato, deli ham and mozzarella.

Still in my creativity mode, I swapped the smoke salmon for deli ham, and provolone for mozzarella. They turned out great! I even made one without smoke salmon just to see if it would make the sandwich less enticing. But I found that it was equally nice! While munching on these cheerful looking sandwiches, OCT and I started to plan for our coming picnic, and agreed that these sandwiches will be a nice addition to our picnic spread. I can hardly wait to resume our Spring picnics! But that has to wait until OCT meet the various important deadlines!

I told OCT that I am going to be a vegetarian one day! I think I am quite sure that I could live on veggie alone. For the meantime, in order to eat healthier, we are going to eat vegetarian meal once a week. Guess that's OCT limit for now....
However health conscious this may sound, I am not ready to give up desserts yet, not anytime soon, especially chocolate!

Asparagus Melt with Pesto Spread
A bunch of asparagus spears (about a pound)
3 tablespoons fat-free mayonnaise (I used 2 tbsp)
1 tablespoon commercial pesto
6 slices sourdough bread, toasted
about 4 oz sliced Smoke salmon
2 tomatoes, sliced
3 slices Provolone cheese
Freshly ground black pepper
Snap off tough ends of asparagus. Steam, covered, 2 minutes or until crisp-tender.
Preheat broiler.
Combine mayonnaise and pesto in a bowl, and stir with a whisk. Spread a thin layer of pesto mixture onto 1 side of each bread slice. Layer each slice with asparagus spears, smoke salmon, 2 tomato slices, and 1/2 cheese slice. Place on a baking sheet; broil 3 minutes or until cheese melts. Sprinkle with pepper.
Read more...
Sunday, March 25, 2007
Lemon Espresso Bites Mishap
Once again I find myself scrambling for a treat idea last Thurday for OCT's Friday lab meeting. I turned to my cookbook collections for ideas, but those that met my eyes were either too time consuming (certainly not for last minute baking) or required special ingredients that I didn't have on hand. So, I resorted to the ever resourceful cooking websites, and settled for a Lemon Espresso Bites recipe. Partly also because I am partial to anything with caffeine or lemon in it. After congratulating myself for finding the recipe with this great flavors combo, I started to work on it.
I must have been mesmerised by the name and the picture of the cookies that I forgot to look at the instructions. After everything was assembled, I faced the first impossible task of grinding the almond to fine powder, without the help of a food processor. It was really a mission impossible. I tried to ground them the best i could with a meat mallet. The end result wasn't very impressive, but I decided to proceed nonetheless.
And everything seems fine until I realised that the cookies were supposed to be piped out through a 1.5 inch round tip into 2 inch rounds. Obviously there's no such decoration tools lying around in my very primitive kitchen, so I scooped out the delicate dough into a large ziplock bag and tried my best to cut a 1.5 inch slit at one of the corners. I remembered seeing someone did that before, so that trick should work. After carefully piped out the 2 inches cookies dough on my baking sheet, I happily returned to the laptop to admire the desired end products. It was at that point that I realised something was not right with my cookies' appearance. The one featured on the website was much flatter than my meringue looking cookies. Actually, these are meringue cookies, but the one on the recipe was a thin meringue cookies. Not the bulky ones like those already baking away in the oven.....

I was worry that so many mishap would eventually destroy my cookies. Hence, I decided to swap the espresso filling with one of the ready made, hard to beat secret ingredient that everybody likes- Nutella! Yes, it's true. Nutella can fix anything! From horrible tasting ice-cream to tasteless bread. Nutella always works. And Nutella is going to save my day! I spread a thin layer of Nutella in between my fat meringue cookies, and secretly hope that OCT's labmates would at least have one, for the sack of Nutella....
Because these cookies are associated with too many unhappy memories, I decided to skip the recipe. Eventhough I know none of you out there would be interested in baking them too. Right?
But if you really must know, or simply curious of how the cookies should turn out, click here
Saturday, March 24, 2007
Sushi for One

I had a sushi dinner on Wednesday night when OCT had to rush for some work. I suddenly like the idea of eating dinner alone. I can cook whatever I want, or just eat a bar of kitkat for dinner!
But Wednesday night, I opted for sushi, and while I was at it, I decided to add my favorite pork floss to it. It may not be everybody's cup of tea and certainly was not how the authentic sushi should be made. But I was in my creativity mode. So here's my pork floss sushi. I think it tastes pretty good, if you like pork floss. :) I wonder what unconventional ingredient can I add to my sushi next time...
Thursday, March 22, 2007
I am not what you think I am
In case you think I am only a loaf of boring, plain white bread.

I am not. I am more sophisticated than that. Eventhough you can not see through my surface.
Unless I am willing to open up to you.

Then, you will see what lies beneath my boring skin.

Hello, my name is Chocolate Babka. And I am delicious. My life is more interesting than other breads. Life would be more wonderful if only I am a few more inches taller. I am obviously too short for a standard babka...
Chocolate Babka
adapted from Gourmet Dec 06
makes 2 loaves (I halved the recipe and made only one loaf)
For dough
3/4 cup warm milk (105–115°F)
1/2 cup plus 2 teaspoons sugar
3 teaspoons active dry yeast (from two 1/4-oz packages)
3 1/4 cups all-purpose flour plus additional for dusting
2 whole large eggs
1 large egg yolk
1 teaspoon pure vanilla extract
3/4 teaspoon salt
1 1/4 sticks (10 tablespoons) unsalted butter, cut into pieces and softened
For egg wash
1 large egg yolk
1 tablespoon heavy cream or whole milk
For chocolate filling
5 tablespoons unsalted butter, well softened
2 (3 1/2- to 4-oz) bars fine-quality bittersweet chocolate (no more than 60% cacao if marked), finely chopped
1/4 cup sugar
Special equipment: a stand mixer fitted with paddle attachment; 2 (8 3/4- by 4 1/2- by 2 3/4-inch) loaf pans; parchment paper preparation
Make dough:
Stir together warm milk and 2 teaspoons sugar in bowl of mixer. Sprinkle yeast over mixture and let stand until foamy, about 5 minutes. (If yeast doesn't foam, discard and start over with new yeast.)
Add 1/2 cup flour to yeast mixture and beat at medium speed until combined. Add whole eggs, yolk, vanilla, salt, and remaining 1/2 cup sugar and beat until combined. Reduce speed to low, then mix in remaining 2 3/4 cups flour, about 1/2 cup at a time. Increase speed to medium, then beat in butter, a few pieces at a time, and continue to beat until dough is shiny and forms strands from paddle to bowl, about 4 minutes. (Dough will be very soft and sticky.)
Scrape dough into a lightly oiled bowl and cover bowl with plastic wrap. Let dough rise in a draft-free place at warm room temperature until doubled in bulk, 1 1/2 to 2 hours.
Assemble babkas with filling:
Line each loaf pan with 2 pieces of parchment paper (1 lengthwise and 1 crosswise).
Punch down dough with a lightly oiled rubber spatula, then halve dough. Roll out 1 piece of dough on a well-floured surface with a lightly floured rolling pin into an 18- by 10-inch rectangle and arrange with a long side nearest you.
Beat together yolk and cream. Spread 2 1/2 tablespoons softened butter on dough, leaving a 1/2-inch border all around. Brush some of egg wash on long border nearest you.
Sprinkle half of chocolate evenly over buttered dough, then sprinkle with half of sugar (2 tablespoons). Starting with long side farthest from you, roll dough into a snug log, pinching firmly along egg-washed seam to seal. Bring ends of log together to form a ring, pinching to seal. Twist entire ring twice to form a double figure 8 and fit into one of lined loaf pans.
Make another babka with remaining dough, some of egg wash, and remaining butter and chocolate in same manner. Chill remaining egg wash, covered, to use later. Loosely cover pans with buttered plastic wrap (buttered side down) and let babkas rise in a draft-free place at warm room temperature until dough reaches top of pans, 1 to 2 hours. (Alternatively, let dough rise in pans in refrigerator 8 to 12 hours; bring to room temperature, 3 to 4 hours, before baking.)
Put oven rack in middle position and preheat oven to 350°F.
Brush tops of dough with remaining egg wash. Bake until tops are deep golden brown and bottoms sound hollow when tapped (when loaves are removed from pans), about 40 minutes. Transfer loaves to a rack and cool to room temperature.
Wednesday, March 21, 2007
Thai Food again!
More Thai dishes turned up on our dining table this week. Before I return the Thai recipe book, I decided to make just one more new recipe from it. We are going to splurge before we bid farewell. By splurge, I mean in term of calories and fat. I have my eyes on a vegetable and tofu curry recipe, which the main ingredient is coconut milk.
Although I always keep a few cans of coconut milk in my pantry cupboard (just in case), I never really got around using them. Since I won't be keeping this book any longer, I should at least try one recipe that used coconut milk. For the uninitiated, coconut milk is a common ingredient used in Thai Cooking. It is used in soup, stew and meat dishes. Something I wonder why the Thais can stay in shape, having to eat all these sinfully delicious food all the time! 
Anyway, I digress. The vegetable and tofu curry is a winner! Eventhough I have replaced a few vegetables the recipe required with something I have on hand. But I guess it doesn't matter, as the star for this dish is the fried tofu! Like many little sponges, they eagerly absorb the curry goodness from the coconut broth. So that when you bite into one, the broth it absorbed simply burst in your mouth. Maybe I exxagerate. But it is really really good. The only glitch though, is the addition of glass noodle. It somewhat absorbs all the broth, and leaves the dish dry. I have to add extra liquid to make up for the dryness in the end.
On the same vein, another Thai dish that we had sometime ago was the sweet and sour pork. A simple all-in-one dish. Simply looking at the pineapple chunks in the picture make me salivate.
Homemade Char Siew Rice
 I bought a big chunk of pork butt last week when it was on offer. Normally I would steer away even when the offer was irresistable.It is simply too laborious to trim off the fat embedded in the pork butt, eventhough I admit the meat itself is really flavorful after cooking.
Last week, a sudden craving of charsiew (chinese roast pork) prompted me to the poultry section and grabbed a slab of pork butt. There's nothing glamorous in butterflying and chopping the butt into small pieces of meat.(That is after I removed most of the fat!) In fact, I was exhausted after all these works. I think I must have working on it for almost 2 hours! Suddenly I miss home, where the biggest issue is when I want my charsiew...

Having said this, my effort was handsomely paid off. The homemade charsiew was fabulous! And it sees us through a few meals, with other dishes of course. The only complaint OCT had was the charsiew being a bit too dry, either because of the lack of fat, or a prolonged roasting time. But it was just the way I liked it. I never liked fatty charsiew anyway. I guess I could leave more fat behind next time, which I believe "the next time" will not come so soon....

There is still half a pack of the trimmed pork butt in the freezer. I think I will use it to make pork carnitas soon. Although the temptation of eating more charsiew is great.
Chinese Style Roast Pork (Charsiew)
Adapted from Cookinglight
1/2 cup hoisin sauce
1/2 cup ketchup
1/4 cup packed brown sugar
1/4 cup dry sherry
1/4 cup low-sodium soy sauce
2 tablespoons honey
2 teaspoons minced green onions
1 teaspoon dark sesame oil
4 garlic cloves, minced
2 pounds boneless Boston butt pork roast, trimmed and cut into (2-inch) cubes
Combine first 9 ingredients in a large zip-top plastic bag. Add pork; seal and marinate in refrigerator 24 hours, turning bag occasionally. Remove pork from bag, reserving marinade.
Preheat oven to 350°.
Place pork on the rack of a broiler pan lined with foil. Bake at 350° for 30 minutes. Turn pork over, and baste with reserved marinade. Discard remaining marinade. Bake an additional 20 minutes or until a thermometer registers 160° (slightly pink).
Preheat broiler. Broil pork 5 minutes or until browned.
Yield: 8 servings (serving size: 3 ounces)
A note on the marinade: I threw away a lot of the marinade in the end. I think half of the amount should be sufficient, as the meat would be marinated overnight in the fridge.(long enough for the flavor to infuse into the meat)
Monday, March 19, 2007
Tis the Season of Giving
 So said the people from Starbucks. I took advantage of their Coffee Break last Thursday and got myself a free cup of hot brewed coffee. Well, I didn't drink it, but used it in the batter for a chocolate cake!
It's not any chocolate cake. This one is from my favorite cookbook author- Ina Garten! According to Ina, this is the most fabulous chocolate cake she has ever made.I must add that, it is mine too! I still remember how nice and moist it was when I baked it for a party last time. This time, having more time on hand, I decided to dress up this homey cake, and adopted Alice Medrich's whipped ganache as filling, and Southern Living's idea of using Pirouline to line the edge of the cake. The result was pretty interesting although I must admit that my decorating skills have plenty of rooms for improvement....


The Most Fabulous Chocolate Cake

cake
1 3/4 cups all-purpose flour, plus more for dusting
2 cups sugar
3/4 cup unsweetened cocoa powder
2 teaspoons baking soda
1 teaspoon baking powder
1 teaspoon kosher salt
1 cup buttermilk
1/2 cup vegetable oil
2 large eggs
1 teaspoon pure vanilla extract
1 cup freshly brewed hot coffee
Filling:(enough to fill one layer)
Whipped Dark Chocolate Ganache
(adapted from Alice Medrich's Bittersweet)
1 cup heavy cream
3 ounces 72% chocolate
2 teaspoons granulated sugar
Frosting (enough for a thin layer of frosting)
3 ounces 72% chocolate, coarsely chopped
1 stick unsalted butter, at room temperature
1/2 large egg yolk
1/2 teaspoon pure vanilla extract
3/4 sifted confectioner sugar
1/2 tablespoon espresso powder
Decoration
2 packs of Pirouline
MAKE THE CAKE:
Preheat the oven to 350°. Butter two 8-inch round cake pans and line them with parchment paper; butter the paper. Dust the pans with flour, tapping out any excess.
In the bowl of an electric mixer fitted with a paddle, mix the flour with the sugar, cocoa powder, baking soda, baking powder and salt at low speed. In a medium bowl, whisk the buttermilk with the oil, eggs and vanilla. Slowly beat the buttermilk mixture into the dry ingredients until just incorporated, then slowly beat in the hot coffee until fully incorporated.
Pour the batter into the prepared pans. Bake for 35 minutes, or until a toothpick inserted in the center of each cake comes out clean. Let the cakes cool in the pans for 30 minutes, then invert the cakes onto a rack to cool completely. Peel off the parchment paper.
MAKE THE WHIPPED GANACHE:
Heat the heavy cream and sugar in a small saucepan until it bubbles on the edges and immediately pour it over the chocolate. Allows the heat from the cream to melt the chocolate.Let stand for 10-15 minutes. Slowly stir to make sure that the chocolate has completely melted. Chill for at least 6 hours or overnight, and whip the ganache only when ready to use.
MAKE THE FROSTING:
In a microwave-safe bowl, heat the chocolate at high power in 30-second intervals, stirring, until most of the chocolate is melted. Stir until completely melted, then set aside to cool to room temperature.
In the bowl of an electric mixer fitted with a paddle, beat the butter at medium speed until pale and fluffy. Add the egg yolk and vanilla and beat for 1 minute, scraping down the side of the bowl. At low speed, slowly beat in the confectioners’ sugar, about 1 minute. In a small bowl, dissolve the espresso powder in 1.5 teaspoons of hot water. Slowly beat the coffee and the cooled chocolate into the butter mixture until just combined.
Set a cake layer on a plate with the flat side facing up. Evenly spread the whipped ganache over the cake. Top with the second cake layer, rounded side up. Spread the frosting over the top and side of the cake. Arrange Pirouline immediately around the cake. Refrigerate for at least 1 hour before slicing.
MAKE AHEAD The frosted cake can be refrigerated for 2 days. Let stand for 1 hour before serving.(this is important, we took the cake out minutes before cutting, and had the cake threaten to fall apart) Read more...
Friday, March 16, 2007
Pizza and more asparagus
I have been wanting to try my hands at the "perfect pizza dough" featured in the latest Food and Wine magazine. But the long rising time deterred me. As someone who decide what to cook on the last minute basis, I can't wait for the 24 hours rising of the dough. I would have fainted from the hunger. Of course I can plan ahead. But I am not in planning mood this week. Maybe I will come around and make it next week. I promise.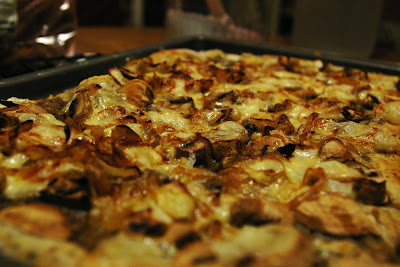
Meanwhile, I decided to give the Trader Joe's 99 cents pizza dough a try. Again, because I cooked my dinner at the last minute, I forgot to take a look at the flavor of dough I bought. It should be the herb-y stuff. Making pizza is really a breeze with the ready-made dough. I topped my pizza with some caramelised onion, crumbled gorgonzola and white button mushroom. Quite a last minute change considering my initial plan was to make a smoke salmon, sour cream, dill and red onion topping. I don't know why but I have the difficulty of making up my mind lately.... Anyway, I forgot to saute the mushroom, and they let out lots of moisture that made our pizza pretty wet.... Other than that, it was a pretty nice vegetarian pizza.
A note on the pizza dough, we find that it was a bit too dense for our liking. OCT thought he prefered the version I made from MS Baking Handbook, in which the crust was thinner. Oh well, I am not going to stop there. Not before I try the F&W's version...
To go with the soggy vegetarian pizza was a side of roasted asparagus (My favorite) and some fried rice (just to keep the rice-man happy!)
Thursday, March 15, 2007
Spring is in the air!
Eventhough the weather we are experiencing in the mid-west suggests otherwise. But the abundance of asparagus that comes with Spring is unmistakable. This week, I have the good fortune of getting some reasonably priced asparagus from the grocery store. Oh, asparagus is one of the many reasons I look forward to Spring. If I could, I wouldn't mind eating them everyday.
OCT on the other hand, couldn't apprehend my passion for asparagus. He would be perfectly happy eating broccoli whole year round.... Well, I am fine with that too. It only means I get to eat most of my favorite veggie.
On Monday night, I decided to dress my otherwise simple roasted asparagus up with roast garlic aioli. My review maybe bias because of my liking for asparagus, but OCT thought that the dish was pretty awesome! I like the subtle, slightly smokey roast garlic in the aioli. The flavor of garlic wasn't as pungent and assertive as it was before roasting. Incidentally, the aioli also went well with the roasted cauliflower we had for dinner. Maybe I will try it on the roast green beans next.
Other than roasted vegetables, I made us some New England Chowder. Bad choice! Experience taught me that our one and only one soup pot is not suitable for sauteeing flour or rather anything in that matter. But sauteeing is the crucial part in my chowder! So I went ahead, and followed the recipe to saute whatever necessary in the pot. Everything seemed well, up to the point after I added the cod and scallop. Feeling like a patient who suddenly regain her sense of smell, I detected a fainted burnt smell in the air. It wasn't until we shovelled the chowder into our mouth that I was sure of what had happened. And dejected at the prospect of what lay ahead of me....In case you wonder, the bottom of the pan was covered with stubborn burnt flour. Such a thick layer that even the strongest detergent couldn't penetrate. Later, I poured in some vinegar, which the acid did the trick to dissolve most of the burnt stuff. However, it wasn't without some muscle work....
Saturday, March 10, 2007
Lemon Spaghetti with Smoke Salmon
Home alone means I can take a long bubble bath without worrying about meeting dinner time.
Dinner alone means I get to try out my new recipe that I am not completely sure OCT will buy.The recipe in point is lemon spaghetti, which I remember seeing somewhere before. It is the perfect solution for someone who needs to shed off some new-gained weights and yet, still craves for something delicious. To make it extra special, I decided to add some smoke salmon. Afterall, I need the protein after working out in gym right?
The meal comes together in a flash, almost as fast as cooking instant noodle. All I have to do is tossing the cooked spaghetti with olive oil, lemon juice, smoked salmon and chopped parsley. And voila, a simple and delicious dinner for one! 
With something as healthy and simple like this, who needs to eat the instant noodles loaded with MSG!
Thursday, March 08, 2007
Blessing in Disguise

This is the first Friday treat since we got back from Singapore. I wanted to bake something simple yet breakfasty. After going through my to-try-list, I decided to make a coffee cake, a recipe I copied sometime ago from Martha Stewart Living magazine.
The recipe is fairly straightforward, just a simple cake batter, with filling made up of espresso powder-sugar mixture.The first complication came when I misread teaspoon as tablespoon. As a result, I added in more espresso powder than I should. But this wasn't too bad. I could rectify this simply by using lesser filling mixture and reserved the rest for future use.
Minutes later, after the batter was poured into the pan, I saw half a cup of sugar lying on the bench. Behind my back all this while. The portion I should have added into the batter long ago. I have no idea how I could make such silly mistake, twice in such simple recipe, but things happened nonetheless. There's nothing I could do than optimistically hoping for the best.
After waiting anxiously for 35 minutes, I took the cake out of the oven and cut a slice to try. It was not as bad as I had anticipated. However, it could use some glaze to make up for the sweetness I left out in the dough.  I made a simple coffee glaze for the accident cake, and with so many modifications, I now proudly claim this to be MY coffee cake.
Accidental Coffee Cake
All ingredients at room temperature:
2 cups all purpose flour
1 tsp baking soda
1 tsp baking powder
1/2 tsp table salt
1/2 cup unsalted butter
1/2 cup granulated sugar
1 cup sour cream
2 eggs
1 tsp vanilla extract
filling:
4 tsp espresso powder
3 tbsp granulated sugar
4.5 tsp Dutch Processed Powder Cocoa Powder
Coffee Glaze:
5 tsp strong brewed coffee
1 tsp espresso powder
1 cup powdered sugar
Preheat oven to 350F. Sift together flour, baking powder, baking soda and salt in a medium bowl. Set aside.
Buttered and floured a 10 inch bundt pan. In an electric mixer, beat butter and sugar together until light and fluffy. Add eggs, one at a time until just combined.
Mix in flour mixture in 3 batches, alternating with sour cream. Add vanilla extract, mix until blended.
Spread 1/3 batter into pan. sprinkle half of the filling, spread another 1/3 batter. followed by filling/ Cover with the rest of the batter. Run a thin knife to marbelize.
Bake for 35-38 minutes or until the cake tester comes out clean. Let cool for 30 minutes.
Stir together coffee, espresso powder and powdered sugar. Pour over inverted cake.
Serves 10-12.