Sunday, December 07, 2008

Cream Scones and life back to normal

scones


You may think it's a cliche, but time really flies faster when you are having fun. We reluctantly bid our loved ones farewell last Thursday after a 3 weeks vacation in Singapore and Malaysia. The journey back was exhausting, as usual. Both of us walked pass the custom and immigration like zombies, only to come alive when we realized that we had left our carry-on luggage (with both our laptops)somewhere at the immigration check point! Thank God for the TSA staff, who went in to search for us three times, and had it found!

The incident almost costed us our connecting flight back to Atlanta. We were at the gate 10 minutes before its takeoff. Our luggages however, couldn't make it on time. Looking on the bright side, we were happy that someone sent them to our doorstep the next day for only 2 dollars. And that's the tip I gave the guy for carrying them up to my apartment on the second floor. After a 24 hours of flying and transiting, the last thing we desire, is to carry our unbelievably heavy bags up those stairs!

So yes, life is back to normal. I am almost fully recovered from the jet-lag, having slept most of my Friday and Sat away. The coming weeks are going to be super busy around here, there are cookies to be baked, parcels to be sent and some important decisions to be made.

And my first ever giveaway too! I will tell you more about it early next week.

chocolate chips scones

Meanwhile, here's the cream scones I made sometime ago for a friend's house moving. I figured they were easy to eat and provided a delicious source of energy before the physical labor ahead of us.

The cream scones recipe from Alice Medrich is richer than my usual standby, which uses buttermilk as the binding agent. If you are looking for something indulgent for the weekend breakfast or tea time, give this a try.

Making scones by hand is a surprising easy and rewarding experience. If you are making scones for the first time, here's my simple guide to delicate and flaky scones.


Cream Scones with Chocolate Chunks
adapted from Alice Medrich's Bittersweet

2 cups all purpose flour
1/4 cup sugar, plus sugar for sprinkling
2 1/2 tsp baking powder
1/2 tsp salt
3 to 4 oz bittersweet or semisweet chocolate, coarsely chopped
1 1/4 cups heavy cream, cold
1 tbsp milk or cream for brushing the tops

Position a rack in the center of the oven and preheat to 425F. Line a baking sheet with parchment paper.

In a large bowl, whisk the flour, sugar, baking powder, and salt together thoroughly. Stir in the chopped chocolate. Make a well in the center and pour the cream into it. Use a rubber spatula to push the dry ingredients from the sides of the bowl into the well, cutting and turning the mixture just until the dry ingredients are almost entirely moistened and the dough looks rough and shaggy. Gather the dough into a lump and knead it gently against the sides of the bowl five or more times, pressing in the loose pieces, until the dough just holds together (it should not be smooth) and the sides of the bowl are fairly clean.

On a lightly floured surface, pat the dough into an 8.5 inch round about 3/4 inches thick.*at this point, I like to cover the dough in saran wrap and chill for at least half an hour,before proceeding to the rest of the steps. The dough is more manageable upon chilling. You can also keep the dough for up to 1 month at this stage, and bake it without defrosting first. Just lightly score the dough into 12 wedges, so that it's easier to cut and bake later. *

Cut into 12 wedges. Place them at least 1 inch apart on the lined baking sheet. Brush the tops with cream or milk and sprinkle lightly with sugar.

Bake until the tops are golden brown, 12-15 minutes. Let cool on a rack, and serve warm or at room temperature.

Read more...

Thursday, November 27, 2008

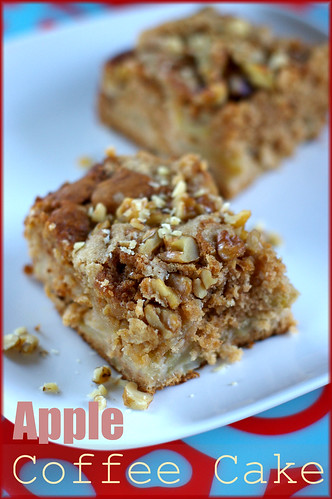
Apple Coffee Cake & Happy Thanksgiving!

apple coffee cake


Although Thanksgiving is not part of our culture, we embraced the speacial day ever since we have been here. Every year, we invited friends over to spend Thanksgiving with us. This Thanksgiving, however, we are back in sunny Malaysia, surrounded by our family for the first time in many years.

We are glad to be home, of course. But we also miss the time spent preparing the big meal. This year, we are lucky to have traditional homecooked meal prepared by mum. I know many of you are travelling today, so I hope you'll have a safe trip home!

From the "Fresh from the Oven" household, we wish you a happy Thanksgiving!


apple coffee cake

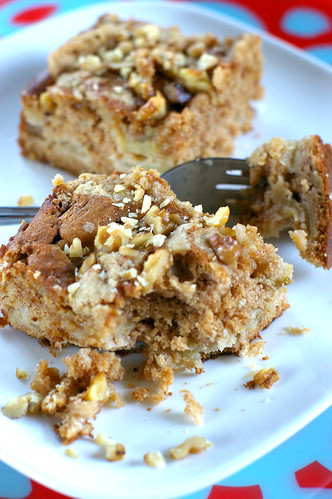
I don't have any Thanksgiving recipes to share, but may I recommend this Apple Coffee Cake for your post Thanksgiving breakfast? It's easy to make, yet the recipe yield a moist and generous serving. OCT colleagues loved it when he brought it to the lab meeting before we came back. I hope you will like it too!

apple coffee cake


Apple Coffee Cake with Crumble Topping and Brown Sugar Glaze
adapted from FoodNetwork.com

1 stick plus 2 teaspoons unsalted butter
1 1/2 cups packed light brown sugar
2 large eggs
2 cups all purpose flour
1 teaspoon baking soda
1 teaspoon ground cinnamon
1/2 teaspoon salt
1 cup sour cream
1 teaspoon pure vanilla extract
2 cups peeled, cored and chopped apples
Crumble Topping:
1/2 cup packed light brown sugar
1/2 cup all purpose flour
1/2 teaspoon ground cinnamon
4 tablespoons unsalted butter, softened
Brown Sugar Glaze:
1/2 cup packed light brown sugar
1/2 teaspoon vanilla extract
2 tablespoons water

Preheat the oven to 350 degrees F. Lightly grease a 13 by 9-inch glass baking dish with 2 teaspoons of the butter.

In a large bowl, cream together the remaining stick of butter and sugar until light and fluffy. Add the eggs 1 at a time, beating after the addition of each. In a separate bowl or on a piece of parchment, sift together the flour, baking soda, cinnamon, and salt. Add to the wet ingredients, alternating with the sour cream and vanilla. Fold in the apples. Pour into the prepared baking dish, spreading out to the edges.

To make the topping, in a bowl, combine the sugar, flour, cinnamon, and butter, and mix until it resembles coarse crumbs. Sprinkle the topping over the cake and bake until golden brown and set, 35 to 40 minutes. Remove from the oven and let cool on a wire rack for at least 10 minutes.

To make the glaze, in a bowl, combine the sugar, vanilla, and water and mix until smooth. Drizzle the cake with the glaze and let harden slightly. Serve warm.

note: I omit the glaze, because I think the cake is sweet enough.

Read more...

Monday, November 24, 2008

Homemade Bagels

Bagels

I love bagels. I can eat them for breakfast, lunch or dinner. We usually get them by the dozens and finish them between the two of us in the span of a few days. When I visited NYC a few months ago, ST and I checked out Absolute Bagels and Murray's for their bagels. I was hoping to experience the bagel epiphany,in the city that claims to have the best bagels in the US. But guess what? I realized that they don't taste much different from my neighborhood Einstein Bro's. Perhaps I don't have discerning taste bud?

I have always wanted to make bagels, but the lengthy process of mixing, proofing, shaping, boiling and baking deterred me for a long time from sinking my fingers into the dough . It wasn't until a few weeks before our trip to Asia that I got down to making my first batch of bagels.

Bagels

The bagel recipe comes from Martha Stewart's Baking Handbook , which I find the instructions to be clear and straightforward. Although the instructions seemed lengthy, it wasn't as hard as I imagined.

To my relief, the shaping was a breeze because the dough was not sticky at all. Even the most nerve racking part- boiling the dough was quite manageable. I was mesmerized by the movement of the dough which first sank to the bottom in the boiling water, and then floated onto the top when it's ready to be baked.

Bagels

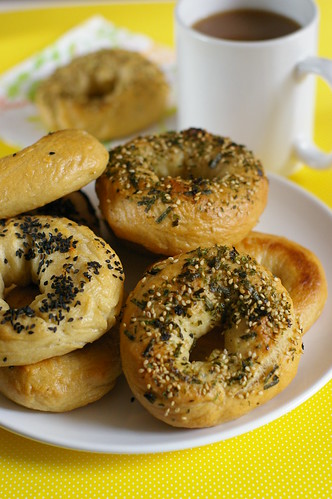
For toppings, I was thinking of my favorite "everything" topping, but have to settle with things I have in the pantry. I experimented a few bagels with Furikake, which is a kind of Japanese seasoning. It gave the bagels a japanese twist but I still prefer the "everything" topping. Having said that, I like the texture of the bagels, especially when they were fresh from the oven. It is great to cross out another item on my to-bake-list before the year ends!

Bagels
adapted from Martha Stewart's Baking Handbook

3/4 tsp active dry yeast
1 2/3 cup warm water
3 tbsp granulated sugar
3 tbsp malt syrup
1 lb 6 oz bread flour (about 4.5 cups)
1 1/2 tbsp salt
toppings: sesame seeds, fennel seeds, poppy seed , Furikake seasoning


In the bowl of an electric mixer, whisk together the active dry yeast and warm water. Let sit until foamy, about 5 minutes. Then replace whisk with dough hook. With the mixer on low, add sugar, 1 tbsp malt syrup, bread flour and salt. Knead until the dough forms, which takes about one minute. The dough will be a little sticky. Continue to knead on medium for 5 minutes. Transfer the dough to a lightly oiled bowl and cover with plastic wrap. Let rise in a warm place until doubled, about 2 hours.

Divide dough into 10 pieces. Cover with plastic wrap and let rest 20 minutes.

Line two baking sheets with parchment paper and spray with cooking spray to grease. With lightly oiled hands, roll each piece of dough to be about 8″ inch long and then shape into a circle to make the bagel.

Place bagels on prepared sheets at least 2″ inch apart. Cover with oiled plastic wrap and let sit for another 20 minutes or until slightly puffy.

Preheat the oven to 500 degrees. Fill your largest, widest stockpot with about 4 quarts of water and bring to a boil. Add the remaining malt syrup.

Gently drop bagels into the water, putting in as many as possible without them touching. After 30 seconds, flip bagels over and simmer for another 30 seconds. Using a slotted spoon remove the bagel and place on parchment lined baking sheet. Top with toppings of your choice.

Immediately place baking sheets in oven and bake for 5 minutes. Then rotate sheet and lower oven temp to 350F. Continue to bake until the tops of the bagels begin to turn a golden brown - about 10 minutes. Flip bagels over and continue to bake for another 5 minutes. Transfer to a wire rack to cool.

Enjoy it while it's warm or keep the remaining in the freezer, for up to 2 weeks. Reheat the frozen bagels in a preheated 350F for 5 minutes, or until warm.

Read more...

Friday, November 21, 2008

Lemon Yogurt Cake

lemon yogurt cake

I am greeted by my greasy reflection, while sitting in front of a mirror to type this entry. The loose t-shirt I have on, is glued uncomfortably to my back. In case you are wondering, I am far from the dry and cold winter in the northern hemisphere. And yes, we are back to the hot and humid foodies paradise- Singapore!

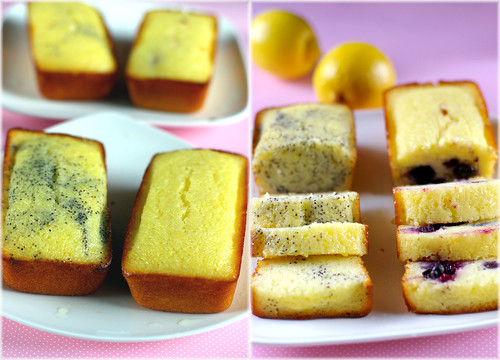
In my rush to clear up the fridge content before our 3 weeks vacation, I baked this lemon yogurt cake. Instead of our usual travel companion-banana cake, we have this to snack on board the 20 odd hours flight.

The lemon yogurt cake recipe originated from one of my favorite cookbook author- Ina Garten. Her lemon cake recipe is one of the early recipes I have tried when I first started baking. It is also one of my all time favorites.

lemon yogurt cake

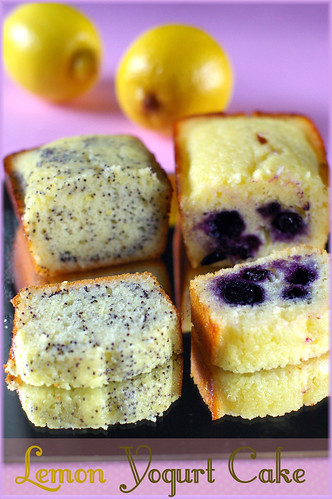
Her lemon yogurt cake uses the same technique of brushing lemon syrup onto the hot cake, which assures that the cake stays moist and packed full with lemony flavor. The kind of cake that I would gladly eat anytime of the day. Instead of using whole milk yogurt, I used the greek yogurt samples I got from Stonyfield Farm. I added 2 containers of the 5.3 oz Oiko organic Greek yogurt, which was slightly more than the recipe indicated. Because I remember having lots of syrup leftover when I made the lemon cake last time, I simply used the juice from 2 lemons, in which the zest had been added to the batter earlier on.

For the convenience of packing, I made the cake with my mini loaf pan and did some personalization with each. Frozen blueberries were added to one mini pan, making that a lemon blueberry cake. The next one has poppy seed in it, making it a lemon poppy seed cake. I left one au naturel, and one with lesser poppy seed in case OCT decides he doesn't like poppy seed.

lemon yogurt cake

How glad we were having the lemon yogurt cake on board with us! The food that United Airline served in the economy class cabins were horrendous! OCT who is not a picky eater laments that the portion has shrunken too. Naturally, he was hungry before the next meal was served. The yogurt cake saved us from resorting to the airline pretzels. :)


Lemon Yogurt Cake
adapted from Ina Garten's Barefoot Contessa At Home

1 1/2 cups all-purpose flour
2 teaspoons baking powder
1/2 teaspoon kosher salt
2 containers of 5.3oz organic Greek yogurt
1 1/4 cups sugar, divided
3 large eggs
2 teaspoons grated lemon zest (2 lemons)
1/2 teaspoon pure vanilla extract
1/2 cup vegetable oil
1/4 cup freshly squeezed lemon juice (from 2 lemons)
2 tablespoons of poppy seed
1/4 cup of frozen blueberries (more if you are making a big loaf cake)

Preheat the oven to 350 degrees F. Grease and flour an 8 1/2 by 4 1/4 by 2 1/2-inch loaf pan or the mini loaf pans.

Sift together the flour, baking powder, and salt into 1 bowl. In another bowl, whisk together the yogurt, 1 cup sugar, the eggs, lemon zest, and vanilla. Slowly whisk the dry ingredients into the wet ingredients. With a rubber spatula, fold the vegetable oil into the batter, making sure it's all incorporated. Pour the batter into the prepared pan.

Add in your preferred add on ingredients (poppy seed or blueberries) and bake for about 50 minutes, (if you are using the big loaf pan) about 25-30 minutes (if you are using smaller pans),or until a cake tester placed in the center of the loaf comes out clean.

Meanwhile, cook the 1/4 cup lemon juice and remaining 1/4 cup sugar in a small pan until the sugar dissolves and the mixture is clear. Set aside.

When the cake is done, allow it to cool in the pan for 10 minutes. Carefully place on a baking rack over a sheet pan. While the cake is still warm, pour the lemon-sugar mixture over the cake and allow it to soak in. Cool.

Read more...

Sunday, November 16, 2008

Apple Galette

apple galette

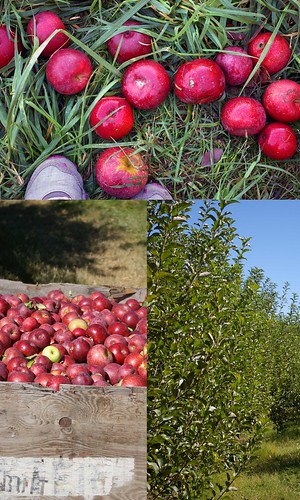
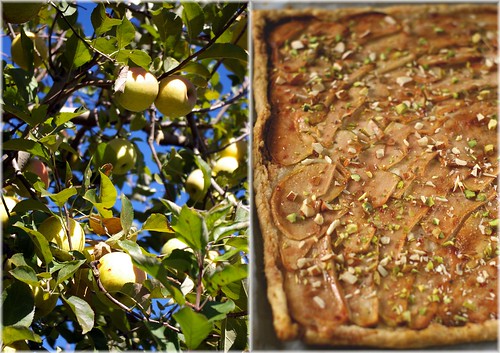
I love fruits picking. There's an indescribable satisfaction of biting into the ripe fruit that one just picked from the tree. A few weeks ago, I persuaded my friends who have never been to fruits picking for an apples picking session at an apple orchard 2 hours drive from Atlanta. Needless to say, we had a great time that day.

apple3

Upon returning with a lot more apples than we could consume, my friends C and T turned to me for an apple pie demonstration. Instead of teaching them the classic apple pie, I opted for a simple apple galette recipe from Cook's Illustrated. A recipe source I know will not disappoint. And I am happy to report that the crust is one of the flakiest I have made. The video demonstation on the site is easy to follow and helpful for bakers of all experience levels.

apple galette3

Although the recipe used food processor, we made the dough by hand, with a pastry cutter. I offered my friends C and T who have never worked with pie dough the following pointers, which I hope you will find them helpful too:

1. Remember to have all the starting ingredients COLD. (the butter, water and flour).

2. Add the ice water slowly. One tablespoon at a time, until a dough ball is almost formed, but not quite yet. There will be some flour left at the bottom of the bowl, but that's ok. You can easily incorporate them into the dough when wrapping it into a circle for chilling later.

3. Handle the dough with a light hand and as little as possible. You don't want to overwork the dough or it will turn out tough after baked.

4. Let the dough rest and chill,for at least 30 minutes, after mixing and forming.

5. Don't be afraid of the dough and have fun!

apple galette

Although we had a little problem cutting and arranging the apple slices in an appealing fashion like the video demonstration,our apple galette turned out just as delicious. I didn't have apricot preserves, so I substituted it with raspberry preserves which explains the dark hue of the galette. That maybe the only aspect that could be improved on. That could easily be fixed with some chopped nuts scattered on top for color constrast.

The Apple Galette is a simple and elegant alternative to the classic American Apple Pie. You will be amazed by how fast it's disappearing from the plate. And if you are like me, you'd regret not cutting a bigger slice for yourself first before serving the others.

Apple Galette
adopted from Cook's Illustrated

Dough
2 cups all-purpose flour (7 1/2 ounces)
2 tablespoons cornstarch
1/2 teaspoon salt
1/2 teaspoon sugar
12 tablespoons cold unsalted butter , cut into 5/8-inch cubes (1 1/2 sticks)
7-9 tablespoons ice water

Apple Filling
1 1/2 pounds apples (3-4 medium or 4-5 small-use granny smith, empire or golden delicious)
2 tablespoons unsalted butter , cut into 1/4-inch pieces
1/4 cup sugar
2 tablespoons apricot preserves ( I substituted with raspberry preserves)
1 tablespoon water


CUT IN BUTTER:
Using Food Processor: Combine flour, cornstarch, salt, and sugar in food processor with three 1-second pulses. Scatter butter pieces over flour, pulse to cut butter into flour until butter pieces are size of large pebbles, about 1/2 inch, about six 1-second pulses.
Using pastry cutter: Mix all dry ingredients in a big bowl, scatter butter pieces over flour, and cut the butter into flour until butter pieces are the size of large pebbles.

ADD WATER:
Using Food Processor: Sprinkle 1 tablespoon water over mixture and pulse once quickly to combine; repeat, adding water 1 tablespoon at a time and pulsing, until dough begins to form small curds that hold together when pinched with fingers (dough should look crumbly and should not form cohesive ball).
Using pastry cutter: Sprinkle water over mixture and lightly mix with hand, adding water 1 tablespoon at a time, until dough begins to form small curds that hold together when pinched with finger. It is ready when it looks crumbly and should not form cohesive ball.

FORM MOUND:
Empty dough onto work surface and gather into rough rectangular mound about 12 inches long and 5 inches wide.

FRAISAGE AND CHILL:
Starting at farthest end, use heel of hand to smear small amount of dough against counter, pushing firmly down and away from you, to create separate pile of dough (flattened pieces of dough should look shaggy). Continue process until all dough has been worked. Gather dough into rough 12 by 5-inch mound and repeat smearing process. Dough will not have to be smeared as much as first time and should form cohesive ball once entire portion is worked. Form dough into 4-inch square, wrap in plastic, and refrigerate until cold and firm but still malleable, 30 minutes to 1 hour.

CUT APPLES:
About 15 minutes before baking, adjust oven rack to middle position and heat oven to 400 degrees. Peel, core, and halve apples. Cut apple halves lengthwise into 1/8-inch-thick slices.

ROLL AND TRIM DOUGH:
Place dough on floured 16 by 12-inch piece of parchment paper and dust with more flour. Roll dough until it just overhangs all four sides of parchment and is about 1/8 inch thick, dusting top and bottom of dough and rolling pin with flour as needed to keep dough from sticking. Trim dough so edges are even with parchment paper.

FORM BORDER:
Roll up 1 inch of each edge and pinch firmly to create 1/2-inch-thick border. Transfer dough and parchment to rimmed baking sheet.

LAYER APPLES AND BAKE:
Starting in one corner, shingle sliced apples to form even row across bottom of dough, overlapping each slice by about one-half. Continue to layer apples in rows, overlapping each row by half. Dot apples with butter and sprinkle evenly with sugar. Bake until bottom of tart is deep golden brown and apples have caramelized, 45 to 60 minutes. Check the bottom of the galette halfway through baking-it should be a light golden brown. If it is darker, reduce the oven temperature to 375 degrees.

GLAZE:
While galette is cooking, combine apricot preserves and water in medium microwave-safe bowl. Microwave on medium power until mixture begins to bubble, about 1 minute. Pass through fine-mesh strainer to remove any large apricot pieces. Brush baked galette with glaze and cool on wire rack for 15 minutes. Transfer to cutting board. Cut in half lengthwise and then crosswise into individual portions; serve.

Read more...

Friday, November 07, 2008

Hazelnut Ring Tea Cake

hazelnut ring tea cake


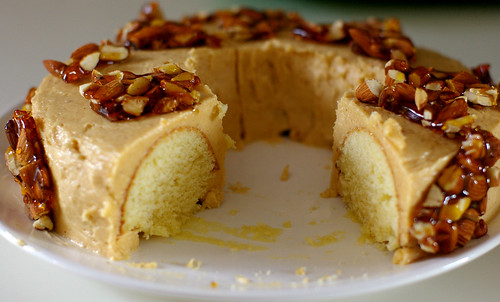
A few weekends ago, OCT and I played babysitters for his colleague who needed to work in the morning. Thinking of having something sweet for all of us to nibble, after a morning of play, I made a simple tea cake from Roland Mesnier's Basic to Beautiful Cakes . Chef Mesnier who is the former White House Executive pastry chef, has spent 25 years serving desserts to many influential politicians and first family.


hazelnut ring tea cake


I also enjoy reading the little introduction preceded every recipes. For instance, Chef Mesnier wrote that this Hazelnut Tea Cake was referred by President Reagan as "The Crunchy Cake" and had requested it for his birthdays several times. Information like this would be great conversation material on dinner parties, although I secretly suspect our young friend wasn't interested in this snippet of Mr Reagen's birthday cake preference. He was more anxious to get a second slice, with extra crunch on the side.


I adopted the recipe of the cake base, but used the praline buttercream recipe from one of the past Daring Baker's Challenges. Instead of making the nougat suggested by Chef Mesnier, I used Giada De Laurentiis's recipe.

Our little friend enjoyed the cake, especially the crunchy part!So was his play mate. :p


hazelnut ring tea cake


Hazelnut Ring Tea Cake
adapted from Roland Mesnier's "Basic To Beautiful Cakes"

For the Cake:
1 cup plus 2 tablespoons all purpose flour
1 teaspoon baking powder
pinch salt
2 large eggs, at room temperature
3/4 cup sugar
1 tablespoon pure vanilla extract
4 tablespoons unsalted butter, melted and cooled
1/2 cup creme fraiche or sour cream, at room temperature. I use sour cream.

For the crunch:
1 cup (about 4 1/2-ounces) hazelnuts/almonds, toasted and skinned
2/3 cup sugar
1/3 cup water

1 recipe of Praline Buttercream. See here for the recipe.

To make the cake:

Preheat the oven to 400F. Heavily grease and flour an 8-inch tube pan. I use a 10 cup bundt pan. The cake is not as high as the original recipe, but taste all the same.

Stir the flour, baking powder, and salt together in a small bowl.

In a large bowl, combine the eggs, sugar and vanilla. Stir until well combined, but do not overmix. Stir the flour mixture into the egg mixture. Then stir in the butter and sour cream/creme fraiche.

Pour batter into the prepared pan and bake intil the cake begins to form a crust, about 15 minutes. Without opening the oven door, turn the heat down to 350F and continue baking until a toothpick insered into the center comes out clean, 20-30 minutes longer.Let the cake rest in the pan on a wire rack and unmold it. Re-invert it onto another wire rack so it is right side up, and allow it to cool completely.

To make the crunch,
Place the toasted nuts close together in a single layer on a parchment-lined baking sheet. Combine the sugar and water in a small saucepan over medium-high heat. Stir the sugar mixture until dissolved. Bring to a boil and let cook until the sugar is light brown, about 8 minutes. Let the bubbles subside then pour the caramelized sugar over the nuts. Place the baking sheet in the refrigerator and let the sugar nut mixture cool until hard, about 30 minutes. When the sugar nut mixture is hard and cool, top with another piece of parchment paper and pound into small pieces, or place the sugar nut mixture on a cutting board and cut into small pieces. Set aside.

To assemble:
Liberally cover the prepared praline buttercream on the cake. Smooth all sides, and arrange the crunch in an appleasing manner.

Serves 12.

Read more...

Monday, November 03, 2008

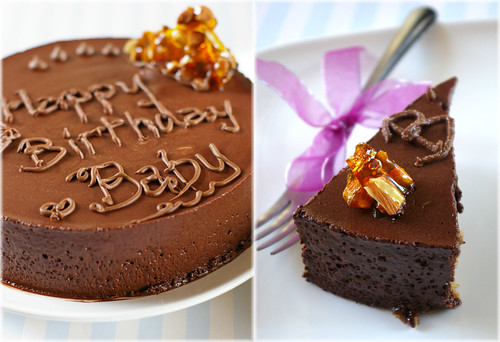
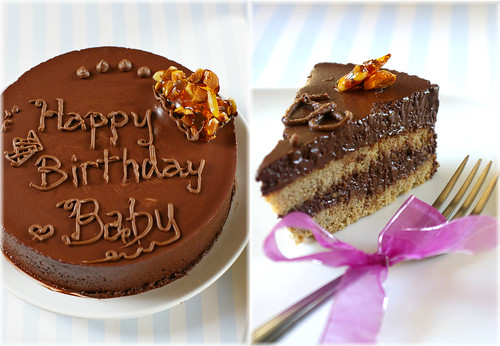
Chocolate Mousse Cake for a special man

oct birthday cake 08

OCT's birthday falls on October. Every year, as his special day approaches, I'd pile a few cookbooks on his lap and ask him to pick one as his birthday cake. Ever since I started baking, his request has always been mango cake. Yes, we both love mango, a lot. So I granted his wishes the past two years. We love mango so much that I even make a mango cheesecake for my birthday last year too.

oct birthday 08

This year however, I think it's time for a change.
"How about having something different for your birthday this year?"
"hmm...but I like mango cake."
"you know, mangoes are not in season now...I will need to use the frozen stuff and you know they are not as flavorful as the fresh ones."
"really? *sigh*....then I will have a chocolate cake"
"great choice, my Lord !"

Then it was up to me on which chocolate cake to make. In the end, I chose a chocolate mousse cake. The cake base was a coffee genoise I adapted from Roland Mesnier's book, and the chocolate mousse was the same one I used for my birthday cake. While the cake turned out disappointedly dry and flavorless, the low fat chocolate mousse was as delightful as I remembered.

oct birthday cake 08


I love how the low fat chocolate mousse tastes deceptively rich and sinful. Instead of using heavy whipping cream, eggwhites was used to make the safe meringue. It was then folded into the chocolate mixture to provide the cloud-like texture to the mousse.

I am not inclined to share the genoise recipe, based on the result I got. Instead, I would recommend anyone interested in making this cake to use this recipe. Of course making the lady fingers from this recipe would make the delicious chocolate mousse cake extra special too.

Not wanting to add unnecessary calories with buttercream decoration, I simply adore the cake with hazelnut brittle I have left from another cake.

oct birthday 08

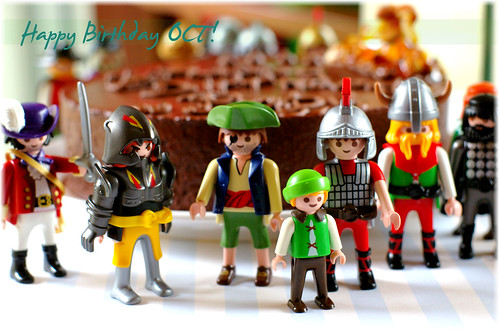
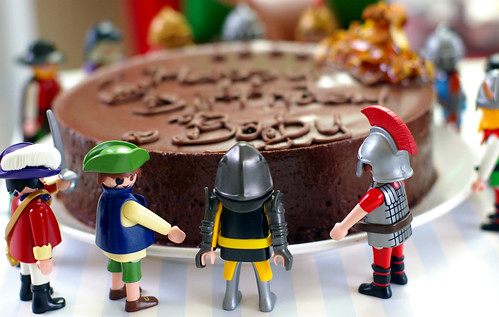
Before OCT reached home from work, I took out some of his favorite toys to take a picture with the birthday cake. After that,I prepared a seafood noodle, along with 2 eggs for his dinner. The dinner he has requested, along with the chocolate cake. Noodle signifies longevity in Chinese. My mother in law used to cook noodle on OCT birthday every year before he came to the States, and that responsibility has passed down to me now. :)


Read more...

Wednesday, October 29, 2008

Daring Bakers Challenge is What's for Dinner Tonight

pizza

(seafood pizza, lemon asparagus pizza, caramelized onion, mushroom and triple cheese pizza)

It's the time of the month again! Pizza is chosen as the October Daring Bakers Challenge, by our hostess Rosa's Yummy Yums. When the challenge was first revealed, I thought it was going to be a piece of cake. Why, I have made a few pizzas before, it's not the most complicated thing to make, if working with yeast doesn't intimidate you.

As I read on, I realize that, as part of the challenge, we have to attempt tossing the dough, and capture the moment. That would indeed be a challenge.

Unlike the pizza recipes I have worked with before, this recipe from Peter Reinhart takes 2 days. I am intrigued by the different in texture and taste developed from the prolong fermentation/resting. I must say that it's one of the best pizza crust I have made.

I don't have a pizza stone, so I simply use the back of the cookie sheet. The crust still turns out crisp. Instead of cornmeal, I use kamut flour, which I can't find other use after making a batch of kamut shortbread. Other than that, I follow the recipe provided.

seafood pizza

I make 3 pizzas from half a batch of pizza dough- Seafood Pizza, Lemon Asparagus Pizza and Caramelized Onion & Mushroom with Triple Cheese Pizza. As expected, the Seafood Pizza turned out to be the crowd pleaser. But the lemon asparagus pizza, which toppings idea I adopted from Elizabeth Falkner on foodandwine.com is surprisingly delightful.

The three pizzas are what's for dinner tonight, and that makes me a very happy girl! Thanks Rosa's Yummy Yums for selecting this recipe as our October challenge. I am glad to have another great pizza dough recipe under my belt now. I can totally foresee myself making it again soon for brunch or lunch party, as my friend T not so discreetly hinted.

I tried the tossing method, a skill I really want to master, but just couldn't get it right yet. :( I am going to try that again when I shape the remaining dough.

Check out other mouth-watering pizza creations from my fellow Daring Bakers here.

Basic Pizza Dough
“The Bread Baker's Apprentice: Mastering The Art of Extraordinary Bread” by Peter Reinhart
Makes 6 pizza crusts (about 9-12 inches/23-30 cm in diameter).

Ingredients:
4 1/2 Cups (20 1/4 ounces/607.5 g) Unbleached high-gluten (%14) bread flour or all purpose flour, chilled - FOR GF: 4 ½ cups GF Flour Blend with xanthan gum or 1 cup brown rice flour, 1 cup corn flour, 1 cup oat flour, 1 ½ cup arrowroot, potato or tapioca starch + 2 tsp xanthan or guar gum
1 3/4 Tsp Salt
1 Tsp Instant yeast - FOR GF use 2 tsp
1/4 Cup (2 ounces/60g) Olive oil or vegetable oil (both optional, but it’s better with)
1 3/4 Cups (14 ounces/420g or 420ml) Water, ice cold (40° F/4.5° C)
1 Tb sugar - FOR GF use agave syrup
Semolina/durum flour or cornmeal for dusting

DAY ONE

Method:
1. Mix together the flour, salt and instant yeast in a big bowl (or in the bowl of your stand mixer).

2. Add the oil, sugar and cold water and mix well (with the help of a large wooden spoon or with the paddle attachment, on low speed) in order to form a sticky ball of dough. On a clean surface, knead for about 5-7 minutes, until the dough is smooth and the ingredients are homogeneously distributed. If it is too wet, add a little flour (not too much, though) and if it is too dry add 1 or 2 teaspoons extra water.

NOTE: If you are using an electric mixer, switch to the dough hook and mix on medium speed for the same amount of time.The dough should clear the sides of the bowl but stick to the bottom of the bowl. If the dough is too wet, sprinkle in a little more flour, so that it clears the sides. If, on the contrary, it clears the bottom of the bowl, dribble in a teaspoon or two of cold water.
The finished dough should be springy, elastic, and sticky, not just tacky, and register 50°-55° F/10°-13° C.

Or

2. FOR GF: Add the oil, sugar or agave syrup and cold water, then mix well (with the help of a large wooden spoon or with the paddle attachment, on low speed) in order to form a sticky ball of dough.

3. Flour a work surface or counter. Line a jelly pan with baking paper/parchment. Lightly oil the paper.

4. With the help of a metal or plastic dough scraper, cut the dough into 6 equal pieces (or larger if you want to make larger pizzas).

NOTE: To avoid the dough from sticking to the scraper, dip the scraper into water between cuts.

5. Sprinkle some flour over the dough. Make sure your hands are dry and then flour them. Gently round each piece into a ball.

NOTE: If the dough sticks to your hands, then dip your hands into the flour again.

6. Transfer the dough balls to the lined jelly pan and mist them generously with spray oil. Slip the pan into plastic bag or enclose in plastic food wrap.

7. Put the pan into the refrigerator and let the dough rest overnight or for up to thee days.

NOTE: You can store the dough balls in a zippered freezer bag if you want to save some of the dough for any future baking. In that case, pour some oil(a few tablespooons only) in a medium bowl and dip each dough ball into the oil, so that it is completely covered in oil. Then put each ball into a separate bag. Store the bags in the freezer for no longer than 3 months. The day before you plan to make pizza, remember to transfer the dough balls from the freezer to the refrigerator.

DAY TWO

8. On the day you plan to eat pizza, exactly 2 hours before you make it, remove the desired number of dough balls from the refrigerator. Dust the counter with flour and spray lightly with oil. Place the dough balls on a floured surface and sprinkle them with flour. Dust your hands with flour and delicately press the dough into disks about 1/2 inch/1.3 cm thick and 5 inches/12.7 cm in diameter. Sprinkle with flour and mist with oil. Loosely cover the dough rounds with plastic wrap and then allow to rest for 2 hours.

Or

8. FOR GF: On the day you plan to eat pizza, exactly 2 hours before you make it, remove the number of desired dough balls from the refrigerator. Place on a sheet of parchment paper and sprinkle with a gluten free flour. Delicately press the dough into disks about ½ inch/1.3 cm thick and 5 inches/12.7 cm in diameter. Sprinkle the dough with flour, mist it again with spray oil. Lightly cover the dough round with a sheet of parchment paper and allow to rest for 2 hours.

9. At least 45 minutes before making the pizza, place a baking stone on the lower third of the oven. Preheat the oven as hot as possible (500° F/260° C).

NOTE: If you do not have a baking stone, then use the back of a jelly pan. Do not preheat the pan.

10. Generously sprinkle the back of a jelly pan with semolina/durum flour or cornmeal. Flour your hands (palms, backs and knuckles). Take 1 piece of dough by lifting it with a pastry scraper. Lay the dough across your fists in a very delicate way and carefully stretch it by bouncing it in a circular motion on your hands, and by giving it a little stretch with each bounce. Once the dough has expanded outward, move to a full toss.

Or

10. FOR GF: Press the dough into the shape you want (about 9-12 inches/23-30 cm in diameter - for a 6 ounces/180g piece of dough).

NOTE: Make only one pizza at a time.
During the tossing process, if the dough tends to stick to your hands, lay it down on the floured counter and reflour your hands, then continue the tossing and shaping.
In case you would be having trouble tossing the dough or if the dough never wants to expand and always springs back, let it rest for approximately 5-20 minutes in order for the gluten to relax fully,then try again.
You can also resort to using a rolling pin, although it isn’t as effective as the toss method.

11. When the dough has the shape you want (about 9-12 inches/23-30 cm in diameter - for a 6 ounces/180g piece of dough), place it on the back of the jelly pan, making sure there is enough semolina/durum flour or cornmeal to allow it to slide and not stick to the pan.

Or

11. FOR GF: Lightly top it with sweet or savory toppings of your choice.

12. Lightly top it with sweet or savory toppings of your choice.

Or

12. FOR GF: Place the garnished pizza on the parchment paper onto the stone in the oven or bake directly on the jelly pan. Close the door and bake for about 5-8 minutes.

NOTE: Remember that the best pizzas are topped not too generously. No more than 3 or 4 toppings (including sauce and cheese) are sufficient.

13. Slide the garnished pizza onto the stone in the oven or bake directly on the jelly pan. Close the door and bake for abour 5-8 minutes.

Or

13. FOR GF: Follow the notes for this step.

NOTE: After 2 minutes baking, take a peek. For an even baking, rotate 180°.

If the top gets done before the bottom, you will need to move the stone or jelly pane to a lower shelf before the next round. On the contrary, if the bottom crisps before the cheese caramelizes, then you will need to raise the stone or jelly.

14. Take the pizza out of the oven and transfer it to a cutting board or your plate. In order to allow the cheese to set a little, wait 3-5 minutes before slicing or serving.

To make Seafood Pizza
Toppings: 8 medium shrimps, 1/2 cup squids and 1/4 cup crab meat, cooked and cooled. parmesan cheese, provolone cheese.
Sauce: Smoked Salmon Cream cheese spread, leftover from my local bagel shop.
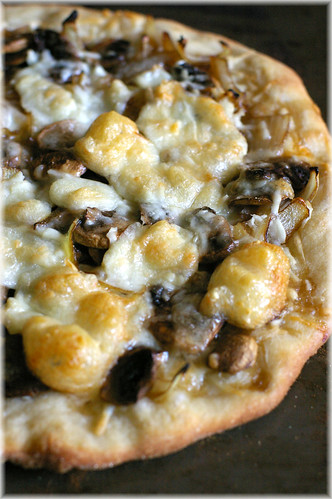
caramelized onion, mushroom & three cheeses pizza


To make Caramelized Onion, Mushroom and Triple Cheese Pizza
topping: Caramelized onion, see instruction here; sauteed mushroom, brie, parmesan, provolone cheese.
sauce: marinara sauce
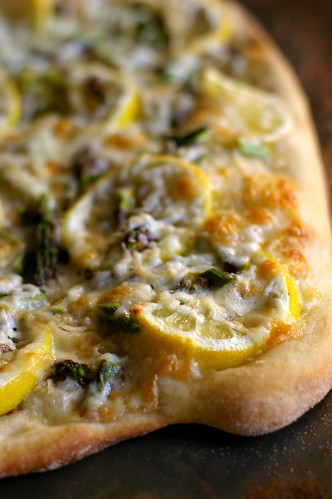
lemon asparagus pizza


To make Lemon Asparagus Pizza:
topping: 1/2 pound of asparagus, cut into 1/4 inch piece on a diagonal, provolone cheese, parmesan cheese, 1 lemon, preferably meyer lemon, sliced thinly.
sauce: none. just brush the top of the dough with extra virgin olive oil.

Read more...

Friday, October 24, 2008

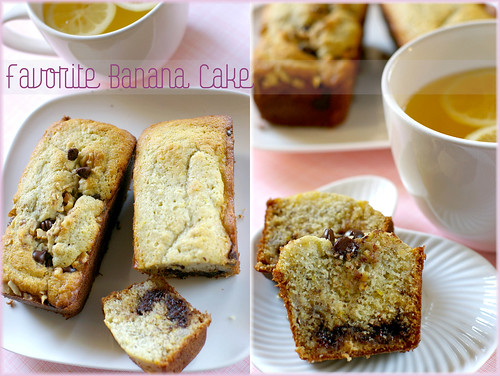
My favorite Banana Cake

banana cake copy


I don't remember how it begins. I bake the same banana cake for all the short and long trips we take. Of all the recipes I have, I alway bring this banana cake on board. Sometime, I bake it for friends who are travelling too. Ask my friends G and M who have since moved back to Singapore. I baked this cake when they drove down to Memphis for a marathon, and when they flew back to Singapore for good. It's funny, because I have emotionally connoted this banana cake with travel, love and well wishes.

This is also the cake I baked for my friend ST when we met in NYC. She was surprised when I took out a cold brick, covered with aluminium foil from my luggage, and presented it to her. I kept it in the freezer, I told her. She was mildly amused, but accepted it politely. After our 5 days getaway, she brought the said cake back to London. How it survived the long journey with luggages packed full with new shoes and clothes perplexed me. But ST told me it survived. And she exclaimed that the banana cake tasted different when it was at room temperature. To that, I nodded knowingly. Isn't it wonderful? A cake that can either be eaten straight from the freezer, or at room temperature. Personally, I like it at room temperature though. :)

banana cake3


I have been wanting to share this moist and light cake with you for a long time. Perhaps you have made it or heard about it already. Or maybe it's also your go-to banana cake recipe? The recipe comes from Rose Levy Beranbaum. The author of "The Cake Bible","The Pie and Pastry Bible" and "The Bread Bible". I love the simplicity of the recipe, and the method of beating softenend butter into dry ingredients yield a light and moist cake everytime.

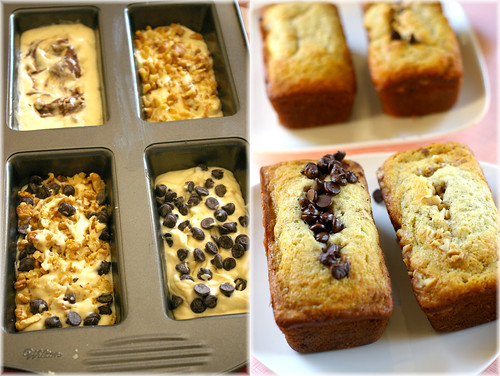
Recently, I snatched a pan with 4 mini loaf cakes capacity at a bargain price. It gives me an excuse to make my favorite banana cake again with some personalization. I make a batch of batter, and divide it evenly. The first one, I sprinkle walnut on top, chocolate chips are added to another, dollop of milk chocolate hazelnut spread is swirled to the next and the last one - with a bit of everything. It's a lot of fun! Although I kind of guessed which one OCT will pick. And he confirms it later, when he asks for the one with everything! For me, I like the loaf with milk chocolate hazelnut spread. ST lugged 2 jars of it to NYC, along with other goodies that she knew I'd enjoy. Biting into the loaf with my friend hand carry chocolate spread makes me feel so loved.

banana cake2


The cake can also be made in muffin pan or the normal loaf pan. The time for doneness will varies, so check your cake when the smell of banana cake first hits you. Often time, it's an indication that the cake is almost ready. Don't wait until you smell burnt, which I don't have to tell you what has transpired. :p

Have a good weekend everyone!

My Favorite Banana Cake
adapted from Rose Levy Beranbaum's "The Bread Bible"

2 very ripe banana, peeled and lightly mashed (1 cup, 8 oz)
1/2 cup sour cream (~4 oz)
2 large eggs
grated lemon zest from 1 lemon
1 1/2 tsp vanilla extract
2 cups (scant) bleached cake flour Or 1 1/2 cups bleached all-purpose flour (7 oz)
10 tablespoons granulated sugar(5 oz)
1 tsp baking powder
1 tsp baking soda
1/2 tsp salt
10 tablespoons unsalted butter, softened (5 oz)
a handful of chopped walnut and chocolate chips (optional)
Nutella or other chocolate spread (optional)

Heat oven to 350 F. In the bowl, combine the mashed banana and sour cream until smooth. Add egg, lemon zest, and vanilla, mix well. In a mixer bowl, combine flour, sugar, baking powder, baking soda, and salt on low speed for 1 min. Add in all the butter and half of the banana mixture, beat on low until dry ingredients are moistened. Increase mixer speed to medium, beat for another 1 1/2 minutes, then add the remaining banana mix in 2 parts, beating well after each addition.

Pour the batter into a greased pan (you can use muffin pan or a loaf pan). Sprinkle your choice of toppings on the cake. As the cake bakes, most of the topping will sink. Bake for 20-35 minutes, if you are using the muffin pan, and 40-50 minutes for a loaf pan or until a knife inserted into the center comes out clean.

Read more...
Monday, October 20, 2008

Grace's Vegetarian Turkey

oct 13 058


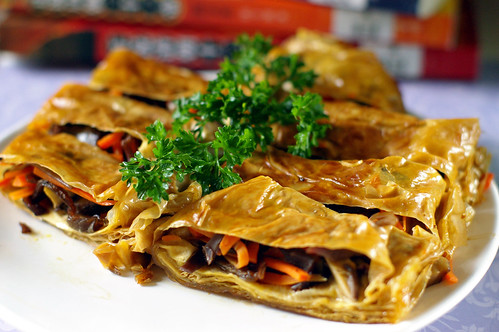
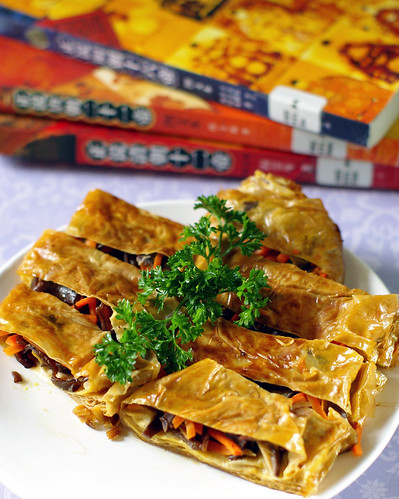
My friend Grace has many talents. On top of being a fantastic baker, cake decorator extraordinaire and photographer, she is also a terrific cook. Last July, I had the pleasure of partaking in a feast she whipped up for her birthday party. This vegetarian turkey was one of the dishes she served.

Grace's vegetarian turkey reminds me of my good friend K in Malaysia, who has been a vegetarian for more than 15 years. Whenever I am in town, I like her to bring me to her favorite chinese vegetarian restaurant and let her do the ordering. There will be a table full of mock chicken, mock ham, mock bacon, and mock roast pork, mock fish and vegetables. I find it fascinating that one can name any meat, and the restaurant will surely has a vegetarian version, make with the mock meat in which the ingredients are essentially soy bean and mushroom, flavored to mimic the real deal.

oct 13 056


I have not seen this kind of chinese vegetarian restaurants in the US, so I was excited when Grace served the vegetarian turkey. I knew I need to learn this dish. K will be impressed if I bring this to the next potluck party when I go home this Nov!

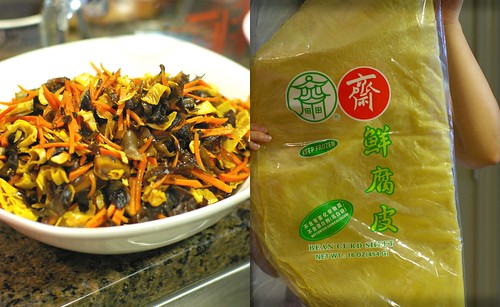
Grace uses an assortment of vegetables as filling/meat, and the beancurd sheet, which can be found at the freezer section of Asian grocery store, as the "turkey skin". That's our friend T, hiding behind the beancurd sheet.

ingredients


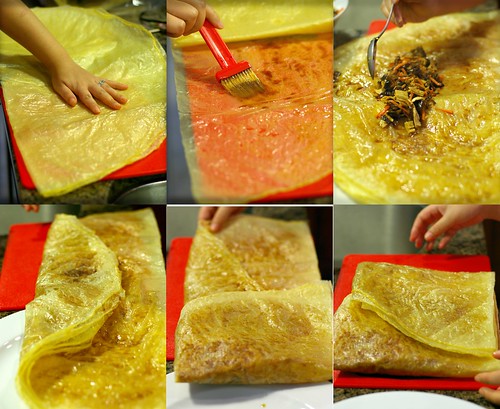
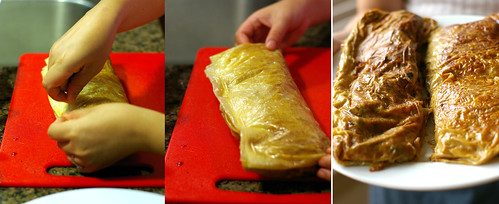
Here's the step by step photo instructions I have taken while Grace was demonstrating the process. If you can read Chinese,check out the recipe on Grace's blog and other mouth watering creations she make. That woman is insanely talented, I miss her food.

step by step


step by step2


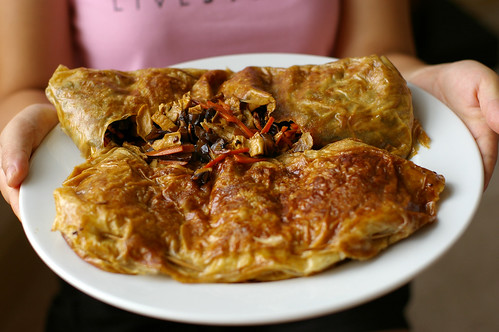
Here's Grace posing with the vegetarian turkey. She will be so proud to know that I finally made it last week on a rainy day. It is as good as my mentor's! ;)

vegetarian turkey


Grace's Vegetarian Turkey
see the recipe in Chinese here


1 pack of beancurd sheet (see the picture above)
1 medium carrot, finely shredded
1 cup wood ear mushroom, rehydrated in water, for 1 hour, and finely shredded
6 dried shiitake mushroom, rehydrated in water, for 1 hour, and finely shredded
vegetarian oyster sauce
soy sauce
1/2 cup vegetable broth
sesame oil
dark soy sauce

For the filling:
Add 2 tablespoons of oil in a nonstick pan, and stirfry the carrot and mushrooms. Season with 1 teaspoon of sesame oil, 1/2 tablespoon of vegetarian oyster sauce and 1 teaspoon of soy sauce. Taste and adjust the seasoning according to your preference. Continue to stirfry until all the ingredients are soft and cook.

Remove from the pan and put the filling in a pan to cool slightly.

Make sauce:
In a small or medium bowl,mix together 1/2 cup of vegetarian broth with 1.5 tablespoons of vegetarian oyster sauce, 1 tespoon of sesame oil, 1/2 tablespoon of soy sauce,1/2 teaspoon of dark soy sauce and 1 teaspoon of granulated sugar.

To assemble the vegetarian turkey:
Remove 2 pieces of the bean curd sheets from the package,fold the sheets in half and cut with a scissor. You will have 4 pieces of half circle now. Using a pastry brush, generously brush the sauce onto a piece of half circle, cover with another half circle, and brush with the sauce. Repeat for 2 more times. You will have 4 pieces of overlapping beancurd sheets.

Put some of the filling in the center of the beancurd sheets, and fold following the step by step instructions above. Secure with a toothpick.

Heat a nonstick pan with oil, add in the "turkeys", and sear until both sides are lightly golden. Pour in th remaining sauce, the turkeys are ready when the sauce is almost fully absorb. Remove from pan, and cool.

At this point, you can keep the vegetarian turkey in the fridge and keep for up to 2 days. Cut when ready to serve.

Read more...

Thursday, October 16, 2008

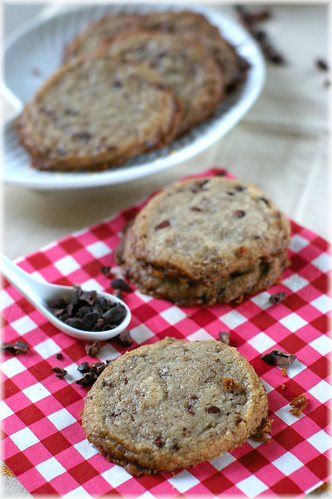
Nibby Buckwheat Cookies

sept 18 158

Do you have craving for certain type of food when the season changes? I crave for cookies this time of the year. The warm cookies, fresh from the oven, plated beside a cup of steaming hot coffee is a perfect companion while I read. There's an undescribable comfort in the process of baking cookies on a chilly day. Perhaps it's the endearing warmth radiated from the oven, or the heady aroma that wafts through the room when the cookies are almost done. Or the sense of satisfaction, having made something from scratch in a short span of time. Or the fake sense of self reassurance, of having done something useful (and edible) after hibernating for a long while.

The nibby buckwheat cookies is from one of my favorite authors- Alice Medrich's latest book- Pure Dessert. When I first read about it on Veronica's blog, I know I want to make it. But I sat on it longer than I should. I bought the required buckwheat flour months ago with the sole purpose of making these cookies, yet I procrastinated. Maybe I was hoping OCT's playmobils will come alive at night, while I was sleeping, and declared "let's make something awesome together, we can make the most delicious buckwheat cacao nibs cookies ever known to this household!" and the next morning, I was woken up by the smell of freshly baked cookies.That would be nice. That is exactly what those playmobils lying in the corner of my bedroom should be doing - be useful.

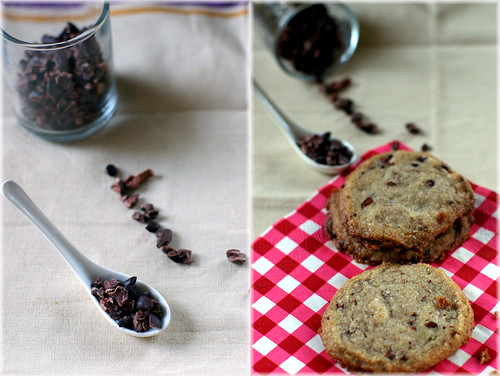
buckwheat cocoa nib cookies


Before you think I have gone crazy and shut this window close, let me say one last thing- make these cookies! They are awesome. Bake it, seriously.You can't buy them anywhere. And even if you have friends who are bakers, like me, forget about them. They wouldn't share with you, even if they have every good intention to. Like I did, I baked a batch, almost handed them to OCT lab, but I changed my mind after I slept on it. And guess where all the cookies went in the end?

If you don't want to buy the buckwheat flour, I find these cookies to be equally excellent. They are great with walnut, and I have made them a couple of times already. In case you are wondering about the fate of the remaining buckwheat flour, its destiny lies in the Nibby Buckwheat Cookies. Maybe I will try to share some next time. :)

Nibby Buckwheat Butter Cookies
adopted from Alice Medrich's Pure Dessert

1 1/4 cups all purpose flour
3/4 cup buckwheat flour
1/2 pound unsalted butter, softened
2/3 cup sugar
1/4 teaspoon salt
1/3 cup cacao nibs
1 1/2 teaspoons vanilla extract

Whisk together all purpose flour and buckwheat flours in a medium bowl. Set aside.

In a medium bowl, with the back of a large spoon or with a electric mixer, beat the butter with sugar and salt for about 1 minute, until smooth and creamy but not fluffy. Mix in the nibs and vanilla. Add the flour mixture and mix just until incorporated. Do not overmix.

Form the dough into a 12 x 2 inch log. Wrap and refrigerate for at least 2 hours, or preferably overnight. Alternatively, you can freeze the dough, and slice the desired pieces to have fresh cookies when the craving strikes.

When ready to bake, preheat the oven to 350F. Line baking sheet with parchment paper. Slice the dough log into 1/4 inch thick slices. Place the cookies at least 1.5inches apart on a baking sheet.

Bake until the cookies are just beginning to color around the edges, 12- 14 minutes. Cool the cookies in the pan on the rack. The cookies are delicious fresh, but get better with time. They can be stored in an airtight container,for up to 1 month.

make 48 cookies.

Read more...

Tuesday, October 14, 2008

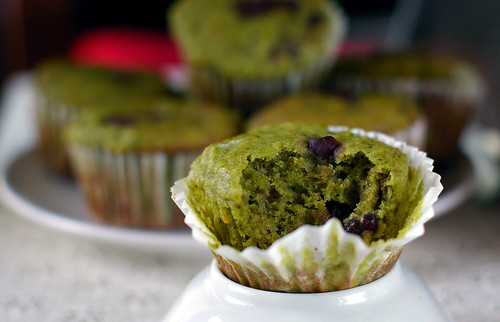
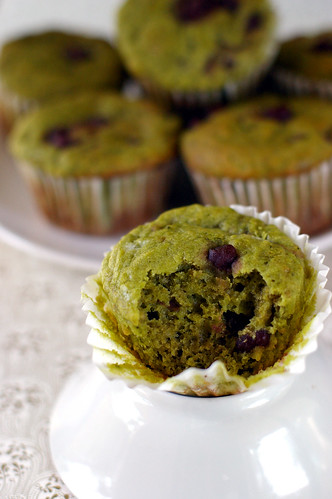
Green Tea Muffins

green tea muffins

I used to bake muffins a lot when we were in St Louis. Initially, they came from the premix boxes. And then, as I slowly got the hang on baking from scratch, I baked out of magazines and books. Nowadays, I draw my inspirations from all the amazing food blogs. In fact, my favorite Raspberry Chocolate Chips Muffins comes from here.

One day, as I was surfing for muffin ideas to bring to a friend's place, someone mentioned green tea muffins. Being a huge matcha fan, that piqued my interest, and I had to have it. Unfortunately there was no recipe accompanied it.

green tea muffins

Undeterred, I make a few tweaks on a recipe from my favorite online recipes source- Epicurious.com and come up with my version of Green Tea Muffins. Because I see muffin as morning food, I prefer mine lighter and not too sweet. With almost 2 teaspoons of matcha powder, the green tea flavor comes through, but it may not be everybody's cup of tea. So adjust the amount of matcha powder to suit your preference. For sweetness, I add 1/2 teaspoon of sweetenend azuki beans into each muffin, and find them compliment each other really well.

As with many matcha recipes I have tried, the green tea muffins turn dry easily. We learn our lesson when we absent-mindedly let them sit uncovered for a few hours. I think an extra splash of milk or an additional tablespoon of melted butter should be sufficient to counter the dryness.But I need to try it again this weekend just to be sure.

green tea muffins


Green Tea Muffins
adapted from Epicurious.com

2 cups unbleached all purpose flour
1 tablespoon baking powder
1/2 teaspoon salt
2 tablespoons sugar
1 egg, slightly beaten
1 cup milk
1/4 cup melted butter
2 teaspoon matcha powder
canned sweetened azuki bean, (1/2 teaspoon for each muffins)

Preheat the oven to 375°F. Butter muffin pans. Mix the flour, matcha powder, baking powder, salt, and sugar in a large bowl. Add the egg, milk, and butter, stirring only enough to dampen the flour; the batter should not be smooth. Spoon into the muffin pans, filling each cup about half full, dropping 1/2 teaspoon of azuki beans into each over and cover with more batter, until the cup is two-thirds full. Bake for about 20 to 25 minutes each. Or until the cake tester inserted comes out clean.

Read more...

Wednesday, October 08, 2008

Meal under 10 dollars

dinner less than 10 dollars

Amid the financial turmoil, many are keeping an eye on their grocery budgets. Even Rachel Ray the queen of 30 minutes meals, stressed the budget friendliness of one of the recipes in her recent episode. I think it certainly reflect the concerns of many audiences these days.I also notice that a few bloggers are talking about budget planning lately, so I decided to try and make a meal under 10 dollars and see what we could get.

Here's the result. For under 10 dollars, this was what we had for dinner last night- Hainanese Chicken rice (rice not shown in picture + chicken), Stirfry Shanghai Bokchoy and a claypot tofu with shiitake mushroom. And it's good for 5 servings. I has a sudden craving for mum's hainanese chicken rice after reading the Wednesday Chef's homemade hainanese chicken rice. So naturally, that was on the menu of the night. Although a side of stirfry shanghai bokchoy would round up the meal nicely, I went on to make a claypot tofu. I just wanted to try out my newly acquired korean soup pot.Lately, We are obsessed with tofu soup, and have been visiting the same tofu house for the past 3 weekends. But more about that in another post. Meanwhile, I know what you are going to ask- How did I do that for under 10 dollars.

chicken 250


Here's the breakdown:
rice- $2.40
Tyson Split chicken breasts with bones - $3.00 (it's going on discount at Kroger this week, with only 0.99/pd)
tomato (0.89/pd)- $0.60
Shanghai Bokchoy- $1.60
Tofu- $1.00/block
dried shiitake mushroom- $0.50
miscellaneous condiments- $0.90 (it is actually lesser than this, but I want to round off the figure to make it 10 dollars. At this point, OCT rolls his eyes)

sept 18 154

In case you are wondering how the plate of chicken is going to serve 5, there's one whole breast that was not shown in the picture. After the dinner, OCT packed the leftover for lunches, and he told me that they were enough for next 3 days. May I add that OCT is a big eater, despite his skinny frame?(life is unfair!)So take his words for it- 5 servings it is!

Authentic Southeast Asian meal for only 2 dollars per serving; and the smile on my satiated husband's face- Priceless.

No recipe for today, but we love the hainanese chicken rice so much that I think that I might make it again this weekend, (while the discount of chicken breasts last, of course). I will try to measure all the ingredients use next time.So, what's your meals stategy? Do you adhere to a budget? Let's share!

Read more...

Monday, October 06, 2008

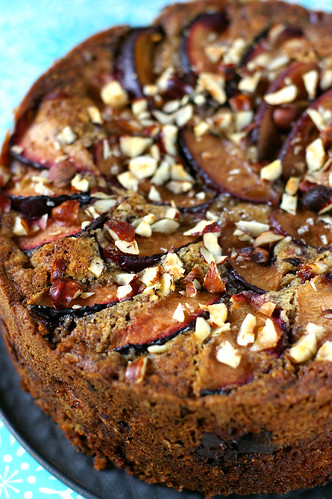
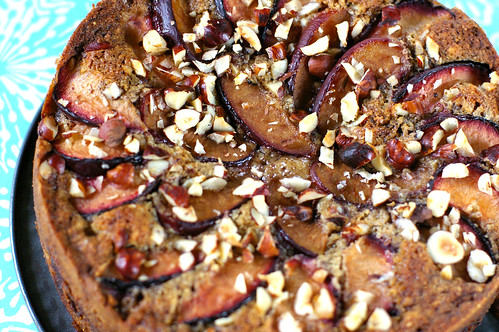
Plum, Hazelnut & Chocolate Tart

plum, hazelnut and chocolate tart

I love reading food magazines. However in the recent months, the few that I subscribe prove to be a stack of disappointment. They no longer inspire me or make me dashed into kitchen to get cooking. All the recipes seem repetitive and pretty much similar to what they have already published in the past. In short, I find them boring *yawn*. Quite frankly, I am comtemplating to discontinue some of them.

Just when I almost lost interest in food magazines, I found the UK food magazines such as Olive and BBC Good Food at Borders. Boy are they interesting and my desire to cook has been resuscitated! How did they escape my radar for so long?! The recipes and pictures are refreshing. Admittedly, there are certain ingredients that may not be readily available in the US, but their food photography and the recipes are amazing. Suddenly, I have many ideas to try out. Along with a few recipes I bookmarked from the magazines.

One of them is this Plum, Hazelnut and Chocolate Tart from September issue of BBC Good Food.

sept 18 021

I am sold when the ingredient list consist of chocolate and hazelnut. It's one of my favorite flavor combinations.(Nutella, anyone?)The recipe also features plum, which is abundant at the moment. The recipe just sounds too interesting to be missed.

sept 18 017

I substituted the self raising flour that I don't keep with all purpose flour and some baking powder; and the muscavado sugar with brown sugar. The end result tastes more like a cake than a tart, but is delicious nonetheless. It is not as sweet as the desserts we are accustomed to, perhap because I have omitted the glaze suggested. But I think it works well as a morning treat or as a tea cake in the afternoon. I would probaby drizzle some melted chocolate on top the next time I make it. Or you could brush the tart with the suggested jelly in the recipe. Either way, a delicious treat is promised.


Plum, Hazelnut & Chocolate Tart
adapted from Sept 2008 BBC Good Food magazine

175g butter , plus extra for greasing
500g plums
175g light muscovado sugar ( I used light brown sugar)
175g all purpose flour
175g ground hazelnuts
3 large eggs
1.5 tsp baking powder
50g bittersweet chocolate, chopped
2 tbsp hazelnuts
2 tbsp redcurrant, damson or plum jelly

Heat oven to 350F (180C). Butter and line the base of a round 8 inch cake pan. Halve and stone 4 plums, set aside for later, then roughly chop the remaining plums.

Put the sugar, butter, flour, ground hazelnuts, eggs and baking powder into a large bowl and beat with a wooden spoon or electric hand mixer for 1-2 mins, until smooth and light. Stir in the chopped plums and chocolate, then tip into the prepared cake pan and smooth the top.

Arrange the halved plums over the top of the mixture, pressing them down lightly, then scatter over hazelnuts. Bake for 40-50 mins until the top is golden and the cake feels firm to the touch. Cool in the pan for 10 mins, then turn out, remove the paper and cool on a wire rack. Heat the jelly, then brush over the top of the cake before serving.

Read more...

Thursday, October 02, 2008

Roasted Pear & Vanilla Bean Frozen Yogurt

roasted pear frozen yogurt1

One of my latest ice cream obsession is Häagen-Dazs's Caramelized Pear & Toasted Pecan. I have become an instant fan,literally on the first lick. Little did I suspected that caramelized pear would taste so delicious in ice cream. No wonder it has won the Häagen-Dazs flavor search in 2007. I couldn't get enough of it, and even though the weather has cooled down considerably- indication of time to put my ice cream maker to rest until next summer, I find myself churning out a batch of roasted pear & vanilla bean frozen yogurt. I couldn't help it. My favorite Greek yogurt is on half price and the gorgeous pears have just graced the farmer's stand, surely this is a SIGN!

Instead of caramelizing the pears, I choose to roast them along with the vanilla bean I found lying around. It was done while I was cooking dinner on a Sunday night. A few basting and 40 minutes later, before the season premiere of Desperate Housewives, the roasted pears were ready and left to cool at room temperature.

roasted pear frozen yogurt

On the brief advertisement break before Brothers and Sisters, I processed the roasted pears with one 17.6 oz container (2 cups) of Greek yogurt in the blender before churning the mixture in the ice cream maker. Although 1.5 cups of Greek yogurt might be a better ratio for the recipe, I was too lazy to measure that out. Plus I prefer my frozen yogurt on the tangy side. I think adding a tablespoon or two of honey may be a good idea if you like it sweeter. As with other icy dessert recipes, taste and adjust the sweetness according to your preference.Have total control and personalize- That's the beauty of homemade ice cream! Just remember to make it slightly sweeter than how you'd like it, as the chilling will dull the flavor later.

sept 18 109

I leave out the nuts because I don't have any on hand. And quite honestly, I am too lazy to roast and chop them, even if I have them handy. With the weather cooling down, my body is craving for soups, cookies and tarts. So watch out for those recipes in the coming months!

roasted pear & vanilla bean frozen yogurt


Roasted Pear & Vanilla Bean Frozen Yogurt

1/3 cup water
1/3 cup firmly packed dark brown sugar
2 tablespoons unsalted butter, cut into small chunks
3 firm Bosc pears, peeled, halved, cored (about 1 pound)
1 vanilla bean
1 17.6oz (2 cups) Greek yogurt

Preheat the oven to 400 degrees F.

Arrange the pears cut side up in an 8-inch square glass baking dish. Add the water into the dish and sprinkle sugar, butter and scraped vanilla bean on top of the pears. Bake until the pears are crisp-tender and beginning to brown, basting occasionally with the juices, about 35-40 minutes.

Let cool on a cooling rack. When the baking dish has cool down,cover with saran wrap and place in the fridge to chill for at least half an hour, or up to a day.

Using a blender, process the roasted pears, with its juice and the yogurt until smooth. Transfer to the freezer bowl of your ice cream machine and freeze according to the manufacturer’s instructions.

Read more...
Related Posts with Thumbnails