Sunday, August 31, 2008

Almost late for Daring Bakers Challenge : Chocolate Éclairs

I just came back from NYC this Thursday night and almost couldn't make it for this month's DB challenge. Although there was enough time to tackle the challenge on the first three weeks of August, the procastinator in me decided to wait until I came back.

eclairs


Little did I expect a 5 days 4 nights getaway with my best friend would leave me so exhausted! I think it must be all the walking we did. I will tell you more about the trip once I have the photos uploaded.

Onto the Daring Bakers challenge now! Like many DBers, I was excited to learn that our hosts- Meeta and Tony had chosen Pierre Herme's Chocolate Éclairs as our August Challenge. I have made a few recipes from the book, so far none of them disappoint.

The chocolate Éclairs consists of 3 components- Choux pastry, chocolate pastry cream and chocolate sauce, all of them can be prepared ahead of time. I made them all this afternoon though, as they were actually quite easy to make.

I made the choux pastry as written, except I started the oven at 400F and lower it to 375F after 5 minutes. The first time when I made the choux pastry, they deflated quite significantly once they were pulled out from the oven. I later learned that it was due to underbake. This time, I baked them about 30 minutes until they turned into golden brown.

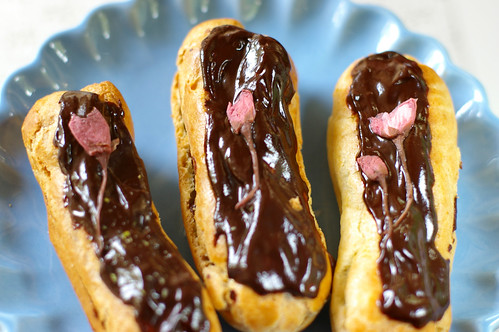
chocolate eclairs with salted cherry blossoms


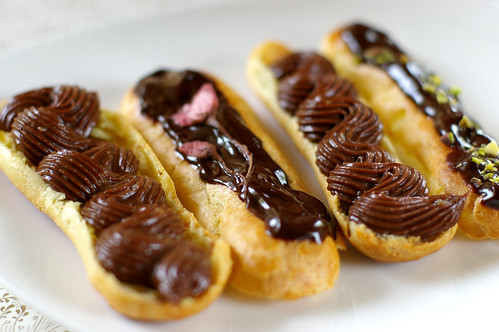
Not wanting to deal with leftover pastry cream, I halved the recipe. As a result, I only managed to fill about 11 shells. The rest of the shells are going to be filled with sorbets/frozen yogurts I made last week. Which will be our dessert tonight.

As for the last component- chocolate sauce, insteads of following the original recipe (with quite a number of steps) I simply melted 2.7oz bittersweet chocolate with 2 tablespoons of heavy cream.

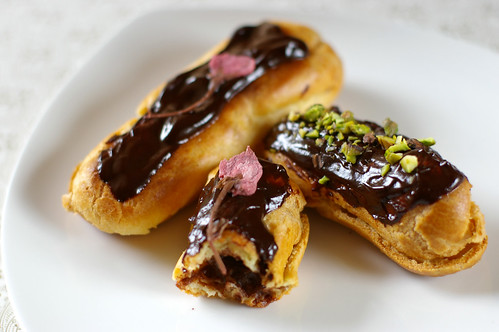
I stick with the original recipe for most parts, which is how I like to approach DB's challenges. However, I added some chopped pistachio on some of the eclairs for texture constrast, and the salted cherry blossom on some for an unexpected flavor twist.

eclairs


As I was making the eclairs, I can't help smiling, remembering the horrible profiteroles my friend ST ordered at one of the celebrated bakeries in NYC. The entree, soup and salad were great. But the profiterole with vanilla bean ice cream? Totally ruined our experience! ST aptly described the texture and taste as card board! The flavorless vanilla bean ice cream didn't help making it any less bearable.

I wish I could share some of these chocolate Éclairs with her now, or some filled with my homemade ice cream to make up for the negative experience! Maybe when she visits me in the next few months, we will make a batch of fresh Éclairs or profiteroles. :) Do you hear me, ST?

eclairs


Pierre Hermé’s Chocolate Éclairs

Recipe from Chocolate Desserts by Pierre Hermé


(makes 20-24 Éclairs)

Cream Puff Dough (see below for recipe), fresh and still warm
Preheat your oven to 375 degrees F (190 degrees C). Divide the oven into thirds by positioning the racks in the upper and lower half of the oven. Line two baking sheets with waxed or parchment paper.


Fill a large pastry bag fitted with a 2/3 (2cm) plain tip nozzle with the warm cream puff dough.

Pipe the dough onto the baking sheets in long, 4 to 41/2 inches (about 11 cm) chubby fingers.

Leave about 2 inches (5 cm) space in between each dough strip to allow them room to puff.

The dough should give you enough to pipe 20-24 éclairs.


Slide both the baking sheets into the oven and bake for 7 minutes. After the 7 minutes, slip the handle of a wooden spoon into the door to keep in ajar. When the éclairs have been in the oven for a total of 12 minutes, rotate the sheets top to bottom and front to back. Continue baking for a further 8 minutes or until the éclairs are puffed, golden and firm. The total baking time should be approximately 20 minutes.
Notes:

The éclairs can be kept in a cool, dry place for several hours before filling.
Assembling the éclairs:

Chocolate glaze (see below for recipe)
Chocolate pastry cream (see below for recipe)
Slice the éclairs horizontally, using a serrated knife and a gently sawing motion. Set aside the bottoms and place the tops on a rack over a piece of parchment paper.


The glaze should be barely warm to the touch (between 95 – 104 degrees F or 35 – 40 degrees C, as measured on an instant read thermometer). Spread the glaze over the tops of the éclairs using a metal icing spatula. Allow the tops to set and in the meantime fill the bottoms with the pastry cream.


Pipe or spoon the pastry cream into the bottoms of the éclairs. Make sure you fill the bottoms with enough cream to mound above the pastry. Place the glazed tops onto the pastry cream and wriggle gently to settle them.
Notes:

If you have chilled your chocolate glaze, reheat by placing it in a bowl over simmering water, stirring it gently with a wooden spoon. Do not stir too vigorously as you do not want to create bubbles.

The éclairs should be served as soon as they have been filled.
Cream Puff Dough
(makes 20-24 Éclairs)

½ cup (125g) whole milk
½ cup (125g) water
1 stick (4 ounces; 115g) unsalted butter, cut into 8 pieces
¼ teaspoon sugar
¼ teaspoon salt
1 cup (140g) all-purpose flour
5 large eggs, at room temperature
In a heavy bottomed medium saucepan, bring the milk, water, butter, sugar and salt to the boil.


Once the mixture is at a rolling boil, add all of the flour at once, reduce the heat to medium and start to stir the mixture vigorously with a wooden spoon. The dough comes together very quickly. Do not worry if a slight crust forms at the bottom of the pan, it’s supposed to. You need to carry on stirring for a further 2-3 minutes to dry the dough. After this time the dough will be very soft and smooth.


Transfer the dough into a bowl of a mixer fitted with the paddle attachment, or using your handmixer or if you still have the energy, continue by hand. Add the eggs one at a time, beating after each egg has been added to incorporate it into the dough.

You will notice that after you have added the first egg, the dough will separate, once again do not worry. As you keep working the dough, it will come back all together again by the time you have added the third egg. In the end the dough should be thick and shiny and when lifted it should fall back into the bowl in a ribbon.


The dough should be still warm. It is now ready to be used for the éclairs as directed above.
Notes:

Once the dough is made you need to shape it immediately.
You can pipe the dough and the freeze it. Simply pipe the dough onto parchment-lined baking sheets and slide the sheets into the freezer. Once the dough is completely frozen, transfer the piped shapes into freezer bags. They can be kept in the freezer for up to a month.
Chocolate Pastry Cream

2 cups (500g) whole milk
4 large egg yolks
6 tbsp (75g) sugar
3 tablespoons cornstarch, sifted
7 oz (200g) bittersweet chocolate, preferably Velrhona Guanaja, melted
2½ tbsp (1¼ oz: 40g) unsalted butter, at room temperature
In a small saucepan, bring the milk to a boil. In the meantime, combine the yolks, sugar and cornstarch together and whisk in a heavy‐bottomed saucepan.


Once the milk has reached a boil, temper the yolks by whisking a couple spoonfuls of the hot milk into the yolk mixture.Continue whisking and slowly pour the rest of the milk into the tempered yolk mixture.


Strain the mixture back into the saucepan to remove any egg that may have scrambled. Place the pan over medium heat and whisk vigorously (without stop) until the mixture returns to a boil. Keep whisking vigorously for 1 to 2 more minutes (still over medium heat).Stir in the melted chocolate and then remove the pan from the heat.


Scrape the pastry cream into a small bowl and set it in an ice‐water bath to stop the cooking process. Make sure to continue stirring the mixture at this point so that it remains smooth.


Once the cream has reached a temperature of 140 F remove from the ice‐water bath and stir in the butter in three or four installments. Return the cream to the ice‐water bath to continue cooling, stirring occasionally, until it has completely cooled. The cream is now ready to use or store in the fridge.
Notes:

The pastry cream can be made 2‐3 days in advance and stored in the refrigerator.
In order to avoid a skin forming on the pastry cream, cover with plastic wrap pressed onto the cream.
Tempering the eggs raises the temperature of the eggs slowly so that they do not scramble.
Chocolate Glaze
(makes 1 cup or 300g)

1/3 cup (80g) heavy cream
3½ oz (100g) bittersweet chocolate, finely chopped
4 tsp (20 g) unsalted butter, cut into 4 pieces, at room temperature
7 tbsp (110 g) Chocolate Sauce (recipe below), warm or at room temperature
In a small saucepan, bring the heavy cream to a boil. Remove from the heat and slowly begin to add the chocolate, stirring with a wooden spoon or spatula.


Stirring gently, stir in the butter, piece by piece followed by the chocolate sauce.

Notes:

If the chocolate glaze is too cool (i.e. not liquid enough) you may heat it briefly in the microwave or over a double boiler. A double boiler is basically a bowl sitting over (not touching) simmering water.

It is best to glaze the eclairs after the glaze is made, but if you are pressed for time, you can make the glaze a couple days ahead of time, store it in the fridge and bring it up to the proper temperature (95 to 104 F) when ready to glaze.
Chocolate Sauce
(makes 1½ cups or 525 g)

4½ oz (130 g) bittersweet chocolate, finely chopped
1 cup (250 g) water
½ cup (125 g) crème fraîche, or heavy cream
1/3 cup (70 g) sugar
Place all the ingredients into a heavy‐bottomed saucepan and bring to a boil, making sure to stir constantly. Then reduce the heat to low and continue stirring with a wooden spoon until the sauce thickens.
It may take 10‐15 minutes for the sauce to thicken, but you will know when it is done when it coats the back of your spoon.
Notes:

You can make this sauce ahead of time and store it in the refrigerator for two weeks. Reheat the sauce in a microwave oven or a double boiler before using.
This sauce is also great for cakes, ice-cream and tarts.


Read more...

Saturday, August 23, 2008

More birthday cakes

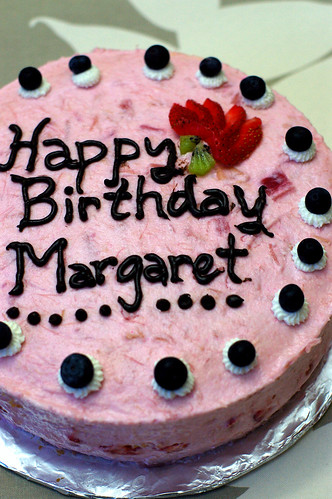
Remember I briefly mentioned about my first birthday cake order? I promised you an update but I forgot. So here it is. I made a strawberry rhubarb mousse cake for Margaret, whom her husband wanted to throw her a surprise birthday party.

Birthday Cake


I was in my rhubarb obsessed phase few months ago, so the choice of flavor was obvious. I used the Fool Proof Sponge Cake as cake base, and arranged the ripe strawberries around the base layer before pouring the rhubarb mascarpone mousse to cover it. Insteads of using buttercream, I decided to simply use the remaining mousse to cover the whole cake. Strands of rhubarbs are visible on the top and side of the cake.

As I was assembling the cake, I couldn't help scrapping and savoring the leftover mousse with the cake that I levelled off. (hey, I had to taste test it before giving it away!) It was a pleasing combination. The sponge cake was airy and moist, while the rhubarb mousse was refreshing. According to the feedbacks, the party enjoyed the cake! Although OCT had collected more comments, it had been awhile, and all I remembered, was they liked it. The birthday girl certainly did! And that's all that matters .

The second cake, was for Margaret's son. Their birthdays were a month apart. I suggested a banana cake with chocolate buttercream, because Homer- the son which OCT befriended to, love chocolate and was reading a book about Dora baking a banana cake at that time. The only request was to make the cake sweeter. I heard he liked strawberries too, so I used some to decorate the cake.


Banana Cake with Chocolate Buttercream


I used the same banana cake recipe here and covered it with Pierre Herme's chocolate buttercream. Because Homer's birthday was almost the same time as some of his visiting cousins, they decided to celebrate it together. This explains the list of names on the cake.

The photos were taken within a short time before they were packed and delivered, which explained the poor quality. I wish I had rememberd to ask for a photo of the cut cake! :(

I am meeting up with my girl friend in NYC in less than 12 hours, so I better go and pack now. Recipes of the cakes will be up when I am back next week!

Have a good week ahead everyone.

Read more...

Tuesday, August 19, 2008

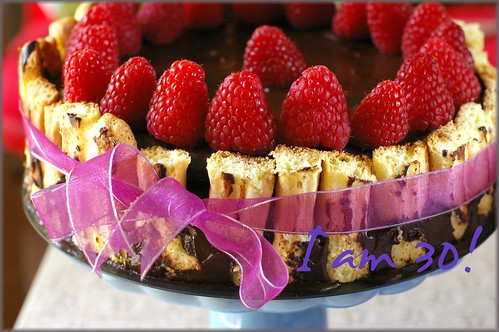
Chocolate Raspberry Charlotte & I am 30!

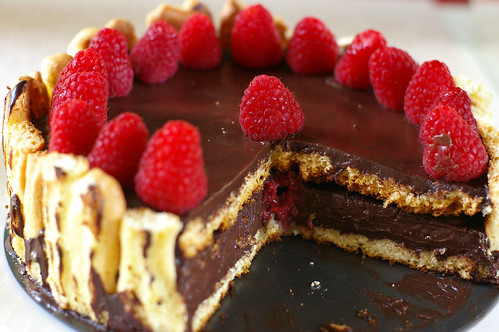
raspberry chocolate charlotte

Every year when our birthdays roll around, OCT and I prefer to stay low key and spend our days quietly in each other's company. Sometime we go out for dinner, sometime when we are too lazy or tired, we stay home and eat in. As much as I love to be around friends and having dinner parties, birthday is the one day which I like to just sit quietly and reflect on the things I have done in the previous year, the books I have read, the milestone I have achieved, the new foods I have discovered, the recipes I have tried, the loved ones I have lost, the places I have travelled, the new friends I have made, and all the blessings and good things that come my way. Most importantly, on my birthday every year, my heart is filled with gratitude for the woman who gave birth to me. This year marks the 30th anniversary of her bravery.

Because being emotional is not something our family is accustomed to, I feel terribly awkward to utter simple words like "I love you mum" & "thank you for giving birth to me all those years ago". Instead, I decided to make a pretty cake to pay tribute to mum.

30th birthday cake


The Chocolate Raspberry Charlotte from Alice Medrich's " Chocolate & The Art of Low Fat Desserts" sounds like a good idea. I love all the recipes I tried from that book. What is more importantly, as I've always told my tasters, they don't taste "low fat" at all.So that's the plan. I will make the cake a day before my birthday and post a nice tribute on the actual day to mum.

The cake was made, but my hopeless piping skill left the homemade lady fingers a lot to be desired for. As for the mousse, instead of using the recipe provided, I swapped it with another from the same book which I have tried and liked. Big mistake! Although the flavors were compatible, the recipe I used yield less mousse, and left the charlotte looking awful. I had to trim the lady fingers which explains the jagged/rustic look of the lady fingers wall. Despite of all the mishap, the lady fingers tasted 100 times better than the store bought ones. I think I will make them again and fill the charlotte with lemon mousse and berries next time for a summery dessert.

raspberry chocolate charlotte


I called home on my birthday, too embarassed to mention about the unfortunate cake, and too shy to say "thank you mum for giving me life".Instead, I found myself sobbing, and stammering. And I confess to my parents about my fear of being 30 and that my friends teased me about still liking Mickey Mouse at 30 years old....

As for the cake, if you can look past its wretched shell, it tastes really great! I am sure the Varlhona cocoa powder and chocolate bar used certainly made a difference. You may not be able to see in the picture, but there were lots of raspberries buried in the rich chocolate mousse. The next time I make this, I will try the original mocha mousse recipe from the book. But this chocolate mousse recipe will certainly make appearance in my future cakes. I still can't believe it's a low fat recipe!

Chocolate Raspberry Charlotte
adapted from "Chocolate and The Art of Low Fat Desserts"

ladyfinger charlotte liner (see recipe below), baked and cooled
chocolate truffle mousse (see recipe below)
2.5 to 3 cups raspberries, rinsed and well dried

Line the 8 inch springform pan with a disk of lady finger circle, cut to fit. Next, line the side if the pan with the liners made earlier. Arrange raspberries on the circle and pour in half of the mousse, or enough to cover the raspberries.

Fit the second lady fingers disk in, and lightly press it against the mousse. Pour the remaining mousse on top to cover, and decorate with the remaining raspberries.


To make the ladyfinger charlotte liner:
4 eggs, separated
1/4 cup plus 1/3 cup granulated sugar
1.5 teaspoons vanilla extract
1/4 teaspoon cream of tartar
1 cup sifted cake flour (3.5 ounces)
2 to 3 tablespoons powdered sugar

Position the rack in the lower and upper third of the oven. Preheat the oven to 375F. Trace two 7 inch circle and two 12x3 inch rectangles on parchment paper. Make sure to have at least one inch space between the rectangles. Turn paper inside out to line the baking pans.

In a small or medium bowl, beat the egg yolks with the vanilla and 1/4 cup of granulated sugar for 2.5 to 3 minutes until very thick and pale.Scrape into a large bowl and set aside.

In a clean dry mixing bowl, beat the eggwhites with the cream of tartar at high speed until soft peak form. Gradually beat in 1/3 cup of granulated sugar until mixture is stiff but not dry.

Using a rubber spatula, fold a third of the egg whites into the yolk mixture. Scrape half of the remaining whites on top and sift half of the flour over them. To fold effectively without deflatting the batter, cut down through the center of the mixture to the bottom of the bowl with the spatula. Scrape a large scoop of batter up the side of the bowl. Lift it above the rest and let it fall gently back on top. Rotate the bowl and continue to cur, scrape and lift batter without mixing, stirring, or smoothing.Don't worry, the different parts will come together. Fold until barely combined.Scrape the remaining whites on top of the batter and sift the remaining flour over them,. Fold again, as described, until combined.

Scrape the batter into a pastry bag fitted with a 9/16-inch plain tip (ateco #7) or closed star tip (ateco #7). Pipe disks by starting in the center of a circle and pipe a spiral of batter to the edge of the circle. Sieve powdered sugar on top.

Using the rectangular guides, pipe a series of straight of S-Shaped ladyfingers 3 inches long and only 1/4 inch apart within the guide. They will puff and attach together as they bake.

Repeat in the second rectangle. Sieve powdered sugar over the batter.

Bake for 12-14 minutes, until golden brown. Rotate sheets from back to front and upper to lower racks about halfway through the baking time. Turn the oven temperature to 300F and leave the oven door open for about 1 minutes. Close down and bake for another 10 minutes.

Remove from oven and immediately lift or slide the parchment papers off the baking sheets and turn them upside down. Peel away the paper from the ladyfingers rectangle. Bend one to fit the inside of the 8-inch springform pan with the flat side facing inside. Repeat with the second rectangle, triming to fit snugly against the first. Set aside to cool completely in pan.

*the ladyfinger liners may be stored, well wrapped at room temperature up to 1 day.

Bittersweet Chocolate Truffle Mousse

1 3/4 teaspoon gelatin
2 eggs, separated
1/2 cup unsweetened Dutch processed cocoa powder
1/2 cup plus 1/3 cup sugar
1 1/4 cup low fat (1%)milk (I used 1 cup soy milk + 1/4 cup heavy cream)
4 ounces bittersweet chocolate, chopped finely
1 teaspoon vanilla extract
1/8 teaspoon cream of tartar

Sprinkle gelatin over 1/4 cup of cold water in a small cup. Let stand without stirring for 5 minutes, or until needed.

Place the egg yolks in a medium bowl near the stove and have ready a small whisk. Combine the cocoa, sugar in a 1.5 quart saucepan and stir in enough milk to form a paste. Stir in the remaining milk and bring mixture to a simmer over medium heat. Stirring frequently with a wooden spoon, reaching all over the bottom and sides of the pan to prevent scorching. Stir the chocolate mixture continuously once it begins to simmer. Simmer gently, stirring for about 1.5 minutes.

Remove from heat and whish a small amount of the hot mixture into the egg yolks. Scrape the mixture back into the pot and whish well to combine. It will be hot enough to be safe. It will thicken without further cooking. Stir in soften gelatin, chopped chocolate and vanilla. Let stand a minute or so and whisk again until chocolate is completely melted and the mixture is perfectly smooth.

Set the saucepan over a bowl of ice water to cool and thicken. Stir and scrape the side from time to time. If mixture set before needed, remove from ice bath, whisk and set aside. If the mixture set, place the pan in a bowl of hot water, and stir until resoftened.

To make the safe meringue:
Bring 1 inch of water to a simmer in a large skillet. Combine cream of tartar and 2 teaspoons of water in a 4-6-cup stainless steel bowl. Whisk in the egg whites and 1/2 cup of sugar. Place the thermometer near stove in a mug of very hot tap water. Set bowl in skillet. Stir mixture briskly and constantly with a rubber spatula, scrapping the sides and bottom often to avoid scrambling the whites. After 1 minute, remove bowl from skillet. Quickly insert thermometer, tilting bowl to cover stem by at least 2 inches. If less than 160F, rinse thermometer in skillet water and return it to the mug. Replace bowl in skillet. Stir as before until temperature reaches 160F when bowl is removed. Beat on high speed until cool and stiff.

Fold about a quarter of the cooled chocolate mixture into the beaten egg whites. Scrape egg white mixture back into the remaining chocolate mixture. Use immediately in the mousse cake. Or scape mixture into dessert glasses or a serving bowl, cover and refrigerated for at least 4 hours, or until set.

Read more...

Monday, August 11, 2008

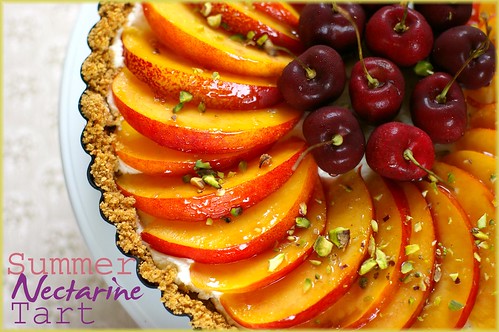
Summer Nectarine Tart

nectarine tart

When the temperature hit upper 90's, the last thing I wanted to do is crank up the oven. So when I saw the nectarine tart on Smitten Kitchen, I knew I would make something similar for our weekend get together. It was simple and elegant, with barely 10 minutes oven time required.

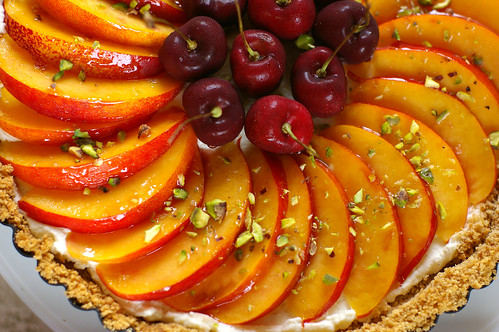
Nectarine Tart

As much as I loved to try the recipe as it was, seeing the positive feedbacks on epicurious.com, I didn't realise that I needed cream cheese and sour cream! And needless to say, I didn't have them on hand.

Not wanting to run out under the scorching sun, I simply combine 8 oz of mascarpone cream, which I remember seeing in the recipe; with a few dashes of whipping cream, a teaspoon of vanilla paste, 1/4 cup of confectioner's sugar and a generous squeeze of lemon juice from half a lemon. all while tasted and adjusted the flavor along the way. But you really don't need a recipe for the cream base. The luscious yet neutral tasting mascarpone takes on almost any flavor that one adds to it. How about lime juice? Or Grand Marnier? Kirsh?I thought of incorporating some cooked rhubarb into the mascarpone cream but decided against it on the last minute.Not that I don't adore the combination of rhubarb and mascarpone, but the state of our messy apartment required some urgent attention before our guests arrival.

Nectarine Tart

The nectarines I bought were not as sweet as I like, so I made a simple glaze, which was simply some heated raspberry perserve, to lightly coat the fruits. Top with some chopped pistachio and cherries for color contrast, the tart was ready to be served alongside the homemade mango sorbet.

I wasn't too happy with how the cookie crust turned out, so I am not going to list out the recipe here. In fact, I prefer my go-to sweet tart dough recipe, which I find to have better structural support. But you can use any of your trusted tart dough recipe too. With the abundant stone fruits and berries occupying prime positions on farmer's market now, use whatever fruits that strike your fancy and treat yourself to a luscious summer fruit tart today!

Read more...

Friday, August 08, 2008

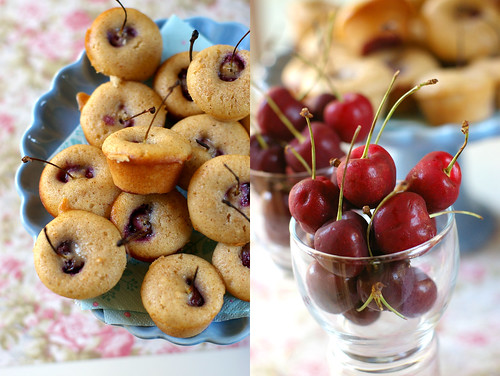
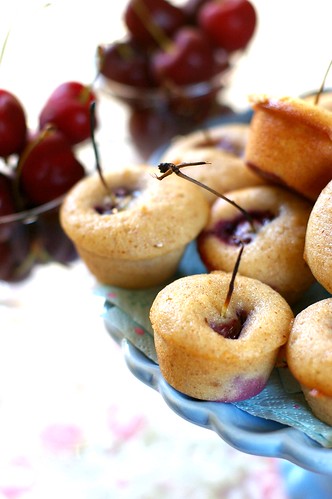
Mini Cherry & Almond Tea Cakes

cherry almond tea cakes


As much as I enjoy eating cherries out of hand, I have to confess that I usually reserve them for baking. I find there's something mystically alluring about baked cherries. It would have been a challenge if the cherries were sweet and juicy. But the 2 lb that I bought last week didn't leave me with such dilemma. They were as bland as water.

I thought they were destined to be baked and transformed.


cherry tea cake


I went on auto pilot mode and whipped up a batch of cherry clafoutis for breakfast and used the next 30 bland cherries in the mini cherry & almond tea cakes recipe. When I first saw the picture of the tea cakes here, I know this would be the best use for those cherries. Not to mention, I could finally use the mini muffin pan that I have bought but long forgotten.


cherry almond tea cakes


Although the author named the recipe tea cakes, the list of ingredients and method of preparation reveal a close resemblance to financiers, which I love. I decreased the amount of brown butter from 10 tablespoons to 8 tablespoons and replaced Chambord for Kirsh which the original recipe suggested.


I like the simplicity of the recipe. Other than browning butter, all one needs is a whisk and a bowl to combine the ingredients. I served them on a tray before a dinner party, and one of my friend's husband loved it so much that I let him took the rest home. Even OCT who usually complains about the hassle of removing pits in cherries like the mini cherry tea cakes.

I am already thinking of making another batch for our next picnic.


IMGP0203

Mini Cherry & Almond Tea Cakes
adapted from Martha Stewart Living

1 stick (8 tablespoons) unsalted butter, plus more for muffin tin
1 cup all-purpose flour, plus more for tin
1 1/4 cups finely ground unblanched almonds
1 cup granulated sugar
1 teaspoon kosher salt
5 large egg whites
4 teaspoons Chambord / kirsch (cherry brandy)
30 sweet (Bing) cherries

Preheat oven to 400 degrees. Brush 30 cups of 2 mini-muffin tins with butter, and dust lightly with flour.
*Note: I used a 24 cups mini muffins pan, and filled the rest of the batter in 3 disposable aluminium muffin cups.

Melt butter in a medium skillet over medium-high heat. When it begins to sputter, reduce heat to medium. Cook, swirling skillet occasionally, until butter has lightly browned. Skim foam from top, and remove skillet from heat.

Whisk together flour, ground almonds, sugar, and salt in a bowl. Add egg whites, and whisk until smooth. Stir in chambord/kirsch. Pour in butter, leaving any dark-brown sediment in skillet, and whisk to combine. Let stand for 20 minutes.

Ladle 1 tablespoon batter into each buttered muffin cup, filling about halfway. Push a cherry into each, keeping stem end up. With a small spoon, smooth batter over cherries to cover. Bake until a toothpick comes out clean and cakes are golden brown, 12 to 15 minutes. Let cool 10 minutes. Run a knife around edges to loosen, and unmold. Cakes can be stored in airtight containers at room temperature overnight.

Read more...
Related Posts with Thumbnails