Wednesday, July 30, 2008

Daring Bakers Challenge:Filbert Gateau with Praline Buttercream

In my usual procastinator fashion, I approached this month challenge almost on the last minute. The last weekend before the posting date to be exact. I envisioned the cake to be the perfect dessert to serve in the intimate dinner party we hosted, with lots of oohs and ahhs, sighs of admiration from our guests. Except I underestimated the amount of time required for the cake and the dinner itself.

gateux


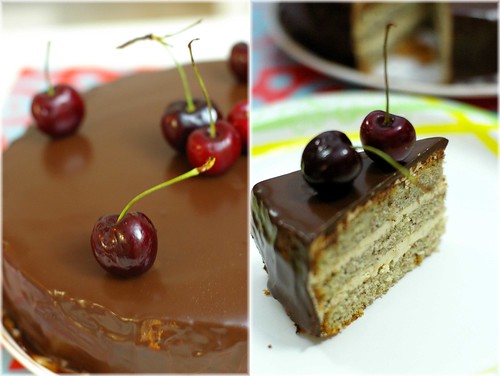
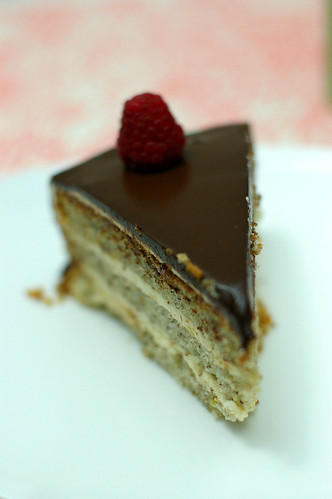
In my limited time, I managed to cover the cake in ganache, but unfortunately not enough time to do any buttercream decoration. The gateau did leave our guests speechless, probably because they didn't know what to say about the half-naked cake. However, after sampling the cake, they heartily offered their compliments. I know they didn't say this out of politeness, because the two couples volunteered to bring back the remaining cake!

My verdict:
The gateau with its multiple components tasted nice. I followed the recipe and didn't alter anything because I liked to see how the original recipe tasted.The only glitch was the genoise, which I found to be slightly dry. I should have used more sugar syrup. The praline buttercream that was made from scratch, was time consuming and a pain to make, because I had to grind the praline paste multiple times in my small coffee grinder. I must not forget to mention the amount of bowls and plates that awaited cleaning after making each component.

But all the work was worth the effort. My dinner guests loved the gateau, which was all that mattered. After making them eat the burnt lemongrass chicken dish, I was glad that the dinner ended on a high note.

Thank you Chris, our July Daring Baker host for choosing this recipe. I am glad that I get the opportunity to make praline paste finally. There's still some leftover and I look forward to playing with it in another recipe, along with the few egg yolks leftover.

Apology for the poor quality photos! It was really stressful to take photos under 5 pairs of eager eyes, all waiting for the dessert to be served. Check out my fellow Daring Bakers' takes on this month challenge here

gateux1


Filbert Gateau with Praline Buttercream
From Great Cakes by Carol Walter

1 Filbert Genoise
1 recipe sugar syrup, flavored with dark rum
1 recipe Praline Buttercream
½ cup heavy cream, whipped to soft peaks
1 recipe Apricot Glaze
1 recipe Ganache Glaze, prepared just before using
3 tablespoons filberts, toasted and coarsely chopped

Filbert Genoise

Because of the amount of nuts in the recipe, this preparation is different from a classic genoise.

1 ½ cups hazelnuts, toasted/skinned
2/3 cup cake flour, unsifted
2 Tbsp. cornstarch
7 large egg yolks
1 cup sugar, divided ¼ & ¾ cups
1 tsp. vanilla extract
½ tsp. grated lemon rind
5 lg. egg whites
¼ cup warm, clarified butter (100 – 110 degrees)

Position rack in the lower 3rd of the oven and preheat to 350 degrees. Grease and flour a 10” X 2” inch round cake pan.

Using a food processor, process nuts, cake flour, and cornstarch for about 30 seconds. Then, pulse the mixture about 10 times to get a fine, powdery mixture. You’ll know the nuts are ready when they begin to gather together around the sides of the bowl. While you want to make sure there aren’t any large pieces, don’t over-process. Set aside.

Put the yolks in the bowl of an electric mixer, with the whisk attachment, and beat until thick and light in color, about 3-4 minutes on med-high speed. Slowly, add ¾ cup of sugar. It is best to do so by adding a tablespoon at a time, taking about 3 minutes for this step. When finished, the mixture should be ribbony. Blend in the vanilla and grated lemon rind. Remove and set aside.

Place egg whites in a large, clean bowl of the electric mixer with the whisk attachment and beat on medium speed, until soft peaks. Increase to med-high speed and slowly add the remaining ¼ cup of sugar, over 15-20 seconds or so. Continue to beat for another ½ minute.
Add the yolk mixture to the whites and whisk for 1 minute.

Pour the warm butter in a liquid measure cup (or a spouted container). * It must be a deep bottom bowl and work must be fast.* Put the nut meal in a mesh strainer (or use your hand – working quickly) and sprinkle it in about 2 tablespoons at a time – folding it carefully for about 40 folds. Be sure to exclude any large chunks/pieces of nuts. Again, work quickly and carefully as to not deflate the mixture. When all but about 2 Tbsp. of nut meal remain, quickly and steadily pour the warm butter over the batter. Then, with the remaining nut meal, fold the batter to incorporate, about 13 or so folds.

With a rubber spatula, transfer the batter into the prepared pan, smoothing the surface with the spatula or back of a spoon. **If collected butter remains at the bottom of the bowl, do not add it to the batter! It will impede the cake rising while baking.

Tap the pan on the counter to remove air bubbles and bake in the preheated oven for 30-35 minutes. You’ll know the cake is done when it is springy to the touch and it separates itself from the side of the pan. Remove from oven and allow to stand for 5 minutes. Invert onto a cake rack sprayed with nonstick coating, removing the pan. Cool the cake completely.

*If not using the cake right away, wrap thoroughly in plastic wrap, then in a plastic bag, then in the refrigerator for up to 3 days. If freezing, wrap in foil, then the bag and use within 2-3 months.

Sugar Syrup
Makes 1 cup, good for one 10-inch cake – split into 3 layers

1 cup water
¼ cup sugar
2 Tbsp. dark rum or orange flavored liqueur

In a small, yet heavy saucepan, bring the water and sugar to a boil and simmer for 5 minutes. Remove from heat, add the liqueur. Cool slightly before using on the cake. *Can be made in advance.

Praline Buttercream
1 recipe Swiss Buttercream
1/3 cup praline paste
1 ½ - 2 Tbsp. Jamaican rum (optional)

Blend ½ cup buttercream into the paste, then add to the remaining buttercream. Whip briefly on med-low speed to combine. Blend in rum.

Swiss Buttercream
4 lg. egg whites
¾ cup sugar
1 ½ cups (3 sticks) unsalted butter, slightly firm
1 ½ -2 Tbsp. Grand Marnier or liqueur of your choice
1 tsp. vanilla

Place the egg whites in a lg/ bowl of a elevtric mixer and beat with the whisk attachment until the whites are foamy and they begin to thicken (just before the soft peak stage). Set the bowl over a saucepan filled with about 2 inches of simmering water, making sure the bowl is not touching the water. Then, whisk in the sugar by adding 1-2 tablespoon of sugar at a time over a minutes time. Continue beating 2-3 minutes or until the whites are warm (about 120 degrees) and the sugar is dissolved. The mixture should look thick and like whipped marshmallows.
Remove from pan and with either the paddle or whisk attachment, beat the egg whites and sugar on med-high until its a thick, cool meringue – about 5-7 minutes. *Do not overbeat*. Set aside.

Place the butter in a separate clean mixing bowl and, using the paddle attachment, cream the butter at medium speed for 40-60 seconds, or until smooth and creamy. *Do not overbeat or the butter will become toooooo soft.*

On med-low speed, blend the meringue into the butter, about 1-2 Tbsp. at a time, over 1 minute. Add the liqueur and vanilla and mix for 30-45 seconds longer, until thick and creamy.

Refrigerate 10-15 minutes before using.

Wait! My buttercream won’t come together! Reheat the buttercream briefly over simmering water for about 5 seconds, stirring with a wooden spoon. Be careful and do not overbeat. The mixture will look broken with some liquid at the bottom of the bowl. Return the bowl to the mixer and whip on medium speed just until the cream comes back together.

Wait! My buttercream is too soft! Chill the buttercream in the refrigerator for about 10 minutes and rewhip. If that doesn’t work, cream an additional 2-4 Tbsp. of butter in a small bowl– making sure the butter is not as soft as the original amount, so make sure is cool and smooth. On low speed, quickly add the creamed butter to the buttercream, 1 Tbsp. at a time.

Refrigerate in an airtight container for up to 5 days, or can be frozen for up to 6 months. If freezing, store in 2 16-oz. plastic containers and thaw in the refrigerator overnight or at room temperature for several hours.

Praline Paste
1 cup (4 ½ oz.) Hazelnuts, toasted/skinless
2/3 cup Sugar
Line a jelly roll pan with parchment and lightly butter.

Put the sugar in a heavy 10-inch skillet. Heat on low flame for about 10-20 min until the sugar melts around the edges. Do not stir the sugar. Swirl the pan if necessary to prevent the melted sugar from burning. Brush the sides of the pan with water to remove sugar crystals. If the sugar in the center does not melt, stir briefly. When the sugar is completely melted and caramel in color, remove from heat. Stir in the nuts with a wooden spoon and separate the clusters. Return to low heat and stir to coat the nuts on all sides. Cook until the mixture starts to bubble. **Remember – extremely hot mixture.** Then onto the parchment lined sheet and spread as evenly as possible. As it cools, it will harden into brittle. Break the candied nuts into pieces and place them in the food processor. Pulse into a medium-fine crunch or process until the brittle turns into a powder. To make paste, process for several minutes. Store in an airtight container and store in a cook dry place. Do not refrigerate.

Apricot Glaze
Good for one 10-inch cake

2/3 cup thick apricot preserves
1 Tbsp. water

In a small, yet heavy saucepan, bring the water and preserves to a slow boil and simmer for 2-3 minutes. If the mixture begins to stick to the bottom of the saucepan, add water as needed.

Remove from heat and, using a strainer, press the mixture through the mesh and discard any remnants. With a pastry brush, apply the glaze onto the cake while the cake is still warm. If the glaze is too thick, thin to a preferred consistency with drops of water.

Ganache Glaze
Makes about 1 cup, enough to cover the top and sides of a 9 or 10 inch layer or tube cake

**Ganache can take on many forms. While warm – great fudge sauce. While cool or lukewarm – semisweet glaze. Slightly chilled – can be whipped into a filling/frosting. Cold & solid – the base of candied chocolate truffles.

6 oz. (good) semisweet or bittersweet chocolate, like Lindt
6 oz. (¾ cup heavy cream
1 tbsp. light corn syrup
1 Tbsp. Grand Marnier, Cointreay, or dark Jamaican rum (optional)
¾ tsp. vanilla
½ - 1 tsp. hot water, if needed

Blend vanilla and liqueur/rum together and set aside.

Break the chocolate into 1-inch pieces and place in the basket of a food processor and pulse until finely chopped. Transfer into a medium sized bowl and set aside.

Heat the cream and corn syrup in a saucepan, on low, until it reached a gentle boil. Once to the gently boil, immediately and carefully pour over the chocolate. Leave it alone for one minute, then slowly stir and mix the chocolate and cream together until the chocolate is melted and incorporated into the cream. Carefully blend in vanilla mixture. If the surface seems oily, add ½ - 1 tsp hot water. The glaze will thicken, but should still be pourable. If it doesn’t thicken, refrigerate for about 5 minutes, but make sure it doesn’t get too cold!

Assembling Cake

Cut a cardboard disk slightly smaller than the cake. Divide the cake into 3 layers and place the first layer top-side down on the disk. Using a pastry brush, moisten the layer with 3-4 Tbsp. of warm sugar syrup. Measure out 1 cup of praline buttercream and set aside.

Spread the bottom layer with a ¼-inch thickness of the remaining buttercream. Cover with ½ of the whipped cream, leaving ¼-inch border around the edge of the cake. Place the middle layer over the first, brush with sugar syrup, spreading with buttercream. Cover with the remaining whipped cream.

Moisten the cut side of the third layer with additional sugar syrup and place cut side down on the cake. Gently, press the sides of the cake to align the layers. Refrigerate to chill for at least 30 minutes.

Lift the cake by sliding your palm under the cardboard. Holding a serrated or very sharp night with an 8-ich blade held parallel to the sides of the cake, trim the sides so that they are perfectly straight. Cut a slight bevel at the top to help the glaze drip over the edge. Brush the top and sides of the cake with warm apricot glaze, sealing the cut areas completely. Chill while you prepare the ganache.

Place a rack over a large shallow pan to catch the ganache drippings. Remove the gateau from the refrigerator and put it the rack. With a metal spatula in hand, and holding the saucepan about 10 inches above the cake, pour the ganache onto the cake’s center. Move the spatula over the top of the ganache about 4 times to get a smooth and mirror-like appearance. The ganache should cover the top and run down the sides of the cake. When the ganache has been poured and is coating the cake, lift one side of the rack and bang it once on the counter to help spread the ganache evenly and break any air bubbles. (Work fast before setting starts.) Patch any bare spots on the sides with a smaller spatula, but do not touch the top after the “bang”. Let the cake stand at least 15 minutes to set after glazing.

To garnish the cake, fit a 12 – 14-inch pastry bag with a #114 large leaf tip. Fill the bag with the reserved praline cream. Stating ½ inch from the outer edge of the cake, position the pastry tube at a 90 degree angle with the top almost touching the top of the cake. Apply pressure to the pastry bag, moving it slightly toward the center of the cake. As the buttercream flows on the cake, reverse the movement backward toward the edge of the cake and finish by pulling the bag again to the center. Stop applying pressure and press the bag downward, then quickly pull the tip up to break the flow of frosting. Repeat, making 12 leaves evenly spaced around the surface of the cake.

Make a second row of leaves on the top of the first row, moving the pastry bag about ¾ inch closer to the center. The leaves should overlap. Make a 3rd row, moving closer and closer to the center. Add a 4th row if you have the room. But, leave a 2-inch space in the center for a chopped filbert garnish. Refrigerate uncovered for 3-4 hours to allow the cake to set. Remove the cake from the refrigerator at least 3 hours before serving.

Leftover cake can be covered with foil and kept in the refrigerator for up to 5 days

Read more...

Thursday, July 24, 2008

In Season: Blueberry Crumb Cake

IMGP9823

Like many bakers, I draw my baking inspiration from what looks good at the market. At the moment, the limelight falls on blueberries.It is the peak season for blueberries now, and the best time to devour this antioxidant rich superfood. In Georgia, it has been a good year for the local blueberries farms. Excellent crops have been reported, unlike last year, when the Easter freeze had wiped out 86% of the georgia state's blueberries. The good crop has translated into fresh fruits with an endearing price tag to the consumers. Always a welcoming sight when prices of everything else rockets up.

IMGP9819

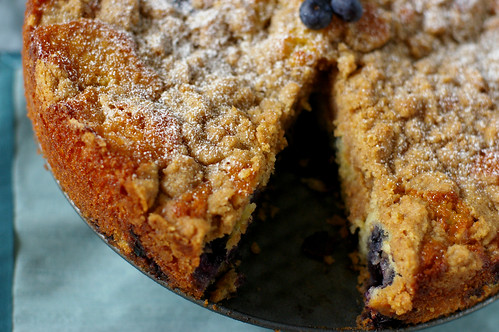
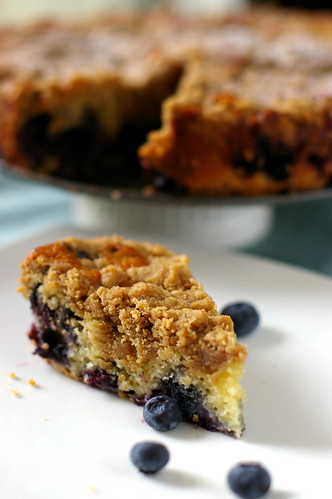
The blueberries are sweet to eat out of hand, so some have found their ways into my morning bowl of granola and soy milk. Some have been dispatched to decorate a birthday cheesecake, while the rest of the cohorts are turned into this blueberry crumb cake.

The recipe I use for the crumb cake comes from one of my favorite food network host-Ina Garten. Although not a fan of the show itself, I love how simple and tasty her recipes always turn out. The blueberry crumb cake is no exception. It is fitting for a weekend brunch, or as a dessert after dinner, with a scoop of vanilla ice cream on the side. I added in another 1/2 cup of blueberries to the recipe, following a suggestion made by a reviewer on the site.

IMGP9817


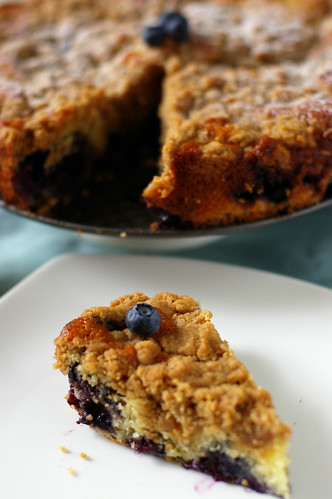
My initial intention has been a thin slice for sampling and photo shoot before sending the rest to OCT's lab. But I like it so much that I succumb to the temptation and sneak another slice onto my plate once my first one is polished! Total lack of abstinance, as OCT would say.


Blueberry Crumb Cake
adopted from Barefoot Contessa via Food Network.com

For the streusel:
1/4 cup granulated sugar
1/3 cup light brown sugar, lightly packed
1 teaspoon ground cinnamon
1/8 teaspoon ground nutmeg
1/4 pound (1 stick) unsalted butter, melted
1 1/3 cups all-purpose flour
For the cake:
6 tablespoons unsalted butter, at room temperature (3/4 stick)
3/4 cup granulated sugar
2 extra-large eggs, at room temperature
1 teaspoon pure vanilla extract
1/2 teaspoon grated lemon zest
2/3 cup sour cream
1 1/4 cups all-purpose flour
1 teaspoon baking powder
1/4 teaspoon baking soda
1/2 teaspoon kosher salt
1 cup fresh blueberries (I used 1.5 cups)
Confectioners' sugar for sprinkling


Preheat the oven to 350 degrees F. Butter and flour a 9-inch round baking pan.

For the streusel:

Combine the granulated sugar, brown sugar, cinnamon, and nutmeg in a bowl. Stir in the melted butter and then the flour. Mix well and set aside.

For the cake:

Cream the butter and sugar in the bowl of an electric mixer fitted with the paddle attachment on high speed for 4 to 5 minutes, until light. Reduce the speed to low and add the eggs 1 at a time, then add the vanilla, lemon zest, and sour cream. In a separate bowl, sift together the flour, baking powder, baking soda, and salt. With the mixer on low speed, add the flour mixture to the batter until just combined.

Fold in the blueberries and stir with a spatula to be sure the batter is completely mixed.

Spoon the batter into the prepared pan and spread it out with a knife. With your fingers,crumble the topping evenly over the batter. Bake for 40 to 50 minutes, until a cake tester comes out clean.

Cool completely and serve sprinkled with confectioners' sugar.

Read more...

Monday, July 21, 2008

Chocolate Matcha Cupcakes

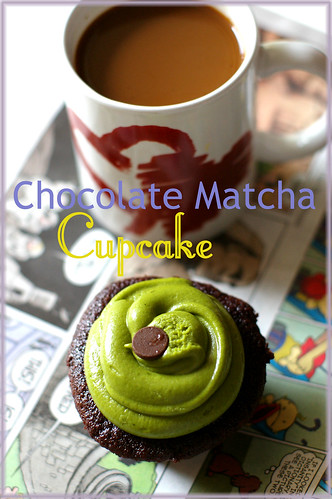
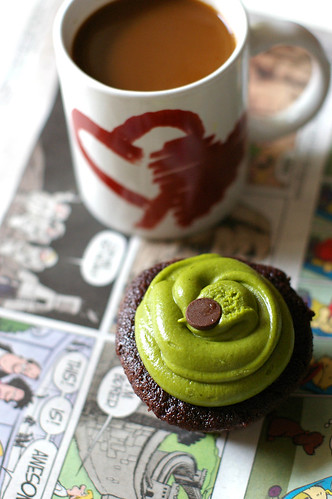
chocolate matcha cupcake

Blame it on the heat, I find it hard to sit still in front of the laptop to write you a coherent post about the chocolate matcha cupcakes I made last week.

30 minutes has passed and I am struck after the first sentence. I think I am not going to try too hard for now. Let us just get straight to the cupcakes, shall we?


IMGP9883

The chocolate cake base is from my favorite author Alice Medrich's book- Chocolate and The Art of Low Fat Desserts . The batter doesn't rise much, but it is moist and chocolatey. Everything you can hope for in a chocolate cake. Most importantly no one can tell that it's low fat.

The matcha cream cheese frosting, is adopted from chockylit. I use the Philly 1/3 Less Fat Neufchtel to cut down on the fat content, although I believe one could substitute the fat free cream cheese here with no problem. My tasters love the chocolate cake, but find the frosting slightly too sweet for their tastes. That can be easily adjusted by reducing the amount of confectioner's sugar used. Because I am aiming for a deep matcha flavor, I used a heaping 2 tablespoons of matcha powder in the frosting. You can certainly taste and adjust the amount according to your liking.

IMGP9885

Tip: If you are looking for matcha powder, try the Asian grocery stores. They are usually shelved with the rest of the tea products. I paid between $4.99-$6.99 for the 1.1 oz tin. Note that matcha powder is different from green tea powder, which the color and flavor is not as intense as the former.

When I couldn't find an Asian grocery store that stock matcha powder in St Louis, I bought mine at Teavana for $16.00!Extortion, I know.

Chocolate Matcha Cupcakes
adapted from Alice Medrich's "Chocolate and The Art of Low Fat Desserts" and here

cupcakes:
1 cup plus 2 tablespoons sifted all purpose flour (4.5 oz)
1/3 cup plus 1 tablespoon unsweetened dutch processed cocoa powder
scant 1/4 teaspoon baking powder
scant 1/4 teaspoon baking soda
1/4 teaspoon salt
1 egg, at room temperature
2 egg whites, at room temperature
1 tablespoon instant espresso or coffee powder dissolve in 1.5 tablespoon of hot water
1 teaspoon vanilla extract
1/4 cup plus 2 tablespoon buttermilk,at room temperature
6 tablespoons unsalted butter, at room temperature
1 1/3 cups sugar
Matcha Cream cheese frosting:
1 stick (8 tablespoons) unsalted butter, at room temperature
4 ounces or 1/2 package of Neuftachel 1/3 less fat Philedephia cream cheese
1.5 cups confectioners' sugar
2 tablespoons matcha powder

Position the rack in the lower third of the oven and prehear ro 350F. Line the muffin pan with paper liners.

Combine and sift flour, cocoa powder, baking powder, salt and baking soda. Set aside. Whisk the whole egg and eggwhites in a small bowl and set aside. Combine the vanilla, espresso mixture and buttermilk in another small bowl, set aside.

Cut the butter into chunks and place in the electric mixer bowl. Beat to softenend, about 1 minutes. Add the sugar gradually, beating constantly for about 3 minutes, until the color of the butter turns pale. Dribble the egg mixture gradually, beating at high speed for 2-3 minutes. On low speed, add in a third of the flour mixture. On medium speed, dribble in half of the buttermilk mixture, scrapping the bowl when necessary. On low speed, add in a third of the flour, followed by the rest of the buttermilk mixture. Beat in the remaining flour until well combined. The batter may look slightly cuddled.

Scoop the batter into muffin cups and bake for about 25-30 minutes, or until toothpick inserted into the center of the cake comes out barely clean. Cool cake on a rack.

To make matcha cream cheese frosting:
Beat butter and cream cheese at medium speed until creamy.

Sift 1.5 cups of confectioners' sugar and 1 tablespoon of matcha powder into the butter/cream cheese mixture and beat to combine.

Taste and add more matcha if desired. I like the matcha flavor, so I used 2 tablespoons in total.

Other matcha recipes on Fresh From The Oven:
Chocolate Matcha Loaf Cake
Matcha Cookies
Chocolate Matcha Brownies
Mini Matcha Cheese Tarts

Read more...

Monday, July 14, 2008

Happy Birthday Grace!

IMGP9918

Today is Grace's birthday. Grace is a special friend whom we met through Flickr. Prior to our meeting, I was always awed by her cake decorating prowess and mouthwatering dishes. I could not help wondering who could conjure all these delicious food. Given our shared interest in food and photography, I knew we would become good friends. I remember our first meeting before the bake sale for the China Earthquake which Grace organized. Her friendliness, enthusiasm for good food and zest for life impressed me greatly.

After the bake sale, we often chat on MSN and hang out whenever we can. I consider it a gift from above, to know someone as wonderful as Grace.

IMGP9916

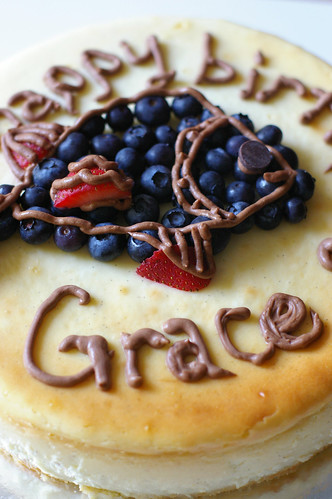
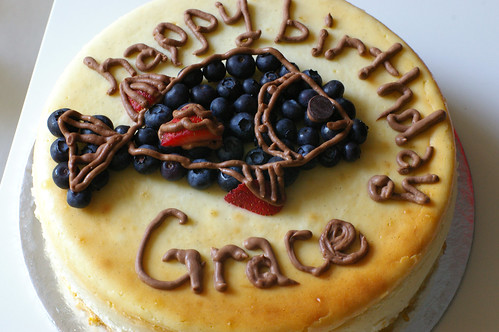
When Grace invited us over for her birthday dinner tonight, I offered to bring a cake. After some deliberation, I settled on a cheesecake. I made her the Vanilla Bean Cheesecake from Junior's Cheesecake Cookbook, which I have baked twice in St Louis.

It should be an uneventful process except that the cake cracked in the center after cooling. Something needed to be done to camouflage the crack. And guess what I did? I drew a fish, because fish is in Grace's Chinese blog title and her nickname. Unfortunately, the cake looked more like the doodle of a 5 years old. For once in my life, I wished I had a 5 years old son. So that I can innocently tell the other guests tonight that my son decorated the cake. :p

IMGP9922

Anyhow, friends who have received birthday cakes from me know that cake decorating is not my forte. The fact stands true even after attending two Wilton Cake Decorating Courses....

Well, I digress. I want to take this opportunty to wish Grace a fun and memorable birthday and all the best for your upcoming MBA class. I know you will make us proud! And thanks for being an awesome friend!


Vanilla Bean Cheesecake
adapted from Junior's Cheesecake Cookbook

four 8-ounce packages Philidaphia Cream Cheese (I use 3 packages of 1/3 less fat Neufchtel and 1 package of original cream cheese), at room temperature
1 2/3 cup sugar
1 vanilla bean (about 7 inches long)
1 recipe 9-inch Junior's Sponge Cake Crust, recipe below
1/4 cup cornstarch
1/2 tablespoon pure vanilla extract
2 extra large eggs ( 3 large eggs are fine too)
3/4 cup heavy whipping cream
one half pint fresh raspberries (about 6 ounces) (optional)
confectioners's sugar

The night before you plan to make this cake, put the granulated sugar in a small bowl and bury the vanilla bean in it, covering it completely. Cover tightly with plastic wrap and let stand overnight to flavor the sugar. When you are ready to make the cake, set the vanilla bean for later use.

Preheat oven to 350F. (I used 325F)Generously butter the bottom and sides of a 9-inch springformpan. Wrap the outside with aluminium foil, covering the bottom and extending all the way up the sides. Make and bake the cake crust and leave it in the pan. Keep the oven on.

Put one package of cream cheese, 1/3 cup of vanilla flavored sugar, and the cornstarch in a large bowl. Beat with an electric mixer on low until creamy, about 3 minutes, scraping down the bowl a few times. Blend in the remaining cream cheese, one package at a time, scraping down the bowl after each one. Increase the mixer speed to medium and beat in the remaining 1 1/3cups vanilla sugar, then the scraped vanilla beans and vanilla extract. Blend in the eggs, one at a time, beating well after adding each one. Beat in the cream just until it's completely blended. Be careful not to be overmix. Gently spoon the batter on top of the crust.

Place the cake on a large shallow pan containing hot water that comes about 1 inch u the sides of the springform. Bake until the edges are light golden brown and the top is slightly golden tan, about 1 1/4 hours. Remove the cheesecake from the water bath, transfer to a wire rack, and let the cake cool for 2 hours. Leave the cake in the pan, cover loosely with plastic wrap, and refrigerate until completely cold, preferably overnight or at least 4 hours.

Wash and drain the raspberries and place them on paper towels to dry, if using. Release and remove the sides of the springform, leaving the cake on the bottom of the pan. Place on a cake plate. Put some confectioners' sugar in a tea stainer and sift enough over the top of the cake to evenly cover it with a fine dusting. Decorate the top with raspberries. Refrigerate until ready to serve. Slice the cold cake with a sharp straight edge knife, not a serrated one. Cover any leftover cake and refrigerate, or remove the decorations, wrap and freeze for up to 1 month.

Junior's sponge cake crust

for one 9-inch cake crust:
1/3 cup sifted cake flour
3/4 teaspoon baking powder
pinch of salt
2 extra large eggs, separated
1/3 cup sugar
1 teaspoon pure vanilla extract
2 drops pure lemon extract (or zest of half a lemon)
2 tablespoons unsalted butter, melted
1/4 teaspoon cream of tartar

for one 8-inch cake crust:
1/4 cup sifted cake flour
1/2 teaspoon baking powder
pinch of salt
2 extra large eggs, separated
1/4 cup sugar
3/4 teaspoon pure vanilla extract
2 drops pure lemon extract (I used zest from half a lemon)
2 tablespoons unsalted butter, melted
1/4 teaspoon cream of tartar

Preheat the oven to 350F and generously butter the bottom and sides of a 8- or 9-inch springform pan (preferably a nonstick one). Wrap the outsde with aluminium foil, covering the bottom and extending all the way up the sides.

In a small bowl, sift the flour, baking powder and salt together.

Beat the eggyolks in large bowl with an electric mixer on high for 3 minutes. With the mixer running, slowly add 2 tablespoons of the sugar and beat until thick light yellow ribbons form, about 5 minutes more. Beat in the extracts.

Sift the flour mixture over the batter and stir it in by hand, just until no more white flecks appear. Now, blend in the melted butter.

Now wash the bowl and beaters really well (even a little fat is left, this can cause the eggwhite not to whip). Put the eggwhites and cream of tartar into the bowl and beat with the mixer on high until frothy. Gradually add the remainining sugar and continue beating until stiff peaks form (the whites will stand up and look glossy, not dry). Fold about one-third of the whites into the batter, then the remaining whites. It's ok if you see a few white specks, they will disappear during baking.

Gently spread out the batter over the bottom of the pan, and bake just until set and golden (not wet and sticky), about 10 minutes. Touch the cake gently in the center. If it springs back, it's done. Watch carefully and don't let the top brown. Leave the crust in the pan and place on a wire rack to cool. Leave the oven on while you prepare the batter.

Dark Chocolate Sponge Cake Crust
Use the above recipe and technique, except you stir in 2 ounces of melted and slightly cooled bittersweet chocolate when you add the extracts.


Read more...

Friday, July 11, 2008

Recipe: Lavender Chiffon Cake with Cream Cheese Frosting

lavender chiffon cake2

It has been a busy week, and before I know, Friday has rolled around! I can't believe I have let this recipe hung in the draft section for a whole week since I last posted the pictures a week ago. I hope you are just as busy,enjoying the summer, grilling, swimming or just hanging out with friends and family.

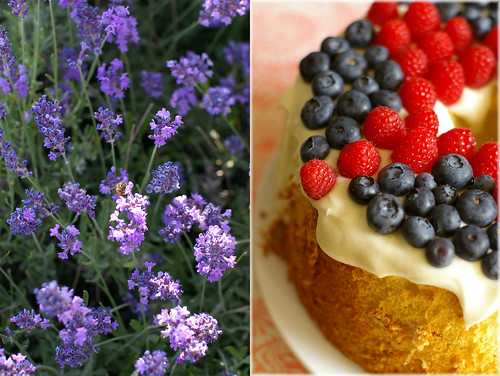
The lavender chiffon cake is inspired by the beautiful lavender bushes I saw while visiting my sister in law in Boulder. Rows after rows of lavenders dotted the beautiful town with breaktaking Rocky Mountains as its backdrop. It's a beautiful place, but I didn't try to capture its magnificient view with my camera. I decided to simply enjoy the company and leave the camera home. Boulder reminds me of Kota Kinabalu, my hometown in which it is located at the foothill of Mount Kinabalu. When I told OCT that, he said he felt the same way too.

lavender chiffon cake

So here's the recipe, which I have adapted from the 2 ways Espresso Chiffon Cake. It's one of my favorite chiffon cake recipes too. I have used a heaping tablespoon of dried lavender here, so its flavor is quite subtle. The cream cheese frosting provides a nice tang to the cake without being too heavy. You can also slice the cake in half, and fill it with another layer of cream cheese frosting. Because I am making the chiffon cake for our long weekend nibble, so I decided to go the light route.

I love raspberries in cake, so I sliced a piece with extra raspberries on it, to reward myself!

Lavender Chiffon Cake with Cream Cheese Frosting

1 tablespoon + 1 teaspoon dried lavender
2/3 cup water
1/2 cup unflavored vegetable oil (canola or safflower)
1 teaspoon pure vanilla extract
zest from 1 lemon
2 1/4 cups cake flour (I used all purpose flour with no problem)
1 tablespoon baking powder
1/4 teaspoon salt
1 1/2 cups granulated sugar, separated
7 large eggs, at room temperature, separated
1/2 teaspoon cream of tartar
Cream Cheese Frosting (see recipe below)
Berries for decoration

To make the lavender chiffon cake:
Cut a round of parchment paper to fit the bottom of the pan and cut out a hole in the middle to fit the center tube of the pan. This cake is baked in an ungreased pan because greasing the pan would keep the batter from rising and gripping the sides of the pan as the cake bakes.

Preheat the oven to 325F.

In a large measuring cup or medium bowl,combine the oil, water, vanilla and eggyolks. Whisk until well combined.

Over a large piece of parchment paper or bowl sift together the flour and baking powder. Add 1 cup of sugar, the dried lavender, lemon zest and salt and stir together.

Make a well in the center of the mixture by pushing the dry ingredients towards the side of the bowl. Add the oil mixture. Using a rubber spatula, stir together until thoroughly combined.

Place the egg whites in the grease free bowl of an electric mixer or in a large grease free bowl. Using the wire whip attachment or a hand held mixer, whip the egg whites on medium speed until they are frothy. Add the cream of tartar. Slowly sprinkle the remaining 1/2 cup of sugar and continue whipping until the egg whites hold glossy and firm but not stiff, peaks, about 5 minutes.

Fold the egg whites into the cake batter in 3 to 4 stages, blending thoroughly after each addition. Transfer the batter to the tube pan. Use the rubber spatula to smooth and even the top.

Bake for 1 hour, or until the cake tester inserted in the center of the cake comes out clean.(Mine took 45-50 minutes).

Remove the pan from the oven and invert it over a cooling rack onto its feet or over a funnel or a thin necked bottle. Let the cake hanf to cook completely. Don't set the pan on a cooling rack on its base. This will cause the cake to collapse onto itself.

Don't shake the cake out of the pan before it is cool. Once the cake is cool. use a thin blade knife or flexible blade spatula to run across the outer edge and the inside tube to help release the cake from the pan. Invert the cake onto a rack, then reinvert onto a serving plate.

To make the cream cheese frosting:
4 ounces cream cheese, at room temperature
1/2 stick ( 4 tablespoons) unsalted butter, at room temperature
1.5 cups confectioners' sugar, sifted
1 tablespoon fresh lemon juice
1 teaspoon of vanilla extract

Using a stand mixer,fitted with a paddle attachment or with a hand mixer in a large bowl, beat the cream cheese and butter together until smooth and creamy. Gradually add the sugar and continue to beat until the frosting is velvety smooth. Beat in the lemon juice and vanilla extract.


Read more...

Friday, July 04, 2008

4th July Cake

4th july

I wasn't going to dress up the lemon lavender chiffon cake, but the berries at the market were just too tempting!

Happy 4th July to those who celebrate the festivities!

IMGP9809

Here's a virtual slice, from me to you. Recipe coming soon on this space, I promise!

Enjoy the long weekend y'all!

p/s: the berries motif is inspired by this post on The Kitchn.

See what I made last year on 4th July here.

Read more...

Thursday, July 03, 2008

Buttermilk Cookies

buttermilk cookies

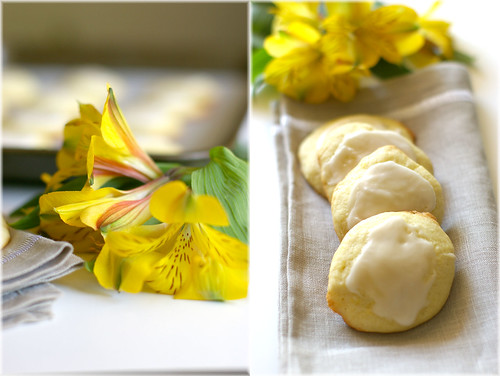
Sitting in front of my laptop, I am debating whether I should blog about these buttermilk cookies.Not that they aren't tasty. To the contrary, these little cookies are quite a treat. The headnote on the Gourmet Jan 2008, in which the recipe first appeared says it all : "These are the cookies of your dream,....tender interior with the slightest bit of crispness around the edge."

lemon buttermilk cookies

Indeed, that's my sentiment of the cookies. When baked right, these cookies are light, and have an almost cake like texture in the center. So why do I even hesitate to blog about it? Well....never mind. That isn't important anymore. Is it?

lemon buttermilk cookies

When baking these buttermilk cookies, remember to bake them one baking sheet at a time, as the recipe clearly indicates. I burnt one tray by baking 2 sheets at a time, thinking I'd save time. Learn from my mistake and don't let the same happens to you. Don't rush it. These cookies are worth the time and effort. The cookies are best eaten the day they are baked, but can be frozen for 1 month. I am curious about the texture of the cookies after being frozen, but not a single cookies survived for that experiment. (OCT brought them to lab, and returned with the empty container)...

Buttermilk Cookies
adopted from Gourmet.com

For Cookies
3 cups all-purpose flour
1 teaspoon grated lemon zest (more if you wish)
1/2 teaspoon baking soda
1/2 teaspoon salt
1 1/2 sticks unsalted butter, softened
1 1/2 cups granulated sugar
2 large eggs, at room temperature
1 teaspoon pure vanilla extract
2/3 cup well-shaken buttermilk

For Glaze (this is half the original recipe, which I find is more than enough to frost the cookies)
3/4 cup confectioners sugar
1.5 tablespoons well-shaken buttermilk
1/2 teaspoon pure vanilla extract

Make cookies:
Preheat oven to 350°F with rack in middle. Line 2 large baking sheets with parchment papers.
Whisk together flour, lemon zest, baking soda, and salt.

Beat together butter and sugar in a large bowl with an electric mixer until pale and fluffy. Add eggs 1 at a time, beating well after each addition, then beat in vanilla. Mix in flour mixture and buttermilk alternately in batches at low speed, beginning and ending with flour mixture, until smooth.

Drop level tablespoons of dough about 1 1/2 inches apart onto baking sheets. Bake, 1 sheet at a time, until cookies are puffed and edges are golden, 12 to 15 minutes per batch. Cool cookies on sheets 1 minute, then transfer cookies to racks.

Glaze cookies:
Whisk together all glaze ingredients and brush onto tops of warm cookies.

Let stand until cookies are completely cooled and glaze is set.

Read more...
Related Posts with Thumbnails