Showing posts with label bread. Show all posts

Monday, March 23, 2009

Breads Invasion!

Beer Bread


I used to think that I was a bread girl. Unlike my better half, I could sustain on bread as my sole source of carbohydrate for weeks. I looked forward to the day we started bread classes, I couldn't wait to pack my freezer with breads and never need to do grocery for weeks.

That was the plan. And I certainly filled up my freezers with breads, even had many extra to give away. I started to plan my meals around breads. Salad, sandwich, soup, you name it- to go with the never ending supply of breads. All the freshly made breads I brought home was reason to envy a pastry student. I felt so spoilt for eating fresh artisan breads as dinners for 2 weeks! However, I had to reluctantly admit that I had overestimated my affinity for breads. Turned out I could only eat that many loaves of breads before bolting for a bowl of rice for comfort. I blame it on my unmistakably Asian genes.

breads invasion


There is something satisfying about bread baking. The way the dough reacts when you knead and shape them. The way it rises and fall and rise some more in the oven-the indication that it is fiercely alive. It almost feels like a science experiment, except that it's a pleasantly edible one. Personally I find the process of bread baking more rewarding than eating the final product.

Having said that, it depresses me a little that I couldn't decipher the greatness of one bread from the other. After making breads for a few days, they all tasted and smelled the same to me. I know, I am unsophisticated this way. Telling a good bread from a mediocre one is easy. But differentiating the flavor and texture from 2 good breads is tough. Or it is quite possibly just me. Most of my classmates can eloquently describe the differences between the various kinds of breads we baked. However, when pressed, I will proclaim my favorite to be the multigrain sourdough. Just don't ask me to articulate the reason.

My creation


Instead of attempting to describe the many breads we made, I will leave you with the pictures. If you have a good way to consume them, I am all ears. I think I am going to make french toast and garlic bread next.

Read more...

Sunday, June 29, 2008

June Daring Bakers Challenge: Danish Braid

danish bread

It's that time of the month again when Daring Bakers strike! I must admit that I am constantly amazed by the choices of challenges month after month. Never once did the hosts choose something that I attempted before! The same can be said about the June Challenge : Danish Braid, which Kelly of "Sass and Veracity" and Ben of "What's Cookin" have picked. In fact, it is one of the pastry items I keep dragging my feet about.

Making a Danish Braid requires two things that I dread. One being making a laminated dough, the most temperamental dough in my opinion, that doesn't work well in warm temperature.

Secondly, the dough needs to be braided....Unless you are adept at bread making,(which I am not), otherwise the instructions of the recipe may seems daunting to the occasional bakers, such as myself.

Under such circumstances, watching someone demonstrates the process in video help to alleviate some of the trepidation. Thanks Kelly and Ben for the thoughtful attachments, they help tons!

So, I watched the videos diligently, and proceeded to make the danish braid. Surprisely, it wasn't as hard as I had imagined. And with a stroke of luck, my dough turned out really easy to work with. The only complaint I have, is the length of time involved. In between each rolling, the dough needs to be chilled for half an hour. Making the danish braid was a 2 day event for me.

danish bread2

I made a simple cream cheese filling to go with fresh blueberries, which are abundant at the moment. Other than the long down time, the whole process went on quite smoothly,and I am happy with the end result. The braid is flavorful, benefitted from the addition of vanilla beans, fresh orange juice and ground cardamom in the dough. I think I will probably leave the cardamom out next time, as I think the taste is a bit overwhelming.

danish breads

Half of the dough has been tranformed into small invidual danish breads. I think I was a bit too generous with the filling, because almost all of them overflew! I jokingly told my friends that they were alien breads.

Will I make it again? Absolutely! I will even try adding Nutella as filling next.

By the time you read this, I will be in Boulder, visiting my lovely sister in law. I will only be able to read about other Daring Bakers experiences when I get back. Who knows, maybe after reading all the inspiring braids, I may start making another batch of danish pastries. To read more about other Daring Bakers takes on the Danish Braid challenge, click here.

Read more...

Sunday, May 18, 2008

Breads Distraction

I guess I just wanted to distract myself, so I baked a batch of bread. They were meant to be plain, like dinner rolls, but I thought they would be more photogenic with some embellishments.

IMGP8972

I cut half a sheet of nori into random shapes and pieces,not exactly knowing how I want to decorate the dough. The thought of shaping them into cute animals has briefly crossed my mind, unfortunately the breads have made up their minds against that idea. Instead of adorable animals, they turned out looking more like characters from a halloween party than anything. Spooky, I tell you!

bread family

To make the bread less scary and more comical, I adhered some pork floss on them after they have cooled down. The first two turned out looking like a kind beardy old man, and a grumpy lady with a bad hair day.

family2


The bread recipe is the same one I used for caterpillar bread and pork floss bun. The "adhesive" was simply nutella. (It shouldn't surprise anyone that Nutella is one of the staples in this household, given my obssesion with it.) I was going to use mayonaise, but was too lazy to open a new bottle just for that. I am sure melted butter or even jam would work in a pinch too.


Read more...

Saturday, April 12, 2008

For The Sack of Nostalgia- A recipe of Caterpillar Bread

Caterpillar bread


Growing up, the time that we kids looked forward the most was when the bread van pull into the neighborhood. We usually called the man behind the wheel- "the bread van uncle". Sadly, I don't recall having another nicer name for the movable vendor who sells various kinds of Asian breads, pastries and snacks out of the back of his van. Normally, we could hear the unmistakable rumbling of his weathered engine with the loud and clear honking miles away, and would patiently wait for it to arrive at its designated stop, usually under a shady tree, 2 houses down from ours at 4p.m.

IMGP7866


My younger brother Alan would always get a hot dog bun, I think he is a devoted hot dog buns follower. Sometime I would get something chocolatey, such as a chocolate cream bun, or sometime I would join him and get a hot dog bun.

So where is this going and what does this have to do with the Caterpillar Bread, you ask? Well, I believe that this caterpillar breads that surfaced and proliferated in many Asian bakeries in late 90's was a derivative of my brother's favorite hot dog bun. And wouldn't it be fun if I could recreate his childhood favorite bread and surprise him when we meet again? I have a feeling that the hot dog bun may still be his favorite bun now. Some things just never change. :p

hotdog bun


My creation


I don't think mine turned out looking like caterpillars, they looked more like turtles, but it was a fun project to undertake on a weekend nonetheless! OCT like to bring them to work on busy days when he doesn't have time for a proper lunch.

IMGP7871


I used the basic sweet dough from the pork floss bun recipe, and squeezed light mayo and ketchup on top of the breads, together with pork floss before baking. A taste which is reminiscent of home.....

*I will type out the detailed recipe soon, but trust me, the step by step instructions above is easier to follow. :)*


Caterpillar Bread

one batch of basic sweet bun dough
1 pack of sausages/franks
mayonaise
ketchup

Divide the basic sweet dough into 70g pieces and mould them into balls. Let them rest for 10 minutes, then roll them flat with a rolling pin.

Put the sausage on the center of the dough and fold the dough into halves. Lightly pinch to seal. Cut each folded dough into 8 small portions, leaving 1/3 from the sealed edges uncut. (The dough should resemble a comb at this point.)

Twist first cut portion to the left, and second to the right, repeat this for the rest of the portions. Place the shaped dough onto a greased baking sheet and press each lightly. Let the dough prove for 45 minutes.

Brush with egg wash, and drizzle ketchup, followed by mayonaise on top.

Bake at 375F for 15-20 minutes or until the breads look golden brown. You can pipe some mayonaise and ketchup on top if desired (for presentation) and sprinkle the optional pork floss.

Read more...

Friday, February 29, 2008

The Daring Bakers Bake French Breads

IMGP7780


This month's Daring Bakers challenge is perfect for me. Ever since the weather turns cold, I have been wanting to horn my skill at bread baking. Of course I occasionally bake dinner rolls, but I am mostly grounded in my comfort zone. Making something like French Bread that takes 7-9 hours has certainly never crossed my mind.

I am really glad that the past challenges have pushed me to bake some cool stuffs that my normal lazy self won't have attempted on my own.

Our hostesses for this month- Sara of I Like to Cook and Mary of The Sour Dough have picked Julia Child's French Bread as this month challenge. It has been a challenge indeed from the very beginning. Even before I dip my measuring cup into the flour. Reading through the looooong recipe, had me feeling exhausted, before I get started.

IMGP7773

But once I got over the reading part, everything else was a breeze. Ok, maybe not as easy as I had envisioned, but hey, after two attempts, I got these batards you see here!

Did I just mentioned I made this recipe twice? Oh yes, that's right. When I first made the recipe on Monday, my dough was unbelievably sticky and the little petits pains that I baked turned out looking anemic. Even though they tasted great, I was quite sure that something wasn't quite right, so I repeated the recipe again on Thursday. Learning from my first experience, I adhered to the recipe more closely, and shaped my dough into batards, like many of my fellow Daring Bakers do.

french bread


Although there are many areas that my french bread can be improved on, I think it will be awhile before I bake french bread again. Don't get me wrong, I love this recipe, and the flavor of this bread is quite addictive. I can eat it without anything topping or spread. It's merely because I have 2 batches of these in the freezer now.

We are going to reheat some petit pains and spread withNutella for breakfast, and the batards, with smoked salmon, apple, spinach and cheese for our weekend dinner and lunch. I wonder how my fellow Daring Bakers are going to eat their French Bread? :)

pink_db


For the recipe of Julia Child's French Bread, see Mary's entry with nice step-by-step photos here

To read about the other Daring Bakers takes on the French Bread Challenge, head over to the Daring Bakers Blogroll.


The past Daring Bakers Challenges:
Tender Potato Bread
Yule Log
Lemon Meringue Pie

Read more...

Tuesday, February 26, 2008

Pork floss buns for the home sick

cny street scene1


*Update: Metric Measurements are now included for the pork floss buns. Enjoy!*

I think I am sick. Ever since I came back from Asia, I have been dreaming about my friends and family every night. Last night, my dream was about me eating packed lunch in my secondary school canteen when some guys came in for extermination. I stood up and told the guys that they should do that after our lunch. But the rest of my friends just continued to eat their food and couldn't seem to care less.

cny street scene

I find it weird that most of the time, my dreams are so absurd and mean absolutely nothing. OCT on the other hand, says he always see whoever he misses in his dream. But his dreams are always filled with wars or other natural disaters he is trying to run away.

cny street scene2

So why am I talking about dreams? Oh, I remember. I am telling you about my sickness. One that I call home sick. I can hardly believe that it will be another 11 months (or longer) before we can head home again. What more with the imminent move to a new city in April, I can't be all optimistic for a longer than 2 weeks stay in Asia next year.

Pork Floss Bun


Whenever I am in Singapore, I like to check out one of the 25 outlets of Breadtalk, and get one of their signature pork floss buns. It is nothing fancy but a sweet bun filled with a secret mayo-like cream and pork floss topping. Upon its induction, many of the local bakeries try to imitate the famous bun and introduce a similar version of their own. All of a sudden, pork floss buns seem to take over the whole island, and became a must have item in all the bakeries. The hype when the pork floss buns were first introduced was only like yesterday. I remember myself joining the beeline of people queuing for the freshly made pork floss buns, choosing one with the most floss on top of the bun, and wouldn't mind eating it for breakfast, lunch and dinner, oblivious to the amount of calories one pork floss bun actually packs. Those were the days. I miss the convenience of having a breadtalk (or other equally good bakeries, for that matter) at every corner I turn.

Pork Floss Bun


This is my version of the pork floss bun. It is by no means comparable to the real deal. But they will work for my craving and oh, the home sick for now.

Pork Floss Bun


Hungry for more bread?

French Bread
Chocolate Babka
Onion Mustard Monkey Bread
Tender Potato Bread

Pork Floss Bun

basic sweet bun dough:(In cups measurement)
3 cups bread flour
1.5 cups all purpose flour
1 pack rapid rise yeast
8 tablespoons granulated sugar
4 tablespoons dry milk powder
300ml warm water (about 105F)
1 egg
1 tablespoon salt
5 tablespoons of unsalted butter, at room temperature

in metric measurement:
480g bread flour
120g all purpose flour
1 pack rapid rise yeast
110g caster sugar
20g dry milk powder
300ml warm water (about 105F)
1 egg
1 tablespoon salt
60g unsalted butter, at room temperature

pork floss
mayonaise

Add yeast to warm water in a medium bowl, and set aside for 10 minutes.

Next, add the bread flour, all purpose flour, granulated sugar and dry milk powder into a large mixing bowl. Slowly mix in the water + yeast mixture with the help of a scraper.

Add in egg and softened butter. Mix well and knead to form a smooth and elastic dough. Because I know it will be easier to show you how to knead in a video, so I asked my boy friend to do just that. Enjoy!

(Ok,so you know he really can't be my boyfriend. But isn't he cute?)

After kneading, leave the dough to prove for 1 hour, or till it doubles in size.

Try pressing a finger into the dough, it should leave a clear mark when it's ready. The dough is now ready to be shaped.

For pork floss bun,
Divide the dough into 60g portion, shape into balls and leave them to rest for 10 minutes.

Shape the dough into oblong shape and put them on a baking sheet lined with parchment paper. Or you can grease the baking sheet without using parchment. Leave the dough to prove for 45 minutes-1 hour.

Brush with egg wash and bake on the middle of the oven at 375F for 12-15 minutes.

When the buns are cooled, spread a thin layer of mayonaise on top of the buns and coat generously with pork floss.

Read more...

Monday, November 26, 2007

My first DB Challenge: Tender Potato Bread!

tender potato bread


Yes, with the christening of this potato bread, I am now a proud member of Daring Bakers! The fabulous online baking community that doesn't require further introduction, in my opinion. If for any reason you haven't heard of them, click here.

pink_sil


I am just happy that I finally get my act together and join these amazing bunch of bakers in the DB family. As for my first challenge, I completed it in record time. Not that I completed it the first week when I learn of the challenge, but it was actually the third week when I dug my hands deep into the sticky potato bread dough. Not exactly prompt compared to lots of DBers, but hey, for those who know me personally (like OCT and my previous sales managers), they know what a procastinator I am! I almost always complete whatever assignments at the very last minute. So, completing this first challenge a week ahead of the deadline is a major improvement for me. :)

On top of becoming a better baker, I think I have become a better person, which is a double bonus for joining Daring Bakers.


tender potato bread


Now let's get on to the Potato Bread, shall we? Instead of a sweet recipe, Tanna of My Kitchen in Half Cups has chosen a savory bread recipe as the November challenge. Honestly, it is a relief to me. Knowing that I will certainly be baking a few sweet recipes in November, I can definitely use a break from all the butter and sugar.

When I told OCT about this month's challenge and asked if he had eaten a potato bread before, he surprised me by saying yes! So has mum, who told me that it was one of grandma's favorite bread. I can't help but wonder if I was the last person alive who have never eaten a potato bread before. Even thoughI have read about potato bread from other's blogs, I keep missing the opportunity to attempt one myself. In fact, I have to confess that I am somewhat intimidated by yeast. And as such, would usually hide behind layers of cakes and tarts when the suggestion of baking bread arises.

But being a Daring Baker to me, is about confronting and conquering my fear. It also helps that they are lots of experienced and helpful bakers, who shared their experiences on the daring bakers blog. All these make the process less intimidating and so much more fun. I enjoy the "sneak previews" everyone posted after their breads were out from the oven.


potato roll


After seeing the many excellent "previews", I tackled my challenge on an early Monday morning. The dough as the rest have warned, was a sticky one. And one shall resist the temptation to add more flour to it. I think I managed pretty well with the help of a bench scraper. Instead of quick to dig my fingers into the sticky dough, I used the scraper to mix and knead the first few turns. I used about 5.5cups of flours, from the 8 cups of flour allowed.


Potato foccacia


As you can see, I shaped my dough into some dinner rolls and a large focaccia with red onion, rosemary and sea salt. The end products were tender, with a bit of chew and flavorful. I am quite surprised that there isn't a faintest hint of potato in the potato bread! I used 10 oz of potato in my batch from the 8-16 oz potato suggested. I believe the inclusion of potato played an important role in keeping the tender texture of the breadrather than exerting its flavor. With the abundance of sweet potatoes at the farmer's market this time of year, I wonder if that would work as an substitute? I shall undertake it as the next potato bread project. It will be interesting to see how the sweet potatoes manifest in potato bread.

foccacia


This recipe yields quite a large batch of bread for a small family like ours. We ate 1/3 of the focaccia with some Tom Yum tuna filling as dinner on the first night, and I nibbled a few pieces after slicing some for photo shoot. The dinner rolls which I sneaked in some muenster cheese in them were saved as our breakfast and lunch on the subsequent days. OCT brought half of the foccacia as lunch the next day and we still have some in the fridge now, waiting to be transformed into a yummy sandwich. I think I will top it with slices of tomatoes, avocados and the leftover turkey from Thanksgiving.

pink_db


To read more about the other Daring Bakers' take on this month challenge, please visit The Daring Bakers Blogroll. I can't wait to see what the rest have come up with!


For the recipe of this month's Tender Potato Bread challenge, check out Tanna's post

Read more...

Saturday, November 10, 2007

Bananas, two ways.

bananas, two ways


I love it when bananas are on sale. The slightly spotted bananas which the grocery store knows will ripen exponentially overnight. They have to get rid of them and I am one happy customer who don't mind buying them.

In the grocery store here, this kind of bananas comes in the 5lb bag. OCT being a banana lover, would try to eat as many as he could.While the rest would be left to ripe at room temperature. After which I would either use some to make a cake or freeze them for later use. I find freezing banana extremely convenient and satisfying. I feel empowered knowing that I can make banana cake whenever the craving hits, without making a trip to the grocery store.

Inspired by the bag of ripen bananas we bought not long ago, I am going to share two banana recipes with you.

The first one is a simple coconut banana bread with lime glaze. After trying a few banana bread recipes and found one that I really love, there isn't much incentive or urgency for me to try a new one. As the old adage says "if it isn't broken, don't fix it". However, I was tempted the positive reviews it received from other reviewers. This recipe, which comes from my favorite magazine- Cooking light, also garnered the test kitchen's highest rating. I just have to make it myself and see what the hype's about.

banana cake with lime glaze

Instead of making it in a loaf pan, as instructed in the recipe, I make it in the muffin pan. It's more convenient for sharing with friends and took half the time to cook.

The coconut banana bread which incorporated low fat yogurt and a few tablespoons of dark rum was full of flavor. I especially love the lime glaze that provided a hint of tang that cut through the sweetness of the banana bread. If you are going to make this recipe, remember not to omit the lime glaze. Since I am not a fan of shredded coconut, I would probably omit it the next time.

Banana Chiffon Cake

The second recipe, is a banana chiffon cake. Recently,I am addicted to the pillowy texture of chiffon cake, and have to make it whenever a good recipe presents itself!Oh how happy we were, biting into the first slice of this cottony soft chiffon cake. The lightness of the cake almost deceived us into finishing half of it in one sitting! Although I like to eat it as it is, I would not consider a thin glaze of chocolate ganache on top to be gilding the lily. Especially when one is considering of bringing this to a party.I am content however, with an unadorned slice of banana chiffon cake to go with my cup of coffee in the morning, or afternoon or even after dinner!

banana chiffon cake

I was initially sceptical of the usage of only one banana in the batter. I mean, it's such a huge cake! But I was pleasantly surprised with the banana flavor in each slice of the chiffon cake. It was the right sweetness and spot on flavor. The secret, as some of you may already know, is to use a very ripe banana.


Coconut Banana Bread with Lime Glaze
adapted from Cookinglight.com

2 cups all-purpose flour (about 9 ounces)
3/4 teaspoon baking soda
1/2 teaspoon salt
1 cup granulated sugar
1/4 cup butter, softened
2 large eggs
1 1/2 cups mashed ripe banana (about 3 bananas)
1/4 cup plain low-fat yogurt
3 tablespoons dark rum
1/2 teaspoon vanilla extract
1/2 cup flaked sweetened coconut
Cooking spray
1 tablespoon flaked sweetened coconut
1/2 cup powdered sugar
1 1/2 tablespoons fresh lime or lemon juice

Preheat oven to 350°.
Lightly spoon flour into dry measuring cups; level with a knife. Combine flour, baking soda, and salt, stirring with a whisk.

Place granulated sugar and butter in a large bowl; beat with a mixer at medium speed until well blended. Add eggs, 1 at a time, beating well after each addition. Add banana, yogurt, rum, and vanilla; beat until blended. Add flour mixture; beat at low speed just until moist. Stir in 1/2 cup coconut. Spoon batter into a 9 x 5-inch loaf pan coated with cooking spray; sprinkle with 1 tablespoon coconut. Bake at 350° for 1 hour or until a wooden pick inserted in center comes out clean. Cool in pan 10 minutes on a wire rack; remove from pan. Combine powdered sugar and juice, stirring with a whisk; drizzle over warm bread. Cool completely on wire rack.

Banana Chiffon Cake
Modified from Everyday Food Jan/Feb 2007 and Carol Bloom's Essential Baker

1 large, ripe banana
3/4 cup water
1/2 cup unflavored vegetable oil
1 teaspoon pure vanilla extract
2 cups all purpose flour (spooned and leveled)
1 tablespoon baking powder
1 teaspoon salt
1 1/2 cups granulated sugar, separated ( I used 1 1/4 cup of sugar)
7 large eggs, at room temperature, separated (I used 6 extra large eggs)
1/2 teaspoon cream of tartar
confectioner sugar, for dusting

For Bittersweet Chocolate Ganache (optional):
6 ounces bittersweet chocolate (I used 72% chocolate), finely chopped
3/4 cup heavy cream
1 to 2 tablespoons rum
1 tablespoon granulated sugar

Center a rack in the oven and preheat it to 325F.

Cut a round of parchment paper to fit the bottom of the pan and cut out a hole in the middle to fit the center tube of the pan. This cake is baked in an ungreased pan because greasing the pan would keep the batter from rising and gripping the sides of the pan as the cake bakes.

In a large measuring cup or medium bowl, mash the banana. Add water,oil,vanilla and eggyolks. Whisk until well combined.

Over a large piece of parchment paper or bowl sift together the flour and baking powder. Add 3/4 cup of sugar and salt and stir together.

Make a well in the center of the mixture by pushing the dry ingredients towards the side of the bowl. Add the banana mixture. Using a rubber spatula, stir together until thoroughly combined.

Place the egg whites in the grease free bowl of an electric mixer or in a large grease free bowl. Using the wire whip attachment or a hand held mixer, whip the egg whites on medium speed until they are frothy. Add the cream of tartar. Slowly sprinkle the remaining 1/2 cup of sugar and continue whipping until the egg whites hold glossy and firm but not stiff, peaks, about 5 minutes.

Fold the egg whites into the cake batter in 3 to 4 stages, blending thoroughly after each addition. Transfer the batter to the tube pan. Use the rubber spatula to smooth and even the top.

Bake for 1 hour, or until the cake tester inserted in the center of the cake comes out clean.(Mine took 45-50 minutes).

Remove the pan from the oven and invert it over a cooling rack onto its feet or over a funnel or a thin necked bottle. Let the cake hanf to cook completely. Don't set the pan on a cooling rack on its base. This will cause the cake to collapse onto itself.

Don't shake the cake out of the pan before it is cool. Once the cake is cool. use a thin blade knife or flexible blade spatula to run across the outer edge and the inside tube to help release the cake from the pan. Invert the cake onto a rack, then reinvert onto a serving plate.

Place the cake on a rack over a lined baking sheet. Sprinkle with confectioner's sugar if using.

*optional*
Making Chocolate Ganache Glaze:
Heat cream, sugar, rum in a saucepan over medium heat until it simmers and bubbles forming on the sides of saucepan. Remove from heat and pour cream over chopped chocolate. Using a rubber spatula, stir to melt chocolate with hot cream until the mixture turns glossy and smooth. Let the chocolate ganache cool to pouring consistency. Pour over the chiffon cake.

Read more...

Monday, October 22, 2007

Dinner from Scratch

The crisp Fall weather has certainly put me in a cooking and baking mood. Unlike summer when I prefer dinner to be ready in less than 30 minutes, I love lingering in the kitchen longer now.

That also means I am more receptive to the ideas of making elaborate, labor intensive recipes and meals. Not that I am connoting these descriptions with the recipes below. In contrary, I have a recipe which I would consider as comfort food for OCT and myself.

From the tropical countries we come from, comfort food means something that's light and preferably not piping hot. That's comfort food for a country with summer weather 365 days a year. A hearty sandwich in my opinion fits the bill.

Because of my weakness in resisting a good seafood(especially shrimps!) recipe, I have my eyes on the Shrimp Rémoulade Po'boy recipe from Cookinglight magazine and a hamburger bun recipe from a blog I like. I think I would call this concortion a Shrimp Rémoulade Sandwich since the authentic Po'boy uses french bread/Baguette. Making this meal certainly requires some planning. Especially when you want to pair the freshly baked bun with the Shrimp Remoulade filling.

Shrimp Remoulade Po'boy


I started my bun making in the early afternoon and had them ready before I prepped the shrimp. According to Joe, the hamburger buns freeze well. It eliminated my worry for having to finish a dozen of them in one meal.

If you have baked bread before, you would understand the moment of joy when the bread comes out of the oven. Because I substituted whole wheat flour for some of the all purpose flour required, mine turned out slightly fibrous. Not exactly the kind you would expect in a soft storebought hamburger bun. I prefer it this way though as it stands up to the Rémoulade sauce without making the whole thing soggy.

I also made a fresh corn salad, which unfortunately was not memorable. If you must try, the recipe is here.

Shrimp Remoulade Po'boy with Corn Salad


Shrimp Rémoulade Sandwich
adapted from Cookinglight, July 2007 and hamburger bun from this blog

Rémoulade sauce:
1/3 cup reduced-fat mayonnaise
2 tablespoons finely chopped onion
2 tablespoons finely chopped celery
2 tablespoons finely chopped green bell pepper
1 tablespoon prepared horseradish
2 tablespoons ketchup
1 teaspoon minced fresh basil
2 teaspoons lemon juice
2 teaspoons Worcestershire sauce
1/8 teaspoon freshly ground black pepper
1 small garlic clove, minced

Remaining ingredients:
24 large shrimp, peeled and deveined
Cooking spray
4 (3-ounce) French bread loaves, sliced horizontally (I used homemade hamburger buns)
1 cup chopped iceberg lettuce
1 cup chopped tomato


To prepare sauce, combine first 11 ingredients in a medium bowl. Chill.
Prepare grill.

Thread shrimp onto 4 (10-inch) skewers. Place skewers on grill rack coated with cooking spray; grill 2 minutes on each side or until shrimp are done.

Preheat oven to 350°.

Hollow out bread halves, leaving a 1-inch-thick shell. Place bread on a baking sheet; bake at 350° for 5 minutes. Place 1/4 cup lettuce, 1/4 cup tomato, and 6 shrimp in bottom half of each loaf. Spoon 1/4 cup sauce over each sandwich. Cover with top bread halves.
*I used homemade hamburger buns in place of the french bread. See recipe below.
Yield
4 servings (serving size: 1 sandwich)

Hamburger Buns

1 cup milk
1 cup water
2 tablespoon sugar
2 tablespoons butter
1 1/2 teaspoon salt
5 1/4 cups all-purpose flour, divided ( I substituted 1 cup of all purpose flour with whole wheat flour)
2 1/4 teaspoons instant yeast

Egg wash

1 large egg yolk
1 tablespoon water

In a small saucepan, add milk, 1 cup water, sugar, butter and salt. Heat over low just until the butter melts - cool to lukewarm.

In a medium bowl, whisk together 3 cups flour with the yeast.

Pour the milk mixture into a large mixing bowl. Mix in the flour/yeast mixture, 1 cup at a time, until all 3 cups are in, beating until smooth. Stir in enough of the remaining flour to make stiff dough.

Scoop the dough onto a lightly floured surface. Knead until smooth and elastic (about 8-10 minutes), adding enough of the remaining flour to prevent the dough from sticking to your hands. Move dough into a large bowl lightly coated with cooking spray. Cover and let rise until doubled, about 60 minutes.

Uncover and punch down the dough. Evenly divide into 12-16 pieces, depending on how large you want the buns to be. Form each piece into a tight ball and place about 2" apart on a parchment lined baking sheet - you may need to use 2 sheets depending on the size. Slightly flatten each ball. Cover and let rise until doubled - another 30 to 45 minutes.

Preheat oven to 400.

In a small bowl, whisk together egg yolk and water. Gently brush egg wash over each bun.

Bake about 20-25 minutes, until golden and they sound hollow when tapped on the bottom. Transfer to a wire rack and cool completely.

Read more...

Thursday, March 22, 2007

I am not what you think I am

In case you think I am only a loaf of boring, plain white bread.


I am not. I am more sophisticated than that. Eventhough you can not see through my surface.

Unless I am willing to open up to you.


Then, you will see what lies beneath my boring skin.


Hello, my name is Chocolate Babka. And I am delicious. My life is more interesting than other breads. Life would be more wonderful if only I am a few more inches taller. I am obviously too short for a standard babka...

Chocolate Babka
adapted from Gourmet Dec 06
makes 2 loaves (I halved the recipe and made only one loaf)

For dough
3/4 cup warm milk (105–115°F)
1/2 cup plus 2 teaspoons sugar
3 teaspoons active dry yeast (from two 1/4-oz packages)
3 1/4 cups all-purpose flour plus additional for dusting
2 whole large eggs
1 large egg yolk
1 teaspoon pure vanilla extract
3/4 teaspoon salt
1 1/4 sticks (10 tablespoons) unsalted butter, cut into pieces and softened

For egg wash
1 large egg yolk
1 tablespoon heavy cream or whole milk

For chocolate filling
5 tablespoons unsalted butter, well softened
2 (3 1/2- to 4-oz) bars fine-quality bittersweet chocolate (no more than 60% cacao if marked), finely chopped
1/4 cup sugar

Special equipment: a stand mixer fitted with paddle attachment; 2 (8 3/4- by 4 1/2- by 2 3/4-inch) loaf pans; parchment paper preparation


Make dough:
Stir together warm milk and 2 teaspoons sugar in bowl of mixer. Sprinkle yeast over mixture and let stand until foamy, about 5 minutes. (If yeast doesn't foam, discard and start over with new yeast.)

Add 1/2 cup flour to yeast mixture and beat at medium speed until combined. Add whole eggs, yolk, vanilla, salt, and remaining 1/2 cup sugar and beat until combined. Reduce speed to low, then mix in remaining 2 3/4 cups flour, about 1/2 cup at a time. Increase speed to medium, then beat in butter, a few pieces at a time, and continue to beat until dough is shiny and forms strands from paddle to bowl, about 4 minutes. (Dough will be very soft and sticky.)

Scrape dough into a lightly oiled bowl and cover bowl with plastic wrap. Let dough rise in a draft-free place at warm room temperature until doubled in bulk, 1 1/2 to 2 hours.

Assemble babkas with filling:
Line each loaf pan with 2 pieces of parchment paper (1 lengthwise and 1 crosswise).

Punch down dough with a lightly oiled rubber spatula, then halve dough. Roll out 1 piece of dough on a well-floured surface with a lightly floured rolling pin into an 18- by 10-inch rectangle and arrange with a long side nearest you.

Beat together yolk and cream. Spread 2 1/2 tablespoons softened butter on dough, leaving a 1/2-inch border all around. Brush some of egg wash on long border nearest you.

Sprinkle half of chocolate evenly over buttered dough, then sprinkle with half of sugar (2 tablespoons). Starting with long side farthest from you, roll dough into a snug log, pinching firmly along egg-washed seam to seal. Bring ends of log together to form a ring, pinching to seal. Twist entire ring twice to form a double figure 8 and fit into one of lined loaf pans.

Make another babka with remaining dough, some of egg wash, and remaining butter and chocolate in same manner. Chill remaining egg wash, covered, to use later. Loosely cover pans with buttered plastic wrap (buttered side down) and let babkas rise in a draft-free place at warm room temperature until dough reaches top of pans, 1 to 2 hours. (Alternatively, let dough rise in pans in refrigerator 8 to 12 hours; bring to room temperature, 3 to 4 hours, before baking.)

Put oven rack in middle position and preheat oven to 350°F.

Brush tops of dough with remaining egg wash. Bake until tops are deep golden brown and bottoms sound hollow when tapped (when loaves are removed from pans), about 40 minutes. Transfer loaves to a rack and cool to room temperature.

Read more...

Friday, February 02, 2007

Pizza night

The cold weather is making me lazy. I have no desire to tackle any complicated recipes than to simply sit in a warm place, with a cup of hot coffee and a book. But there's OCT I have to feed. And I can't possibly dish out the instant noodle with frozen dumplings on a weekday night. No, that is too irresponsible.

But I am still feeling lazy. So I made pizzas. I would have used the store bought dough in a heartbeat, if there's any in the fridge. But there is none. So, I made my own pizza dough. No big deal. It's not remotely difficult at all. All one needs, is plenty of time, and patient, to wait for the dough to rise into something that can eventually be baked and devoured.

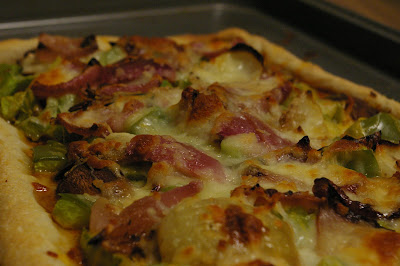
One thing I like about homemade pizzas is the absolute control of all ingredients used. For our dinner, I made one with pineapple chunks, pepperoni and mushroom, and another one with green peppers, roasted onion, pesto,mushroom and pepperoni. Both have been topped with "reasonable" amount of monterey and mozzarella cheese.

And because I have problem making the crust into perfect 12-inch round, I decided to make them into rectangular. I believe that shouldn't affect their taste.

Read more...

Wednesday, January 24, 2007

Pineapple Fried Rice and Onion Mustard Monkey Bread

I made more rice the previous night so that I could have enough to experiment on another Thai recipe - Pineapple Fried Rice. Although we have been making our version of Pineapple Fried Rice for quite some time now, I decided to follow the recipe and see how different would it turn out compared to ours.

According to the book, this recipe uses only fish sauce and soy sauce to flavour the meat and rice. My usual version normally include sesame oil, oyster sauce, ketchup and rice vinegar. But the simple version from the book actually yields a more authentic Thai flavour. The taste and smell of fish sauce is more distinct here, without the distractions from other sauces.

The original recipe called for cashew nuts, but I used peanuts, because that's what I have on hand. The marriage of crunchy nuts, soft tangy pineapple chunks, juicy prawn and chicken with rice make this Oriental Fried Rice a destined crowd pleaser.

The cold weather also make me crave for some warm fresh bread. As a result, I made half a recipe of Onion and Mustard Monkey Bread from Food and Wine magazine. It would be the perfect side dish with roast chicken or pot roast. But we were too engrossed with the fried rice and ended up not eating much of the bread. I kept 4/5 of the bread in a paper bag, hoping that it will not turning into an inedible rock the next day. It looked absolutely stunning when it first came out from the oven. From the little piece that I ate, I know that this is going to be a keeper. As for OCT? He prefers RICE over any other types of grains anytime. He will be very grumpy if he didn't get his RICE fix every few days.....


Onion Mustard Monkey Bread
adapted from Food and Wine Magazine

1 stick unsalted butter
1 1/2 cups milk
2 tablespoons sugar
1 envelope dry active yeast
4 cups all-purpose flour, plus more for dusting
Salt
1 medium onion, finely chopped
3 tablespoons whole-grain mustard
2 tablespoons snipped chives
1 teaspoon chopped thyme


In a saucepan, melt 3 tablespoons of the butter. Add the milk and sugar and heat just until warm. Transfer to a large bowl, stir in the yeast and let stand until foamy, 5 minutes. Stir in the flour and 1 1/2 teaspoons of salt until a sticky dough forms. Turn the dough onto a lightly floured work surface and knead until smooth, 5 minutes. Oil the bowl and return the dough to it. Cover with plastic and let stand in a draft-free spot until doubled in bulk, about 1 hour.

Butter a 10-inch tube or Bundt pan. Punch down the dough and divide it into 4 pieces. Roll each piece into a 12-inch log and cut each log in 12 equal pieces. Roll each piece into a ball.

Heat 1 tablespoon of the butter in a skillet. Add the onion and cook over moderate heat until softened, 6 minutes. Stir in the mustard, chives and thyme. Add the remaining 4 tablespoons of butter; stir until melted. Season lightly with salt and transfer to the large bowl to cool slightly. Add half of the dough balls and turn to coat with the onion mixture. Arrange the balls in the bottom of the pan. Repeat with the remaining dough balls. Cover loosely with plastic wrap and let stand until risen to the top of the pan, about 1 hour.

Preheat the oven to 425°. Bake the bread in the lower third of the oven for 25 minutes, or until golden. Cover the pan loosely with foil, reduce the oven temperature to 375° and bake for 30 minutes longer, or until risen. Let the bread cool in the pan for 15 minutes. Set an inverted plate on top and turn the bread out onto it. Set another plate on top and invert the bread so it’s right side up. Break into rolls or cut into slices.

MAKE AHEAD: The bread can be prepared through Step 3 and refrigerated overnight.

Note: I halved the recipe, and make it in a 9-inch loaf pan.


Thai Pineapple Fried Rice ( Khao Phad Suparod)

2.5 cups cooked rice
4 oz skinless, boneless chicken breast
8 large shrimps, shelled, deveined (5 oz/150g)
1/2 cup pineapple chunk
6 tbsp vegetable oil
1 tsp chopped garlic
2 eggs
3 tbsp soya sauce
2 tbsp fish sauce
1/2 tsp black pepper
1/3 cup roasted unsalted cashews
2 stems green onion, thinly chopped
strips of red pepper
fresh coriander leaves
slices of tomato and cucumber

Slice the chicken into 1/4inch/5-mm strips. Reserve along with the shrimps.

Heat oil in a wok (or a large frying pan) until it is just about to smoke. Add garlic and stirfry for 30 seconds. Add chicken and shrimps and stirfry for 1-1.5 minutes, until the meats have turned white, then decrease heat to medium high. Break the eggs directly into the wok. Fry the egg without breaking them up for 2 minutes, until they are partially set.

Push the eggs and meat to one side of the wok, and add the rice to the other side. Add soy sauce and fish sauce on the rice and then using a shoveling motion, combine the 2 sides of the wok, tossing- stirring for 2 minutes, mixing the rice with the eggs, chicken and shrimp, working from the bottom up so that all the rice has a chance to fry in the oil and everything is integrated.

Sprinkle black pepper on the rice and add cashews, green onion and the reserved pineapple chunks. Toss-stir for 1- 2 minutes, folding the new ingredients into the rice and then remove fom heat. Transfer to a serving dish and top with red pepper strips and fresh coriander leaves.

Garnish sides with slices of tomato and cucumber. Serve immediately.

Serves 2-4

Note: Use the ingredient list as a guideline and season the fried rice as you cook.

Read more...

Monday, January 15, 2007

Asiago and Balsamic Caramelised Onion Focaccia

OCT shuddered when I told him that focaccia was part of the menu last week. Because the last time I attempted to make focaccia, it took us forever to finish it. Moreover, it was not really a success. (at least that's what OCT thought) .

the focaccia I baked 2 weeks ago, and took us forever to finish....


But I determinely like focaccia, and endeavour to bake a killer batch one day. I even borrowed a book on how to bake bread from the library. It's sitting prominently on my apartment floor. I will read it from front to back on one fateful day...

But before that, I made a simple focaccia, adapted from Cookinglight magazine. And I halved the recipe this time, so that we could finish it in 2 days. Interestingly, this small batch seems more manageable compared to the past batches I made. It worked out nice for us, since even the half batch can feed 4 people. So, I could even tear some to snack on before dinner.

I baked it in a 9-inch cake pan, which it rose up nicely. However, the texture of the focaccia was a bit too soft for my liking. I prefer the chewy type. But the soft texture suited OCT's taste, so he didn't complaint this time.


Asiago and Balsamic Caramelised Onion Focaccia
Adapted from Dec 2006 Cookinglight

2 tablespoons plus 2 teaspoons extravirgin olive oil, divided
1 cup chopped onion
2 tablespoons honey, divided
1/4 teaspoon dried thyme
2 tablespoons balsamic vinegar
1 1/2 teaspoons salt, divided
1 package dry yeast (about 2 1/4 teaspoons)
1 1/4 cups warm water (100° to 110°)
3 3/4 cups all-purpose flour (about 17 ounces), divided
Cooking spray
3/4 cup (3 ounces) grated fresh Asiago cheese

Heat 2 teaspoons oil in a nonstick skillet over medium-high heat. Add onion, 1 tablespoon honey, and thyme; cook 5 minutes or until browned, stirring occasionally. Remove from heat; stir in vinegar and 1/4 teaspoon salt. Cool completely.
Dissolve yeast and remaining 1 tablespoon honey in 1 1/4 cups warm water in a large bowl; let stand 5 minutes. Lightly spoon flour into dry measuring cups; level with a knife. Add onion mixture, remaining 2 tablespoons oil, remaining 1 1/4 teaspoons salt, and 3 1/2 cups flour to yeast mixture; stir until a soft dough forms. Turn dough out onto a floured surface. Knead until smooth and elastic (about 8 minutes). Add enough of remaining flour, 1 tablespoon at a time, to prevent dough from sticking to hands.

Place dough in a large bowl coated with cooking spray, turning to coat top. Cover and let rise in a warm place (85°), free from drafts, 1 hour or until doubled in size. (Gently press two fingers into dough. If indentation remains, dough has risen enough.) Punch dough down; cover and let rest 5 minutes. Gently press dough into a 15 x 10-inch jelly-roll pan coated with cooking spray. Cover and let rise 25 minutes or until almost doubled in size.

Preheat oven to 400°.

Sprinkle dough with cheese. Bake at 400° for 18 minutes or until browned. Cool in pan on a wire rack 10 minutes. Remove from pan; cool completely on rack.

Note: I halved the recipe.

Read more...
Related Posts with Thumbnails