Monday, April 30, 2007

Lasagna : Two ways

We had lasagna twice last week. First was a simple roll up version, recipe of Rachael Ray and the second one- Asparagus Lasagna, was devoured on our weekly vegetarian night.

Wanting the comfort of a lasagna but not the work of putting one together, I was delighted to find a short cut from Rachael Ray's website. Instead of the usual layering method, the filling was simply placed on top of individual lasagna noodle and rolled up before putting in a baking dish. The individual lasagna rolls were then baked with a simple pasta sauce and mozzarella cheese for less than 10 minutes. OCT thought it was a pretty good, all in one meal. He has the leftover all by himself (as usual).


The second lasagna was a vegetarian version, featuring my favorite Spring asparagus. It was a perfect vegetarian meal; satisfying without feeling guilty. Instead of Bechamel sauce, this recipe used a pesto white sauce. The end result was significantly lighter than its cream/milk counterpart but tasted much nicer. Maybe because I never really like milk anyway.


Actually, I was thinking of making a seafood lasagna when I first bought the lasagna noodle. Who knows I would end up with two totally random recipes than the one I have first set eyes on. Typing this out made me feel a bit guilty, I think I will try to make the seafood lasagna before it goes totally covered by other recipes on my to try list.

Here's the original recipe, but I added in some chopped Kielbasa, and used pasta sauce insteads of Gorgonzola cream sauce, to cut down on time and fat.

Spinach and Mushroom Lasagna Roll-ups with Gorgonzola Cream Sauce
adapted from Rachael Ray

16 cremini caps, cleaned with a damp towel and finely chopped in food processor
1 small yellow-skinned onion, finely chopped
2 cloves garlic, minced
2 tablespoons (2 turns around the pan) extra-virgin olive oil
1 (10-ounce) package frozen chopped spinach, defrosted and squeezed dry
Salt and pepper
1/4 teaspoon ground nutmeg or the equivalent of freshly grated
2 cups part skim ricotta
8 curly edge lasagna noodles, cooked to al dente (12 to 14 minutes)
1 cup fat free chicken broth
8 ounces Gorgonzola, crumbled
1/2 cup (3 turns around the pan) heavy cream
1 to 1 1/2 cups shredded mozzarella

In a medium skillet over moderate heat, saute mushrooms, chopped onions, and garlic in oil until mushrooms give off their juices and darken and onions are tender, about 7 or 8 minutes. Season with salt and pepper; the salt will help draw water out of the vegetables as they cook.

Add dry chopped spinach to the pan and heat through for 1 minute. Adjust seasonings with salt, pepper, and a little nutmeg. Add ricotta and stir into mixture to heat cheese through, 1 minute longer. Remove pan from heat but leave in the warm skillet.


Heat broth in a small pan over moderate heat. Melt Gorgonzola into broth and bring liquid to a bubble. Stir in cream and thicken sauce 2 minutes.

Place cooked lasagna noodles on a large work surface or cutting board. Spread lasagna noodles with a layer of spinach-mushroom filling. Roll up pasta and arrange the 8 bundles in a shallow casserole dish. Pour warm sauce over roll-ups and top with mozzarella. Place casserole under broiler to melt cheese.


Asparagus Pesto Lasagna
adapted from Vegetarian Times ( I halved the recipe, and used a 9x9-inch baking dish)
serves 10

1/3 cup all-purpose flour
3 1/2 cups low-fat milk, divided
6 Tbs. pesto*, or more to taste
2 Tbs. grated Parmesan cheese, plus additional for garnish, optional
1 tsp. salt
1/4 tsp. ground black pepper
2 tsp. olive oil
1 1/4 lb. asparagus spears, tips cut off and reserved, spears trimmed and chopped into 1/4-inch pieces
1 clove garlic, minced (about 1 tsp.)
16 no-cook lasagna noodles (9 oz.)
2 cups shredded Fontina or part-skim mozzarella cheese (8 oz.), divided


Preheat oven to 350F. Whisk flour and 1/2 cup milk in saucepan until smooth. Gradually whisk in remaining milk. Bring to a boil over medium heat, whisking constantly, and boil 1 minute, or until thickened. Remove from heat; stir in pesto, Parmesan, salt and pepper. Reserve 1 cup white sauce.

Warm oil in large nonstick skillet over medium-high heat. Add chopped asparagus (not tips) and cook, stirring often, 5 minutes, or until tender. Add garlic; cook, stirring, 1 minute, and season to taste with salt and pepper. Remove from heat.

Coat 13x9-inch baking dish with cooking spray. Place layer of noodles in dish, overlapping slightly. Layer with half of cooked asparagus, 3/4 cup Fontina and half of sauce. Add another layer of pasta, remaining sauce, remaining cooked asparagus and 3/4 cup Fontina. Top with layer of noodles, then with reserved 1 cup white sauce. Arrange reserved asparagus tips over top and sprinkle with remaining Fontina.

Bake, uncovered, 35 to 40 minutes, or until golden. Let stand 10 minutes; serve with additional grated Parmesan cheese, if desired.

Wednesday, April 25, 2007

OCT's big day

It is OCT's big day today. All he has done for the past 6 years is finally coming to a fruitful end today. Neither of us slept well last night. I was excited and he was a bit nervous. It was just like yesterday when he left home to come to St Louis, to pursue his dream. And now that everything has fallen into the right place just as we have anticipated, I can't wait to enter another stage of our adventure, hopefully in a more interesting place this time. We have even talked about the possiblity of me entering a pastry program, should the right opportunity arises.

But it's too early to talk about all these now. He only defended his dissertation today, and there are still lots of things needed to be done before we move on.

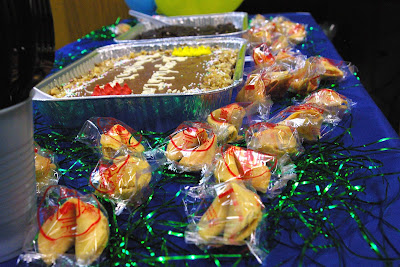
So for now, I would like to present to you what I made for OCT "After- Defense Party".


A tray of Mississippi Mud Cake and a simple yellow sheet cake with chocolate frosting. Not the most impressive party cake, I made it last minute after we failed to order a proper one from the bakery.


Everybody likes the Mississippi Mud Cake, but we think the yellow sheet cake is too sweet for our liking...

Last but not least, Dr Ong himself, for a job well done! Congrats OCT!


Mississippi Mud Cake
adapted from Cookinglight
Cake:
3/4 cup boiling water
1/2 cup unsweetened cocoa
3/4 cup granulated sugar
1/2 cup butter, softened
1 teaspoon vanilla extract
2 eggs
1 1/3 cups all-purpose flour (about 6 ounces)
1 teaspoon baking soda
1/4 teaspoon salt
1/2 cup fat-free buttermilk
Cooking spray
3 1/2 cups miniature marshmallows

Frosting:
1/4 cup unsweetened dutch processed cocoa
1/4 cup evaporated fat-free milk
3 tablespoons butter, melted
1/8 teaspoon salt
2 cups powdered sugar
1 teaspoon vanilla extract

Preheat oven to 350°.
To prepare cake, combine 3/4 cup boiling water and 1/2 cup cocoa, stirring until blended. Cool. Place granulated sugar, 1/2 cup softened butter, and 1 teaspoon vanilla in a large bowl; beat with a mixer at medium speed until blended. Add cocoa mixture and egg substitute; beat well. Lightly spoon flour into dry measuring cups; level with a knife. Combine flour, baking soda, and 1/4 teaspoon salt in a bowl, stirring well. Add flour mixture and buttermilk alternately to sugar mixture, beginning and ending with flour mixture. Spoon batter into a 13 x 9-inch baking pan coated with cooking spray. Bake at 350° for 20 minutes or until a wooden pick inserted in center comes out clean. Top with marshmallows. Bake an additional 2 minutes or until marshmallows are soft.

To prepare frosting, combine 1/4 cup cocoa, evaporated milk, 3 tablespoons melted butter, and 1/8 teaspoon salt in a medium, heavy saucepan over medium heat. Cook for 4 minutes, stirring frequently. Stir in powdered sugar and 1 teaspoon vanilla. Cook 2 minutes, stirring constantly. Drizzle frosting over cake. Cool. Cut cake into squares.

Yield: 15 servings (serving size: 1 square)

Yellow Sheet Cake with Chocolate Frosting
adapted from Cookinglight

Cake:
Cooking spray
1 tablespoon all-purpose flour
1/2 cup butter, melted
1 (8-ounce) carton fat-free sour cream
1 1/2 cups granulated sugar
2 teaspoons vanilla extract
2 large eggs
2 cups all-purpose flour
1 teaspoon baking soda
1/2 teaspoon salt
3/4 cup low-fat buttermilk

Frosting:
1/2 cup (4 ounces) block-style cream cheese, softened
1/4 cup butter, softened
1 teaspoon vanilla extract
1/3 cup unsweetened cocoa
1 to 2 tablespoons evaporated fat-free milk
1/8 teaspoon salt
2 cups powdered sugar, divided

Preheat oven to 350°.
To prepare cake, coat bottom of a 13 x 9-inch baking pan with cooking spray (do not coat sides of pan); line bottom of pan with wax paper. Coat wax paper with cooking spray; dust with 1 tablespoon flour. Set aside.

Combine 1/2 cup butter and sour cream in a large bowl, stirring with a whisk until well blended. Add granulated sugar and 2 teaspoons vanilla. Beat with a mixer at medium speed 3 minutes or until well blended. Add egg substitute; beat 2 minutes or until well blended.

Lightly spoon 2 cups flour into dry measuring cups; level with a knife. Combine 2 cups flour, baking soda, and 1/2 teaspoon salt, stirring well with a whisk. Add flour mixture and buttermilk alternately to sugar mixture, beginning and ending with flour mixture; mix after each addition. Pour batter into prepared pan. Sharply tap pan once on counter to remove air bubbles. Bake at 350° for 30 minutes or until a wooden pick inserted in center comes out clean. Cool in pan 10 minutes on a wire rack; remove from pan. Carefully peel off wax paper; cool completely on wire rack.

To prepare frosting, place the cream cheese, 1/4 cup butter, and 1 teaspoon vanilla in a large bowl; beat with a mixer at high speed until fluffy. Add cocoa, milk, and 1/8 teaspoon salt; beat at low speed until well blended. Gradually add 1 1/2 cups powdered sugar; beat at low speed until creamy. Gradually add remaining 1 1/2 cups powdered sugar. Place cake on a serving platter. Spread frosting over top and sides of cake. Store cake loosely covered in the refrigerator.

Yield: 18 servings (serving size: 1 piece)


Monday, April 23, 2007

May there be peace...

Peace wasn't exactly the right word to describe everybody's mood last week. With the news of war, suicide bombers that killed hundreds in the middle east and something closer which impacted us more, the Virginia Tech Massacre. I wonder what it takes to have every habitatants of this earth to live peacefully with one another.

But actually, I don't have to look far. I myself sometime bear grudges for something that people did or said to me. Most of the time unintentionally. Maybe if I could be more forgiving and loving, I will make this a better place to stay for myself and those around me.


In light of all these conflicts going on around us, I pull out a recipe from Dorie Greenspan's Baking: From My Home to Yours, which was aptly named as World Peace cookies. According to Dorie's neighbour who has tried this cookies, a daily dose of these cookies everyday would ensure "planetary peace and happiness". Who knows, maybe chocolate and sugar could be the answer of tribal hatred, bitterness and loneliness?


World Peace Cookies
adapted from Dorie Greenspan's Baking: From My Home to Yours

1 1/4 cups all purpose flour
1/3 cup unsweetened cocoa powder (I used Dutch processed cocoa powder)
1/2 tsp baking soda
11 tbsps unsalted butter, at room temperature
2/3 cup packed, light brown sugar
1/4 cup sugar
1/2 tsp fleur de sel or 1/4 tsp fine sea salt
1 tsp pure vanilla extract
5 ounces bittersweet chocolate, chopped into chips

Sift flour, cocoa powder and baking soda together.

Working with a mixer with paddle attachment, beat the butter until soft and creamy. Add both sugars, salt and vanilla and beat for 2 minutes more.

Turn off the mixer, pour in the dry ingredients. Pulse the mixture at low speed for 5 times, with one to two seconds each time, until the flour disappear into the dough. Try to work the dough as little as possible for better texture. Toss in the chocolate pieces and mix only to incorporate.

Turn the dough out onto a piece of saran wrap, roughly shape it into a log, approximately 1.5 inch.

tip:For perfect round, I split the paper towel core to half in the center, and place the wrapped dough in the center. Tie the paper core on both ends and freeze the perfect round dough in the freezer until ready to bake.
Slice the dough into 1/2 inch rounds, don't be concerned if the dough crack as you cut them, simply squeeze the bits back to the cookies.

Tip:To minimize crack, try to cut the chocolate chunks into smaller chips, that way the chocolate can disperse more evenly into the dough. Also, if you put the dough in freezer, wait about 5 minutes to let the dough soften a bit.

Bake at 325F for 12 minutes. They won't look done nor firm, but that's the way they should be. Transfer the cool.

Orange Strawberry Muffins

Insteads of eating the leftover strawberries out of the container, I have turned them into fairly healthy breakfast treats for OCT.
Thanks to the pureed strawberries, the batter was in a romantic pink shade before baking. However, the pink colour quickly faded after they were baked. OCT who is not fond of strawberry actually like this muffin.


Strawberry Orange Muffins
adapted from Cookinglight

1 1/4 cups halved strawberries
3 tablespoons butter or stick margarine, melted
2 teaspoons grated orange rind (I used meyer lemon peel)
2 large eggs
1 1/2 cups all-purpose flour
1 1/4 cups sugar (used only 1 cup)
1 teaspoon baking powder
1/2 teaspoon salt
Cooking spray
2 teaspoons sugar

Preheat oven to 400°.
Combine first 4 ingredients in a blender, and process just until blended. Lightly spoon flour into dry measuring cups; level with a knife. Combine flour, 1 1/4 cups sugar, baking powder, and salt. Add strawberry mixture to flour mixture, stirring just until moist. Spoon batter into 12 muffin cups coated with cooking spray. Sprinkle with 2 teaspoons sugar. Bake at 400° for 20 minutes or until muffins spring back when touched lightly in center. Remove from pan immediately.

Yield: 1 dozen (serving size: 1 muffin)

Friday, April 20, 2007

Strawberry Celebration Cake

We had a great time last Sunday celebrating the April birthdays with a fantastic outdoor cookout cum potluck dinner.

The hospitable host BP and her husband made most of the yummy food. Too bad I didn't bring a camera to capture the spread. But the grilled chicken and fish were excellent! That made me really envy those who have access to an outdoor grill when the weather turns warmer. OCT and I had fun tending the backup grill, and grilled some sweet potatoes and pork!(both were yummy too!)


Of course a birthday party gave me a perfectly good excuse to bake a cake! I was the usual ambitious self when it comes to celebration cake. I made a chocolate strawberry cake, which consists of chocolate genoise with chocolate mousse, whipped cream with strawberries sandwiched in the center and dark chocolate ganache. With my very limited skill, the genoise layers came out uneven and the eggs in the mousse scrambled, before the right temperature was achieved. I threw away the first batch, and started over again, but the texture didn't improved. Because the mousse tasted fine after straining, I decided to keep it and spread the thin mousse over the genoise. Another layer of whipped cream and strawberries was then added to help to heighten the cake, literally.


Without a proper cake ring, the appearance of the cake suffered. Look at the untidy edges! Not even the thick ganache can do its trick to camouflage that! The decoration on top was OCT's idea eventhough I was the one executed it. White chocolate and fresh fruits are really handy when a novice baker like myself needs to decorate (and camouflage all the flaws!) a cake.


Making this cake is a great learning process. Through the cake, I learned:
- how to make the chocolate genoise, finally. After procastinating for so long.
-the important of using the right instrument the task required. When the recipe required instant thermometer, DON'T use a candy thermometer. It detects temperature too slowly!
-Don't pester your husband when he is watching his favorite tv show, (eventhough he has watched it a dozen times before) or risk being reproached.
-Start planning and baking early and have backup plans in case the cake doesn't turn out the way it should.
-I need to buy an instant read thermometer and some cake rings!( hopefully some decorative tips too)

Though laborious, this is one cake that I don't mind making again and again, eventhough I have a really long to-try-list awaiting.

Here's the recipe of the genoise, a great building block for this yummy cake.

Chocolate Genoise:
adapted from Alice Medrich's
Bittersweet

4 tbsp unsalted butter
1 tsp pure vanilla extract
1/3 cup sifted (before measuring) all purpose flour
1/3 cup sifted (before measuring) Dutch processed cocoa powder
4 large eggs
2/3 cup sugar

Position a rack in the lower third of the oven and preheat the oven to 350F. Line the bottom of the cake pan with parchment paper.

To clarify the butter: in a very small saucepan, or in a narrow glass jar in the microwave, heat the butter without stirring, until it mleted and very hot. The butter will separate into foam on top, clear yellow oil beneath, and water plus some milk solids on the bottom. Simply spoon off and discard the foam on the surface. Transfer 3 tablespoons of the clear yellow butter to a medium heatproof bowl. Add the vanilla to the bowl and set aside.

Sift the flour and cocoa powder three times, return to the sifter and set aside.

In a large heatproof bowl, preferably the bowl of your electric mixer, use a whisk to combine the eggs and sugar thoroughly. Place the bowl in a wide skillet of barely simmering water. Whisking constantly, heat the eggs to lukewarm (about 105F). With an electric mixer, beat the egg mixture at high speed until it has cooled , is tripled in volume, and resembled softly whipped cream. This may takes 3 to 5 minutes, or longer with a less powerful mixer.

Meanwhile, set the bowl of butter and vanilla mixture in the skillet of hot water, with the burner turned off to keep warm.

Sift about one third of the flour and cocoa over the whipped eggs. Use your largest rubber spatula to fold the mixture, quickly but gently, until combined. Fold in half the remaining flour, then fold in the rest. Remove the butter mixture from the skillet. Scoop about 1 cup of the batter into the bowl and fold together until completely combined. Fold the butter mixture into the remaining mixture. Turn the batter into the prepared pan and tilt to level.

Bake until the cake begins to shrink slighly around the edges and the top springs back when pressed with finger, 35 to 40 minutes. Cool the cake completely in the pan on a rack.

To unmold, run a small knife or spatula around the inner edges of the pan to release the cake. Invert it onto a rack and remove the parchment liner. Turn the cake right side up, so that the skin on top of the cake does not stick to the rack. (The genoise can be wrapped and refrigerated for 2 days or frozen up to 3 months.)

I used the chocolate ganache made
here to cover the cake.

Wednesday, April 18, 2007

Yong Tou Foo- The only way I know


Before I was 19, there's only one kind of yong tou foo that I have acquainted. The kind that stuffs tofu with minced meat. Afterall, that's what yong tou fu literally means.

Yong Tou Foo is one of mum's signature dish. She likes to cook it when she knows there's a big company coming for dinner. Her version is more laborious andhence, sumptuous where okra, eggplants, bittergound, mushroom and chilli are used, together with her homemade minced meat. It still amazes me that mum makes all the minced meat herself, using her trust-worthy Parang knife. My version is definitely simpler. I only used the fried toupok with ready made minced meat from the freezer section. But that's good enough for now. Paired with a bowl of steaming rice, and sambal belachan dipping sauce, it's one of my childhood comfort food memory.

I can't find the chinese fermeted yellow bean paste in my last chinese grocery shopping, so I substituted it with the Korean's Da Jiang (which the English translation stated that it's fermented yellow bean paste).

A simple dinner with some chinese stirfry veggie before we headed down for our free cones at Ben & Jerry!

My latest obssesion

Hi there, sorry for disappearing for 2 weeks. I was in a baking slump ever since my failed attempt at making kueh lapis (layer cake) 2 weeks ago. I felt really dejected and defeated, after losing 15 eggs in the inedible mess. Not a comfort word came from OCT, instead he told me that I probably should give up the hope on making this high cholesterol, time consuming and highly unhealthy cake. There should be better use of the eggs and my time elsewhere.

So I was sad, sad that I failed once again, and there's no more eggs in the fridge to avenge. So sad that I didn't make any effort in baking, or cooking any new recipes. I simply went with the flow, and cooked whatever I feel like and know how, to slowly let my vulnerable heart heals.

Had it wasn't for the post-easter shopping that I did last Monday, I would still be sitting here, sulking and sighing. Instead of hunting and buying the past Easter goodies, I found myself something much better that made me feel Christmas comes early!


It all started when I spotted some Valrhona Cocoa Powder at 50% off on the clearance rack in World Market! I took a deep breath and reached out to grab three glorious boxes of Valrhona that I have never imagined I could afford. Well, I guess I could, if I insisted to buy, but living on a graduate stipend, splurging $9 for 8oz of cocoa powder may not be a wise investment. Not with the rate I finishes my baking supplies.


Upon reaching home, I felt really empowered and took out Pierre Herme's Chocolate Desserts to look for ideas to test my newly acquired cocoa powder. A cup of coffee and some pages flipping later, I decided on Viennese Chocolate Sables. According to Monsieur Herme, he learned to make these delectable sables from the source, none other than the famous Wittamer pastry shop in Vienna. Because the recipe uses lots of butter and confectioners' sugar, the sables have a melt-in-your-mouth texture. Pairing with the intense flavour of Valrhona Cocoa Powder, they are perfect anytime of the day, with a cup of tea or coffee.

I let OCT bring most of the sables to lab the next day, wanting to hear what others think of the cookies. One of his colleagues commented that they weren't sweet enough. The rest didn't comment but the box came back empty. Well, I personally like the sables as they are, not overly sweet, which allows the chocolate flavour to shine through.

Pierre Herme piped the dough out in the characteristic W shape, but I have an unfortunately small tip that the thick dough couldn't pass through. Instead, I simply piped them out in coin size. Despite of their regrettable appearances, the sables are everything they promised-delicate, light and chocolatey.


The success of the sables had one side effect on me though. I was deeply regret for only buying 3 boxes of the cocoa powder! I couldn't sleep without worrying that there would be no more left on the shelve when we returned on Saturday. So, it was pure joy when we found some boxes of Valrhona Cocoa Powder sitting on the shelf. They were being moved to another shelf since I last spotted them and there was obviously fewer boxes remained. I happily grabbed another 3 boxes and can't help smiling for the whole day eventhough the weather was really crappy (with rain and snow) on a spring weekend.

Update: I went back to buy another 2 boxes the next week, making my Valrhona Cocoa Powder collection a total of 8 boxes!

Viennese Chocolate Sables

1 3/4 cups plus 1.5 tbsp (260g) all purpose flour
5 tbsp (30g) Dutch-processed cocoa powder, preferably Valrhona
2 sticks plus 1.5 tbsp (8 3/4 ounces, 250g)unsalted butter, at room temperature
3/4 cup plus 2 tbsp (100g) confectioners' sugar, sifted
pinch of salt
3 tbsp lightly beaten egg whites (lightly beaten 2 large egg whites, then measure out 3 tbsp)
confectioners' sugar for dusting (optional)

Preheat the oven to 350F (180C) and line two baking sheets with parchment papers. Fit a pastry bag with a medium-sized open star tip and keep it close at hand.(The tip should be crenellated, but its piping hole should be open and somewhat straight, rather than curved and tightly rounded.)

Whisk together flour and cocoa. In a large bowl, beat the butter with a whisk until it is light and creamy- for the recipe to be successful, the butter must be very soft. Whisk in the sugar and salt, then stir in the egg whites. (Don't be concern if the mixture separates; it will come together when you add the dry ingredients.) Gradually add flour and cocoa until it is incorporated- don't overwork the dough once flour is added,a light touch is what gives these cookies their characteristic crumbliness.

Because the dough is thick and heavy, it's best to work wth it in batches. Spoon about a third of the dough into the pastry bag, Pipe the dough into W-shaped cookies, each about 2 inches (5 cm)long and 1 1/4 inches (3 cm) wide, 1 inch apart onto the baking sheets.

Bake the cookies for 10 to 12 minutes- no more- or until they are set but neither brown nor hard. Using a wide metal spatula, transfer the cookies to a rack to cool to room temperature. Repeat with the remaining dough. Dust the cookies with confectioners' sugar before serving.

The cookies will keep in a tightly covered tin at room temperature for a week. They can be wrapped and frozen for up to a month.

Make about 65 cookies.

Wednesday, April 04, 2007

Housewife has deadline to meet too!


Eventhough I really don't like to be called a housewife. Because I don't exactly do a lot of house work. And certainly not working and staying at home doesn't make me a "housewife" or "housefly" as one of my friends accidentally blurted out.

But if you must insist on calling me a housewife, then I guess there's nothing I can do to stop you. Just don't say that I am a boring housefly, and nobody gets hurt.

In case you think only people who are working or studying have deadlines to meet, then you are wrong. Housefly like myself have deadlines to meet too. It comes in the form of expiring dates of all kinds of dairy products. Like today. My buttermilk and heavy cream are expiring. My mission is to use up as much as I could, and keep wastage to the minimum.

Because of this, I have been baking frantically for the past two days. So far, I made a lemon cream cake, 1 batch of chocolate ganache for a birthday cake, some truffles and chocolate tarts. Despite of all the stuff that keep streaming out from my oven, I still have to throw away half a cup of heavy cream and one cup of buttermilk. Unless I stop typing now and get up to make a batch of scones, then maybe I can use up the buttermilk. But maybe not. I am too tired now.

Here's just some pictures of the truffles and chocolate tarts I made. It's my first time making truffles, and I believe this will not be the last time. Eventhough it isn't a complicated process, the end products are deeply and sinfully satisfying. I added 2 tablespoons of Caramel Bailey in mine but the flavor was too mild that it went undetectable. Guess I will have to add more next time. With some basic knowledge of truffle making, hopefully I can try some bold flavours in the future.

Actually truffles are nothing more than cream and chocolate. But the way a handmade truffle glides down the throat is unbelievably satisfying. No wonder they are alway associated with exobitant price tags.


The filling of the chocolate tarts used more or less the same ingredient as the truffles. Except that the percentage of chocolate used was different and it's alcohol free. I used the sweet tart dough recipe from the same book, the recipe is here.In fact after making 3 batches of chocolate ganache, I am a bit mixed up on what alterations I have made on different batches. I should have been more organized and recorded down all the alterations in different batches. Maybe next time.....


Truffles/ Chocolate ganache filling for chocolate tarts ( made 3 times in a day!)
adapted from Pierre Herme's Chocolate Desserts

9 ounces (260g) bittersweet chocolate, finely chopped
1 cup heavy cream
2 tbsp liquor (rum / bailey etc) optional
3.5 tbsp (50g)unsalted butter, at room temperature,cut into 4 pieces
Dutch processed cocoa powder, for dusting

Put the chocolate in a heatproof bowl that can hold all the ingredients. Bring the cream (and liquor if you are using any) to a full boil in a saucepan to a full boil, then pour the hot cream into the center of the chocolate. Working with a spatula, gently stir the cream into the chocolate in ever widening concentric circle until the ganache is homogenous and smooth. Allow the ganache to rest on the counter for about a minute before adding the butter.

Add the butter 2 pieces at a time, stirring gently to blend. When all the butter is blended into the mixture, pour the ganache into a baking pan or bowl. Put the pan in the refrigerator and when the ganache is cool, cover it with plastic wrap and chill for at least 3 hours. (or overnight)

note: you can use the soft ganache at this point to frost cake. Or put it in the fridge for later use. Just leave it out in the counter for it to soften before use.
Because I needed to use up my heavy cream, I made 3 batches, and kept one batch, covered in plastic wrap in the freezer.

When you are ready to shape the truffles, spoon a generous amount of cocoa powder into a bowl, and set out a baking sheet lined with parchment or waxed paper. Remove the truffle mixture from the fridge and scoop up a scant tablespoonful of ganache for each truffle; put the dollops of ganache on the paper-lined pan. dust the palms of your hands with cocoa powder and, one by one, roll the mounds of ganache between your palms to form rounds. As you shape each truffle, drop it into the bowl of cocoa powder or whatever topping you want to use (I used some chopped pistachio).

The truffles can be served as soon as they are coated or they can be stored in the refrigerator for a day or two, cover and away from foods with strong odors.