Sunday, July 30, 2006

What will you do with a lot of peaches?

(Photo taken by our talented friend-Melvin)

Yesterday, we went peach picking with our friends. I was naturally very excited, as this was my first time, and will probably be the last time to pick peaches here. If everything goes smooth, we will be back in Singapore same time next year.

The orchard is about an hour drive from our place and we set off in the morning to avoid the blazing sun in the afternoon. Still, it's one of the hot summer day. But it's worth it to expose ourselves under the sun for 2 hours. OCT and I had a great time picking peaches right from its source! OCT complained that I went MIA a few times, while looking for the ripe peaches. I have never been a big fan of peach, probably because I never eaten any nice peach before. Yesterday however, we shared 6 peaches among us in the orchard. Some tasted like mango, which I like!

In the end, we picked over 14 pounds of peaches. We have given some to friends, eaten a few yesterday, and made a banana peach smoothies today. I have a peach cobbler in the oven right now. If it tastes nice, I will post the recipe later.


Other than that, I also intend to make a peach cheesecake and some peachy baked goods. If you know of any good recipe, do let me know.


peach, anybody?

Thursday, July 27, 2006

Strawberry Country Cake

I baked a strawberry cake today :) And OCT said it's delicious! To emphasize his appreciation, he testified further to his audience that he didn't like strawberries, and did not eat them in normal circumstance. But this strawberry cake is so good! That he wanted to eat more tomorrow.

The recipe is here. This is another winner from Ina Garten's cookbook. Come to think of it, there isn't a single recipe that I don't like from her book. Ironically, I haven't owned a single copy of her book yet.....I think I will get her latest book when it's out in October.

Coming back to the strawberry cake. Ina said this is the cake to make when strawberries are in season. Though the peak season has passed, I am still glad to find some pretty nice strawberries at the grocery store this week . Ermm....at reasonable price, of course. With August drawing close, I am going to make some berries tarts soon. Well, I am never a fruit/berries tart fan. But recently I have learned not to be prejudiced against any ingredients! And I am determined to give whatever food and myself a chance before I declare my dislike against them. I think I am going to give cilantro another try.(Yike!!!)

The recipe yields 2 cakes. I used a 9-inch pan instead of the 8-inch that Ina suggested. Because of this, my cake came out slightly flatter. The baking time was also shorter; It's roughly 30 minutes, instead of 50 minutes as stated in the original recipe. I was tempted to use both cakes initially, but decided to listen to Ina's advice. I carefully sliced one cake into half, and filled them with whipped cream and strawberries.

As I only applied a thin layer of whipped cream on the cake, I have some leftover. Since no one was watching, I dipped some strawberries into the cream. It was delicious, I tell you! You may think what's the big deal about whip cream? You know, I never care about whip cream before. And always ask for no whip on my Starbucks Mocha. But this whip cream is different. Luckily I have SELF CONTROL. So even when no one's watching, I threw away the rest of the cream. I think I will add more cream to the cake when I make it again..


Wednesday, July 26, 2006

Chocolate Chip Cookies

I was feeling dejected last Monday for some unknown reasons. After a few attempts of cheering me up with no success, OCT said " Do you want to bake something?"

I was brightened up instantly at the thought of baking. I wanted to bake something that would make me very happy. This meant some sugar high goodies. Maybe some chocolate chip cookies. An old tried and tested recipe perhaps? Or maybe I should give the one at Epicurious.com a try. I decided to try the new recipe eventually.

The method that it used was a bit unconventional. The butter was first melted in the microwave and beated with brown and white sugar until light and fluffy, followed by the addition of other usual ingredients. I substituted 1/2 cup of whole wheat flour with all purpose flour to give the cookies a mild nutty flavor. It wasn't a distinct flavor, but it helped to add some complexity in the otherwise simple chocolate chip cookies. I still prefer my cookies with nuts, so maybe next time I will add some pistachio and see how it goes.

I baked 6 cookies and one huge one with mini kissables.And freeze the rest of the dough for later use. They were good! And a time saver! Mainly because you don't have to wait for the butter to come to room temperature (which will take at least half an hour)and the baking time was only 13 mins!

The cookies are crunchy on the edge and chewy in the middle. I pronoun this to be my favorite chocolate chip cookies, for the time being!......until someone tempts me with another recipe.


( I made one 8-inch cookies with Hershey kissables using the scrape from the dough)


Chocolate Chip Cookies
(adapted from Epicurious.com)

3 cups all-purpose flour (I subbed 1/2 cup with whole wheat flour)
1 1/2 teaspoons baking soda
1 1/2 teaspoons salt
2 sticks (1 cup) unsalted butter, melted and cooled slightly
1 1/2 cups packed light brown sugar
1 cup granulated sugar
3 large eggs
1 1/2 teaspoons vanilla
2 1/2 cups semisweet chocolate chips (16 oz) (i think this is too much, i used only 10oz)


Put oven rack in middle position and preheat oven to 375°F. Line 2 large baking sheets with parchment or wax paper.
Whisk together flour, baking soda, and salt in a small bowl.

Beat together butter and sugars in a large bowl with an electric mixer at high speed until pale and fluffy, 2 to 3 minutes. Lightly beat 1 egg with a fork in a small bowl and add 1 3/4 tablespoons of it plus 2 remaining whole eggs to butter mixture, beating with mixer until creamy, about 1 minute. Beat in vanilla. Reduce speed to low and mix in flour mixture until just blended, then stir in chips.

Scoop 1/4 cup batter for each cookie, arranging mounds 3 inches apart, on 2 baking sheets. Flatten mounds into 3-inch rounds using moistened palm of your hand. Form remaining cookies on additional sheets of parchment.

Bake, 1 sheet at a time, until golden, 13 to 15 minutes. Transfer cookies to a rack to cool and continue making cookies in same manner using cooled baking sheets.


Tuesday, July 25, 2006

Life without a car...

can be extremely frustating sometime. Today is a fine example. I went to do grocery shopping using the free shuttle service provided by OCT's school. On my way back, I purposely came out 10 mins earlier than the shuttle schedule. Because the shuttle comes every hour, so I really don't want to miss it. it is no fun waiting under the sun for another hour, not to mention I have bought some dairy products and meat.

So there I waited patiently for 30 minutes, with no sight of the shuttle. Then a Korean came and asked if the shuttle will be here soon. I told her that it would probably be there soon, as it has been more than 20 mins late. And so we waited for another 10 minutes. I was pretty frustated, and asked if the korean wanted to share a cab. Apparently she stays very near to my apartment, and she has a party of 4. I thought it would be economical to share a cab with another 4 people. Man was I wrong.

After she booked a cab, we waited for another 10 mins. still no sight of the shuttle. All in all, I have waited for an hour. And I don't think I have missed the shuttle because I was there 10 minutes earlier than the schedule.

That was first part of the story.

I was quite relieved when the cab came. 5 of us went into the cab, and were back to where we stayed in 15 minutes. Because I was sitting in front, next to the driver, so I paid for the fare. It was $13.9, plus tips, it was $16.00. After I unloaded my bags from the cab, the korean gave me $8.00. Can you believe it??!!!!!!! They are a party of 4 people. Which part of SPLIT that she doesn't understand? (16/5)x4 = roughly $12-13!

Maybe it's their culture or what. I was astonished/angry/tired and didn't want to argue with her. If she thinks this is fair, and deems this is what I mean by SHARE a cab, then so be it. I am just very angry now.

And I can assure you, this is not the first time the screw-up shuttle caused such distress to me. I am pretty sure this will not be the last.

What can I say? I should blame myself for not having a car. Or i wouldn't have to deal with all these nonsense.

I miss Singapore. I want to go home.

Monday, July 24, 2006

3rd lemon cake recipe

I fell in love with lemon cake the moment I tried Ina Garten's Lemon Cake several months ago. Ever since then, I have been on a look out for other lemon cake recipe which could rival her version. I tried this from Cooks Illustrated, which was not too bad, but not as good as Ina's.

Last Friday, I felt adventurous, and tried a new lemon bundt cake recipe. It was not nice. And way too compact that could be mistaken as brick. Neverless to say, I was disappointed. Luckily it only used 2 lemons, 3 cups of flour, 2 sticks of butter and 4 eggs. Not really an expensive cake. More often than not, it is not the cost that I am worry about. It's the end product itself. Being not happy with the taste, we naturally refrain from giving it away. Neither can I throw the perfectly edible food to the bin.

I can only hope that the taste improvea over time, which in this case is highly unlikely.... I am not going to post the recipe here. If I have not gained anything from this experience, at least I am quite certain that Ina Garten's lemon cake is the best.

Sunday, July 23, 2006

St Louis Power Outage Dinner

As I was baking the egg tarts last Wednesday, the city was hit by the worst thunderstorm in the history of Greater St Louis. I am shocked when I learned that the thunderstorm that lasted for less than an hour has caused power outage that affected 550,000 people.

We count ourselves lucky as the thunderstorm doesn't affect us in the slightest way. However, 3 of our friends were not so fortunate. They have no power supply at home since last Wednesday night. With the heat wave in St Louis last week, you can imagine how hot it is with no air-conditioner at home.

To commemorate the event, we invited our friends who were affected by the power outage over for dinner last Thursday. When we looked out from the window, we saw one stretch of street with light, and the opposite stretch was in complete darkness. Quite a contrast to the usual bursting scene in the area we stay.

Coming back to the food, our friend M has taken some really nice shots.


Upper left: Indonesia Chicken Upper right: Curry powder chicken
Lower left: tomyam eggplant Lower right: Stirfry brocolli with carrot and prawn

The Indonesian Chicken is a new recipe from allrecipes.com. The peanut butter used in the sauce reminds me of satay, which is another South East Asia delicacy. You must really like peanut butter to appreciate the dish, for the peanut butter taste is quite distinct here. However, if you are looking for something different from your usual chinese style chicken (with oyster sauce/wine) , give this dish a try. Personally, I think this recipe is a keeper.

Indonesian Chicken


2 teaspoons olive oil
1 pound skinless, boneless chicken breast halves - cut into chunks
3/4 cup low-sodium chicken broth
1/3 cup smooth peanut butter
2 teaspoons honey
1 tablespoon low sodium soy sauce
1 teaspoon red chile paste
2 tablespoons lemon juice
3 green onions, thinly sliced
2 tablespoons chopped peanuts (optional)

Heat the oil in a skillet, and cook the chicken 5 minutes on each side, or until juices run clear. Remove and put the chicken on a warm plate.


Mix the chicken broth, peanut butter, honey, soy sauce, chile paste, lemon juice in the same skillet over medium heat. Cook and stir 5 minutes, until slightly thickened. Add the chicken back to the skillet, to simmer with sauce, until the sauce become thickened. Serve over rice. Garnish with green onions and peanuts.

Wednesday, July 19, 2006

My first attempt at Egg Tarts

Trust me, I have been wanting to make egg tarts for a long time. What has been putting me off is the tart dough. Apparently, the flaky tart dough is not something that's easily attainable.

Today however, I decided to give it a try using the leftover dough from yesterday pineapple tart dough. It may not be the right dough, but it was conveniently there, saving me time to make a fresh batch of dough. Besides, it is really wasteful to throw away some perfectly good dough.

I adapted the filling recipe from my friend MY, with a few minor changes. Unlike conventional egg tarts, I used my muffin pan, and didn't roll out the dough as listed in the recipe. I adopted a simpler way to make the tart shell out of a dab of dough in the muffin pan.

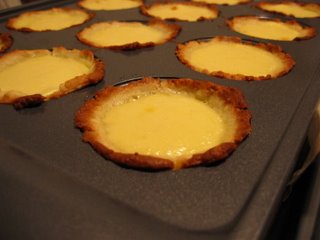
After 20 minutes, these are what I get:


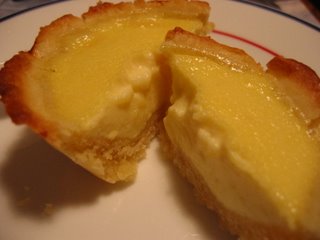
Of course they are not the best egg tarts I have ever eaten. But they are good enough for a sudden craving of egg tarts in a foreign land.

Both the filling and tart shell have rooms for improvement. But the initial success gives me the assurance that I CAN make egg tarts too!

And OCT added that I should work on the appearance too.....

In case you want to know, below is the ingredients and proportion of the egg custard:

2 Eggs
2 Egg yolks
40g granulated sugar
100ml whipping cream
150ml 2%milk

Cook whipping cream and milk in a small saucepan until bubbles starts forming at edge but not boiling. Add sugar and stir until it dissolve completely. Remove from heat. Add to the eggs and yolk when the mixture has cool down.

Sieve the egg custard mixture into a measuring cup and pour them into individual tart shells.

Bake at 375F for 20 mins.

Makes 12 tarts

Tuesday, July 18, 2006

Almost a thousand pineapple tarts

Today, we devoted a whole day to make pineapple tarts. The initial target was to make a thousand pieces. After a 2 hours and one hundred tarts later, we reluctantly admitted that a thousand tarts within a day was too daunting a task, if not impossible.

So, we change the plan to make whatever amounts until we used up the pineapple jam.

We made the tarts at YM's place from 10a.m. Ever since I have acquired my KitchenAid mixer 7 months ago, I have forgotten how tiring it could be to use a handheld mixer. Today, I am once reminded. Baking is no longer therapeutic when you need to use the handheld mixer for more than 10 times within 7 hours.

At around 6p.m, we still have about 200 tarts to be completed. We decided to move to my place to make the rest of the tarts. Whipping the dough becomes a bliss at the presence of the powerful mixer.

Sorry about the digression. I am supposed to tell you more about the tart making process. Somehow, today's dough making experience reminds me of how often we take things for granted. And I shall be more thankful for what I have and complain less of what I devoid.

Dough making aside, the tart making session was fun! I wish I had brought my camera with me, so that I could show you the tart making process. Maybe next time. Meanwhile, these are some of the tarts we made today:

Monday, July 17, 2006

Coffee Coconut Ice Cream Cake

As part of my R&R weekend, I make a Coffee Coconut Ice Cream Cake using the same issue of Gourmet as the roast pork recipe. Making ice cream cake is so much easier than any other cake. All you have to do is crush some cookies and soften the ice cream, and assemble it to be frozen overnight. and voila! You will be greeted with a good summer accompaniment, that will have make adults clamoring like children!

For this recipe, I used Ciao Bella's Coconut Sorbet and Haagen Daz's Light Coffee Ice cream. This is the first time we try this brand's sorbet, it was heavenly on its own. I can't wait to try the rest of their flavor and gelato!( of course I will have to wait till the sale). The Haagen Daz light ice cream becomes pale to comparison. I think next time I will use Starbucks ice cream which has more profound coffee taste. The original recipe called for a fudge topping, which I think will make the cake too sweet. As a result, I omitted the topping to save some calories.

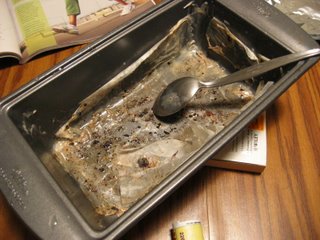
The ice cream cake was really good! So good that it didn't last longer than 2 days. And I was so engrossed in devouring the cake that I forgot to take a picture of it! I hope I won't have to wait long to make another one soon.


Coffee Coconut Ice Cream Cake
(adapted from Gourmet Magazine)

For crust
3/4 cup chocolate wafer crumbs (from about 15 cookies such as Nabisco Famous Chocolate Wafers)
1 teaspoon instant-espresso powder
2 tablespoons unsalted butter, melted

For ice cream layer
1 pt premium coffee ice cream, softened slightly
1 pt premium coconut sorbet, softened slightly

For fudge sauce
3 tablespoons heavy cream
1 tablespoon light corn syrup
1 tablespoon packed dark brown sugar
1 teaspoon unsweetened Dutch-process cocoa powder
1/8 teaspoon salt
2 oz fine-quality bittersweet chocolate (not unsweetened), finely chopped
1 tablespoon unsalted butter
1 teaspoon vanilla

Special equipment:
a 1 1/2-qt rectangular mold such as a 12- by 3 1/4- by 2 3/4-inch pâté mold; parchment paper; an offset metal spatula


Make crust:
Put oven rack in middle position and preheat oven to 375°F.
Line mold with a double layer of parchment paper, allowinga few inches of overhang along each side.

Stir together crumbs, espresso powder, and butter and press over bottom of mold. Bake until crisp, about 10 minutes, then cool completely in mold on a rack, about 20 minutes.

Make ice cream layer:
Scoop and drop ice cream and sorbet alternately into mold in 1 layer until crust is covered, then smooth with offset spatula until flat. Make another layer in same manner. Freeze, covered with plastic wrap, until firm, at least 2 hours.

Make fudge sauce and finish cake:
Bring cream, corn syrup, brown sugar, cocoa, salt, and half of chocolate to a boil in a 1- to 1 1/2-quart heavy saucepan over moderate heat, stirring until chocolate is melted. Reduce heat and simmer, stirring occasionally, 5 minutes, then remove from heat.

Add butter, vanilla, and remaining chocolate and stir until smooth.

Cool fudge sauce to warm, at least 15 minutes.

Pour warm sauce over ice cream layer and freeze again, uncovered, until firm, about 15 minutes. Remove cake by grasping both ends of parchment, and transfer it to a platter. Using a spatula to stabilize end of cake, carefully slide parchment out from under cake.

Cooks' notes:
• Sauce can be made 1 week ahead and cooled completely, uncovered, then chilled in an airtight container or jar. Reheat before using.
• Cake keeps, wrapped well in plastic wrap and then in foil, 3 days.

Makes 10 servings.

Friday, July 14, 2006

Am I out of my mind?


OCT said I was out of my mind to think I can make 36 cans of pineapple into the pineapple jam on my own. over the weekend.

I didn't realise the seriousness of the matter until I sat down to do some simple maths on the time required. How naive am I to think I can take on such a huge undertaking... If it takes 2 hours to cook down 5 cans of pineapple, I will have to repeat the work 7 times at least. Not to mention the time and effort required to open,drain and stir the pineapples.....It is not rocket science, but extremently labor intensive and time consuming. While the jam is cooking, I have to stir it CONTINUOUSLY or it will get burnt.

I have completed 2 batches, and the third batch is still cooking....Prospect of achieving my goal seems pretty positive. But my weekend will be burnt. Luckily, our friends Melvin and Gerrie offered to help on Saturday afternoon.

Now with extra pair of hands, I actually have a pretty good weekend :) OCT and I went out on Saturday for breakfast and bought a $5 dollar (after mail in rebate and 20% discount) blender! I can't wait to put the blender into good use. More importantly, after all the R&R over the weekend, all the pineapple jam are now ready to be used for our pineapple tarts making! We are going to make a thousand pineapple tarts on Tuesday for an event on this coming Sat and Sunday. I still can't imagine people will fork out money to buy my humble pineapple tarts.....

What happen if nobody wants my pineapple tarts?!

Wednesday, July 12, 2006

Roast Pork ( Char Siew)- st louis style

I bought some cheap pork butt last week because I remember seeing some recipes requested for that. After the pork butt was safely kept in the freezer for a week, I can't recall the exact recipe I wanted to try them on. So I ended up looking up recipe to use the pork butt insteads of the other way round.

There's a recipe from Gourmet, apparently an Asian recipe for roast pork. I decided to try that. We took some time to cut the 5 lbs pork butts into 2 inches chunk and divided them into 2 freezer bags. One bag was used for tonight's dinner. Since it required overnight marination, we pour in the sauce before we went to bed yesterday.

The roasting process was quite different from what I am accustomed to. A half inch of water was first added to the tray below the roasting pan without contact with the pork. Follow by a few rounds of basting with the marinate. This is especially challenging since there's hot water in the tray. Not to mention the hot weather we are experiencing now.

All in all, it's quite tasty, and definitely worth the effort. The overnight marination does ithe work to infuse enough flavor into the pork. I still have some leftover....I wonder what can I do with them...


Roast Pork (adapted from Gourmet Magazine)

1 (1-lb) solid piece boneless pork butt (shoulder), halved along the grain
1/4 cup hoisin sauce
1/4 cup soy sauce
1/4 cup Chinese rice wine or sake
1 tablespoon finely chopped peeled fresh ginger
1 teaspoon finely chopped garlic
1/2 teaspoon salt

Cut pork along the grain into long 1 1/2- to 2-inch-wide strips. Remove and discard any sinew but do not trim fat. Transfer pork to a large sealable plastic bag. Stir together remaining pork ingredients in a small bowl until combined well. Add to pork and turn to coat, then squeeze bag to eliminate as much air as possible and seal. Marinate pork, chilled, at least 4 hours but no longer than 24.

Put oven rack in lower third of oven and preheat oven to 375°F. Put 1/2 inch water in a 13- by 9-inch roasting pan and place a metal rack across top of pan (rack should not touch water).

Remove pork from marinade, reserving marinade, and arrange pork strips 1 inch apart on rack. Roast in oven 15 minutes.

Meanwhile, bring marinade to a boil in a 1-quart saucepan, then boil 1 minute (marinade may look curdled). Remove from heat.

Brush both sides of pork with some marinade and roast 10 minutes more. Generously brush both sides of pork with marinade again and roast, basting 2 or 3 times, 10 minutes more.

Increase oven temperature to 400°F and roast pork until strips are mahogany-colored and caramelized on edges, 10 to 15 minutes more (pork should roast for a total of about 50 minutes). Transfer to a cutting board and let stand, loosely covered with foil, 10 minutes.

What do you think of this?

I mean the new skin. I decided it's time for a change from the old pinkish skin. And added some cookbooks that I really like on the sidebar. I am looking forward to adding more features in my blog. But with my limited HTML knowledge, I think it's going to take awhile...

Shrimp Scampi with Linguini


I almost forgotten that I made this recipe last Sunday until I uploaded my food pictures from the digital camera.

It was a very refreshing dish, using only lemon juice and white wine as sauce. I did add some brown sugar to it because it was too sour in the beginning. But maybe that's because I didn't measure the lemon juice properly. If I have followed the instruction more closely, I am sure this step could be omitted.


Shrimp Scampi with Linguini
(Adapted from Tyler Florence)

1 pound linguini
4 tablespoons butter
4 tablespoons extra virgin olive oil, plus more for drizzling
1 large shallot, finely diced
5 cloves garlic, sliced
Pinch red pepper flakes, optional
20 large shrimp, about 1 pound, peeled and deveined, tail on
Kosher salt and freshly ground black pepper
1/2 cup dry white wine
1 lemon, juiced
1/4 cup finely chopped parsley leaves

For the pasta, put a large pot of water on the stove to boil. When it has come to the boil, add a couple of tablespoons of salt and the linguini. Stir to make sure the pasta separates; cover. When the water returns to a boil, cook for about 6 to 8 minutes or until the pasta is not quite done. Drain the pasta reserving 1 cup of water.

Meanwhile, in a large skillet, melt 2 tablespoons butter in 2 tablespoons olive oil over medium-high heat. Saute the shallots, garlic, and red pepper flakes (if using) until the shallots are translucent, about 3 to 4 minutes. Season the shrimp with salt and pepper; add them to the pan and cook until they have turned pink, about 2 to 3 minutes. Remove the shrimp from the pan; set aside and keep warm. Add wine and lemon juice and bring to a boil. Add 2 tablespoons butter and 2 tablespoons oil. When the butter has melted, return the shrimp to the pan along with the parsley and cooked pasta and reserved pasta water. Stir well and season with salt and pepper. Drizzle over a bit more olive oil and serve immediately.

Note: The recipe said this recipe serve 4. But we think this serves at most 3 adults, or 2 very hungry man.

Back to the mundane


After travelling and slacking a few days after coming back, the kitchen stove was finally working at full force yesterday.

I stirfried some spinach, made some popiah and a tilapia dish as dinner yesterday. It took me 2 hours to get everything on the table and we had dinner at 9 p.m... anyway OCT came home late from work too, so it was ok.

Tuesday, July 11, 2006

A batch of chocolate biscottis

I baked a batch of chocolate biscottis on our 1st wedding anniversary. By no means that it is my gift to OCT, I was thinking of baking these goodies for somebody else actually.....

Because the biscottis are very well received by whoever that tried them in the past, I decided to make a big batch this time, using the recipe from Martha Stewart Baking Handbook. I wish I could overcome my laziness to type out the recipe soon. Borrowing the idea from Starbucks, I replaced 1/2 cup of flour with whole wheat flour. It gives the biscottis a nutty taste and somehow smoothen the harsh taste from the Hershey's Dutch processed cocoa. Also, i used 2 types of chocolates this time. The bitterweet Ghiradelli chocolate chips and 72% cocoa Vidalia. The marriage of both chocolates= heavenly.

The process of baking biscottis is always a messy and lengthy one. But a bite of the end product confirms that they are worth the effort. In fact, it's much cheaper to make the biscottis on your own than to buy them from the store. Even when you are using the best ingredients.

I ate some with my coffee this morning. It was so good~

Sunday, July 09, 2006

The hundred thousand dollar Cheesecake

I am slowly recovering from our exhaustive DC trip and wanted to bake something. It's only a matter of cookies or cake. I asked OCT what he wanted to eat. Cake was his answer. But what cake? I greedily search through my recipe collection, and decided to try the Southern Living Cookoff winning recipe: Chocolate Coffee Cheesecake.

This cake is made of cream cheese, espresso powder, chocolate and kahlua. Almost all of my favorite ingredients are put into the formula. Plus it's a $100,000 recipe. I got to see how good it is.

At the outset, I must tell you that I have made some changes to the ingredients, like I used 3 blocks of cheese instead of 4 blocks that the recipe suggested. And used 1/3 less fat cheese instead of normal cream cheese. Because of this, I also have to adjust the amount of other ingredients accordingly.

After chilling the cheesecake overnight, we can't wait to have a piece each for breakfast. The cheesecake has a distinct cheese and chocolate taste, but I am quite disappointed that not a hint of kahlua and espresso powder can be detected from the cake. One of the plus point,though, is that it is not overly sweet. This is more of a chocolate cheesecake than Coffee cheesecake if you asked me....I am not sure if it will be much different should I make a full fat recipe.

Fast forward 2 days, we have given a huge portion of the cake to friends, and left with a very small piece for ourselves. when we tasted the cheesecake on Tuesday, the flavor has somehow mend very well together. I wonder if there's an explanation for why cheesecake taste better after 24 hours....

And my cheesecake cracked, again. OCT asked if there's a way to ensure that the cheesecake will not crack, and whether the bakery has to throw away the cake if it's cracked......Sure there's a way to ensure that the cake doesn't crack, but I was just too lazy to put in a water bath, or to monitor the cake more often than I should. And speaking of bakery, I never remember seeing a cracking cheesecake on the shelf, so I assume they will throw the cracked ones away.

Anyway, this is my cracked but still edible cheesecake:


Chocolate Coffee Cheesecake
(Adapted from Sharon Collison, winning recipe of Southern Living Cook-off 2005)


3 cups crushed chocolate graham crackers (about 20 sheets) (I used 2 cups)
1/2 cup butter or margarine, melted
PAM Original No-Stick Cooking Spray
4 (8-ounce) packages PHILADELPHIA Cream Cheese, softened (I used 3 blocks, 2 blocks of 1/3 cream cheese and 1 block normal cream cheese)
1 cup DOMINO Granulated Sugar (used 3/4 cup sugar)
1/4 cup coffee liqueur
1 teaspoon instant coffee granules
1 teaspoon vanilla extract
4 large eggs (used 3 eggs)
4 (1-ounce) bittersweet baking chocolate squares (used 3 ounce)
Mocha Sauce (omitted)

1. Stir together crushed graham crackers and butter; press mixture into bottom and up sides of a 9-inch springform pan coated with cooking spray.
2. Bake at 350° for 10 minutes. Cool crust in pan on a wire rack. Reduce oven temperature to 325°.

3. Beat cream cheese and 1 cup sugar at medium speed with an electric mixer until blended. Add coffee liqueur, coffee granules, and 1 teaspoon vanilla, beating at low speed until well blended. Add eggs, 1 at a time, beating just until yellow disappears after each addition.

4. Remove and reserve 1 cup cream cheese mixture. Pour remaining batter into prepared crust.

5. Microwave chocolate squares in a medium-size glass bowl 1 minute or until melted, stirring after 30 seconds; let cool slightly. Stir reserved 1 cup cream cheese mixture into melted chocolate, blending well. Spoon chocolate mixture in lines on top of batter in springform pan; gently swirl with a knife.

6. Bake at 325° for 1 hour or until almost set. Turn oven off. Let cheesecake stand in oven, with door closed, 30 minutes. Remove cheesecake from oven, and gently run a knife around outer edge of cheesecake to loosen from sides of pan. (Do not remove sides of pan.) Cool on a wire rack. Cover and chill at least 4 hours.

7. Remove sides of springform pan. Serve with Mocha Sauce.

Note: For testing purposes only, we used Kahlúa for coffee liqueur.


Saturday, July 08, 2006

Eating in DC....

FOOD is one of the important aspect of travel. No trip is complete without the memory of good food we eat. For our Washington DC trip, we hunt for cheap and good food recommended by other travellers and the DC local paper- Washingtonian.

First Day: Our flight was delayed due to bad weather. After an one hour detour stop at the nearby Dulles Airport, we reached the Ronald Reagan Airport around 8p.m. We have ham sandwiches as dinner that night.

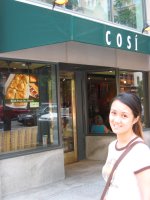
Second Day: For lunch, we went to Cosi, a sandwich place where they serve breakfast and lunch. We sat near the counter where we could see the staff kneading the bread dough, putting them in the old fashion, cave like oven ( I don't know its proper name) and taking out the baked one. There's only one type of bread with different fillings, which I think is a good idea. Sometime too many choices make life complicated (at least for me). I ordered a BLT sandwich and OCT had a Grilled Chicken Sandwich. I preferred his actually, for the grilled chicken was so succulent and the bread was niceand crispy in a good way! I don't mind eating it again if we didn't make other dining plans for the subsequent days.
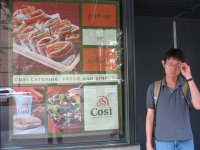

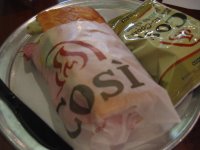
Dinner was at Malaysian Kopitiam. This is a small restaurant run by 2 Malaysians from Ipoh, and the place was being voted as a Cheap and Good eating place! We ate lamb satay, fried oyster, char kuay teow and rice. It was a nice meal except the chilli was not as hot as those in Malaysia.

3rd day: 4th July. Everywhere in the Mall area was crowded, humid and hot. After visited only one museum and watched first part of the parade, we decided to retreat to the comfort of our hotel room. Besides, OCT wanted to watch Italy vs Germany at 3p.m. We had our lunch at another sandwich place : Potbelly, which was pretty good and much cheaper than Cosi. For only $3.99 each , we had a sandwich which we ate for lunch and dinner. They even have live music performance in the restaurant when we were there. I don't mind eating there again, if it's not for the other plans we have......Oh, when being asked for the condiment choices, OCT told the staff we want EVERYTHING. hehehe, this is so OCT.

4th day: We woke up late, and had to give the Capitol tour amiss. We went straight to the Library of Congress tour, which took our breath away. I am not exaggerating, the beauty of the place is beyond words. And certainly my 3.2MP camera can't even capture 1/10 of its magnificient view. I greedily took in as many sight as my little brain can accommodate and save them in my memory. After the tour, we had lunch at the Longworth Cafeteria, just opposite the Capitol. It's a Senate Office building, the food there are reasonably priced, and tax-free. Not only that, they have wide choices of food for everybody. I ordered a wrap, which was huge, and OCT ordered a burger. Then we decided to share a salad among us. I really like their salad bar as they have many choices of veggies and meat.
Dinner was a Chinese meal at the Union Station Foodcourt. The fried rice was pretty tasteless, this was the worst meal we have in DC.

5th day: Last Day in DC, and we overslept AGAIN. Seems like we are destined to come back to DC for the Capitol tour another time. We had breakfast/lunch at Breadline, one of the local sandwich place at Penn. Ave that receive tonnes of rave reviews from other travellers and locals. We share a Cuban Sandwich among us. You won't believe how filling it was....


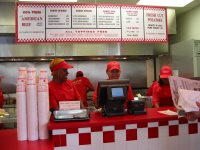
And for a late lunch, we checked out a local burger chain "Five Guys" . This family run business offer cheap and good burgers where they grind their beef chunk and handmade them into patties. They are opening a new outlet at the airport soon. If you happen to go there in the future, do check them out.
Sunday, July 02, 2006

Another cake to bring for our trip: Chocolate Swirl Banana cake


Yesterday night I made ANOTHER cake for our trip. OCT likes the banana cake that we have eaten almost every week, so I made him another one! This time, I omitted the walnut, which he doesn't like and added melt 72% chocolate. It makes the banana cake tastes very chocolatey. Yum~

And this is the tuna pasta salad I made the night before.

I will be away from 2 Jul- 6 Jul. Hope I will have more updates + photos when I return. Have a happy 4th July everyone!